Step-by-Step: Stake ZIL to Zilliqa 2.0 Moonlet Node
Introduction
Moonlet is a professional, security-first and AI-driven node operator delivering reliable infrastructure services across leading blockchain networks—including Solana, Zilliqa, Cosmos, Near, Ethereum, Sui, and Monad.
Our infrastructure is trusted by top protocols and partners, including Wormhole, Pyth Network, DoubleZero, and is designed to meet the demands of both high net worth individuals and institutional players.
We are actively working toward achieving compliance certifications such as SOC 2 Type II and ISO 27001, underscoring our commitment to operational excellence, transparency, and institutional-grade security.
By staking your ZIL to the Moonlet validator on Zilliqa 2.0, you benefit from:
-
✅ A self-custodial staking flow—full control, no third-party risk
-
✅ Institutional-grade validator performance with active monitoring and AI-driven uptime management
-
✅ A trusted partner with a proven track record across multiple ecosystems
Whether you're optimizing yield or securing your stake in the network, Moonlet offers a seamless, secure, and future-ready staking experience on Zilliqa 2.0.
Prerequisites
Before proceeding, please ensure the following:
-
This guide is exclusively for users who manage their ZIL tokens via a Ledger hardware wallet.
-
Supported Ledger devices include:
-
Ledger Nano S
-
Ledger Nano X
-
Ledger Flex
-
Ledger Stax
-
-
Ensure your Ledger firmware is up to date.
-
You need only the Ethereum app installed on your Ledger:
-
Install the Ethereum app via Ledger Live — Zilliqa 2.0 is an EVM-compatible network, so it uses the Ethereum app for all operations on the new chain.
-
In case the app is not yet installed or you're unsure about their version, open Ledger Live and install or update the Ethereum app to the most recent release.
-
-
Use Google Chrome or Brave for the best compatibility with stake.moonlet.io.
-
For security and stability reasons, Ledger devices must be connected to your laptop or desktop via a USB cable. Bluetooth connections are not supported for this operation.
Step-by-step
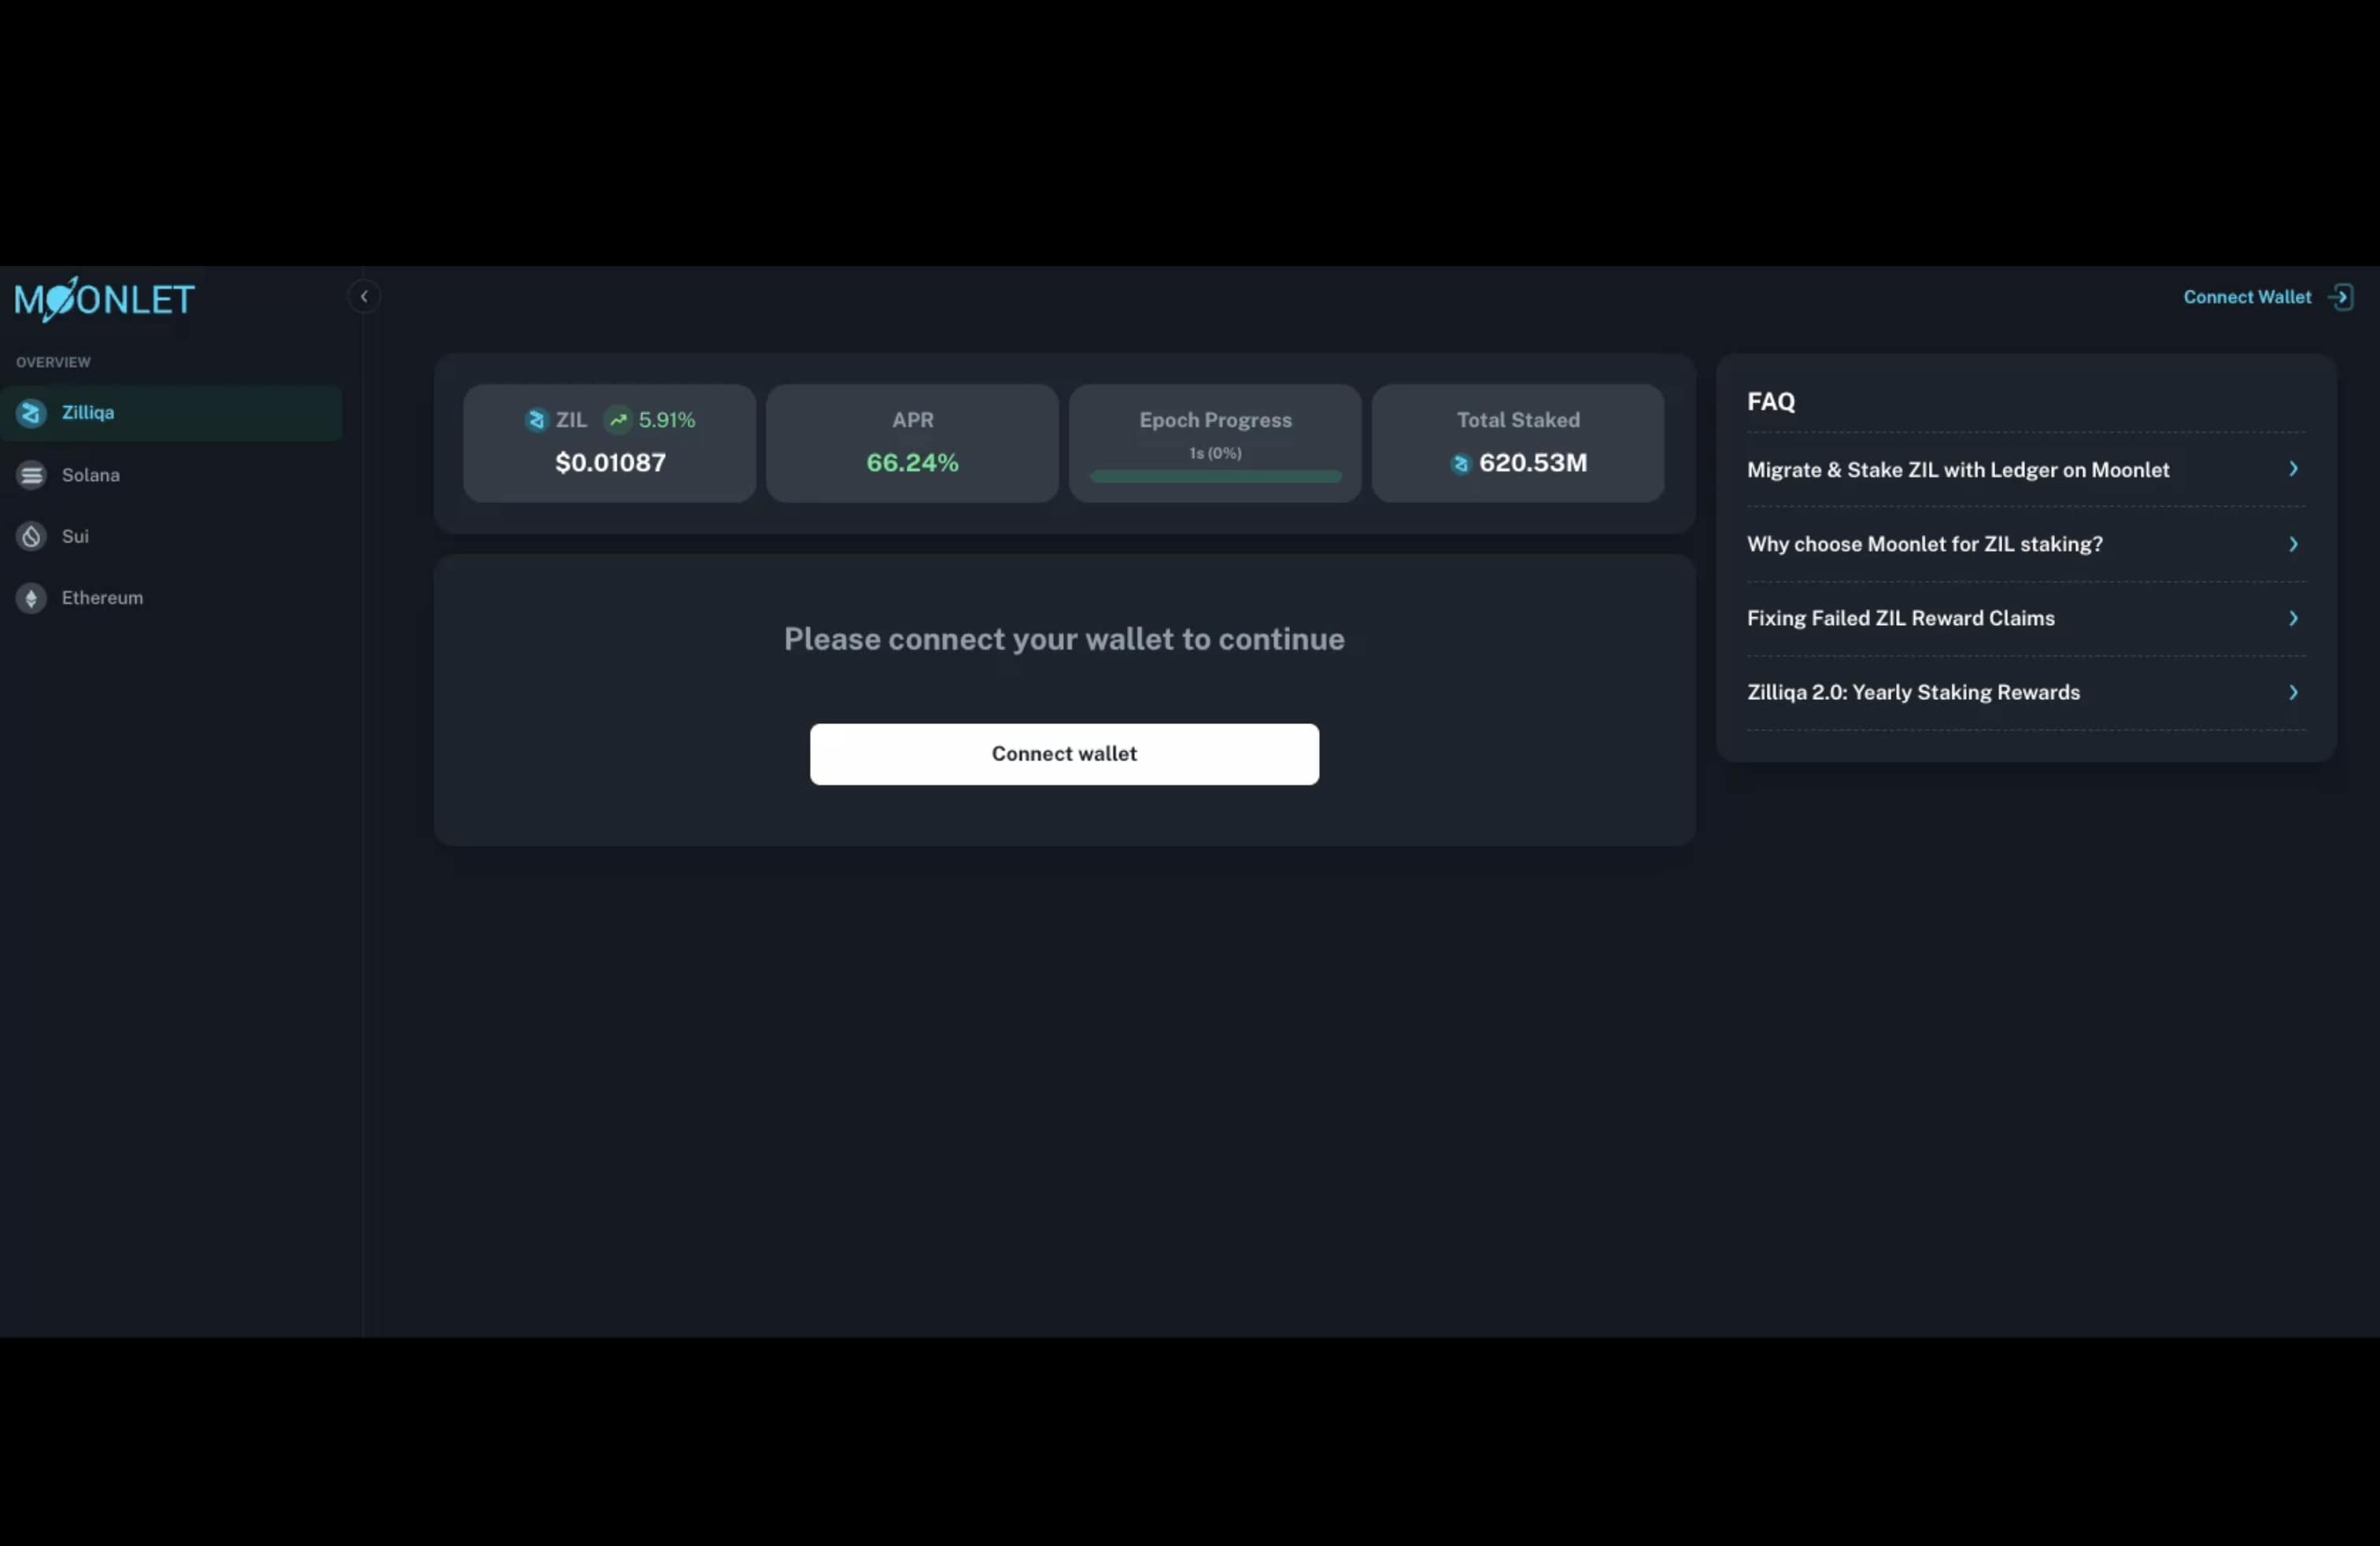
Step 1: Access the Moonlet Dashboard
Navigate to stake.moonlet.io and select Zilliqa from the left-hand side menu. This is Moonlet’s official self-custodial staking interface, purpose-built to let you securely stake your ZIL tokens to the Moonlet validator on Zilliqa 2.0 using your Ledger device.
Click the “Connect Wallet” button to initiate a read-only connection between the Moonlet Dashboard and your Ledger wallet. This allows the interface to fetch your public account data (such as balances and staking status) while keeping your private keys fully secured inside your Ledger device.
🔐 At no point does Moonlet have access to your secret phrase or private keys.
All transactions are locally signed on the Ledger hardware and then broadcast to the network—ensuring maximum security and full self-custody.
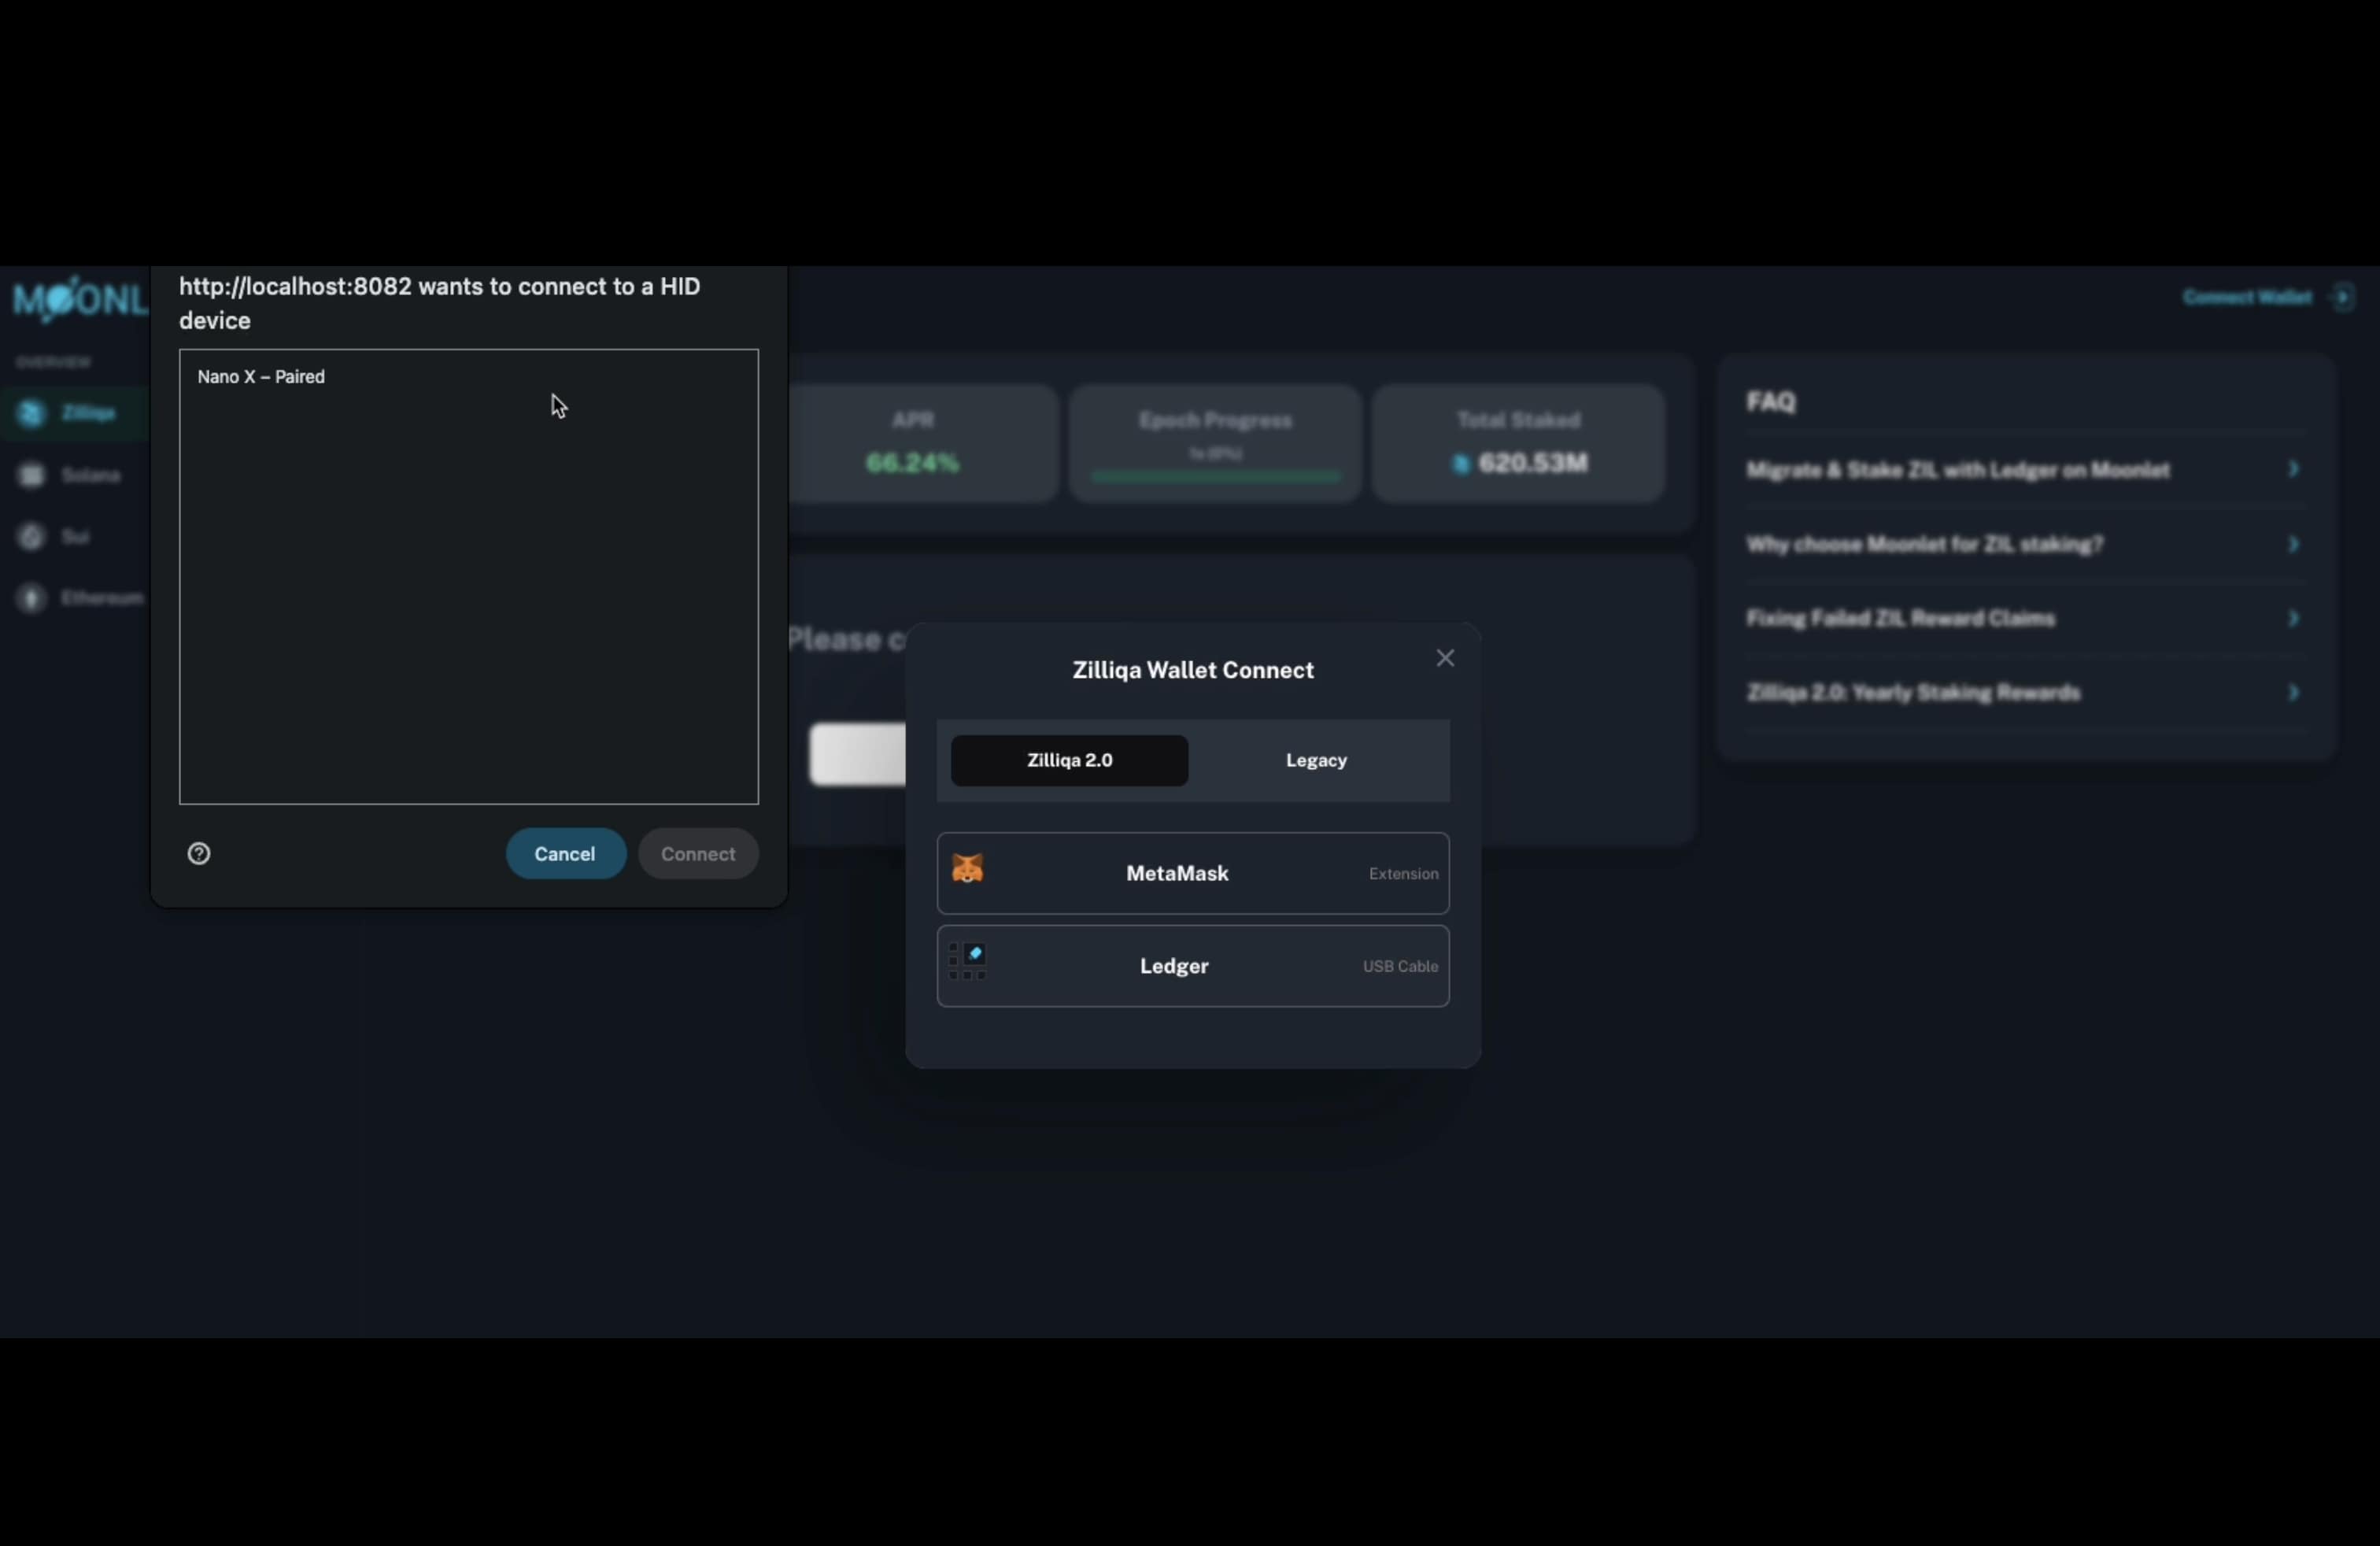
Step 2: Connect Your Zilliqa 2.0 Wallet
After clicking “Connect Wallet”, navigate to the “Zilliqa 2.0” tab in the pop-up window.
Choose your preferred connection method:
-
Ledger (recommended for maximum security)
-
MetaMask (browser-based software wallet)
🔐 We strongly recommend using Ledger, a hardware wallet known for its high security and reliability—especially for long-term staking and large holdings.
Note: Only USB cable connectivity is supported for Ledger devices. Bluetooth is disabled to ensure optimal stability and reduce attack surface.
Once you've selected your method, confirm the connection through your browser’s native pop-up window. If using Ledger, follow the on-screen prompts and approve the connection directly on your device to complete the secure pairing.
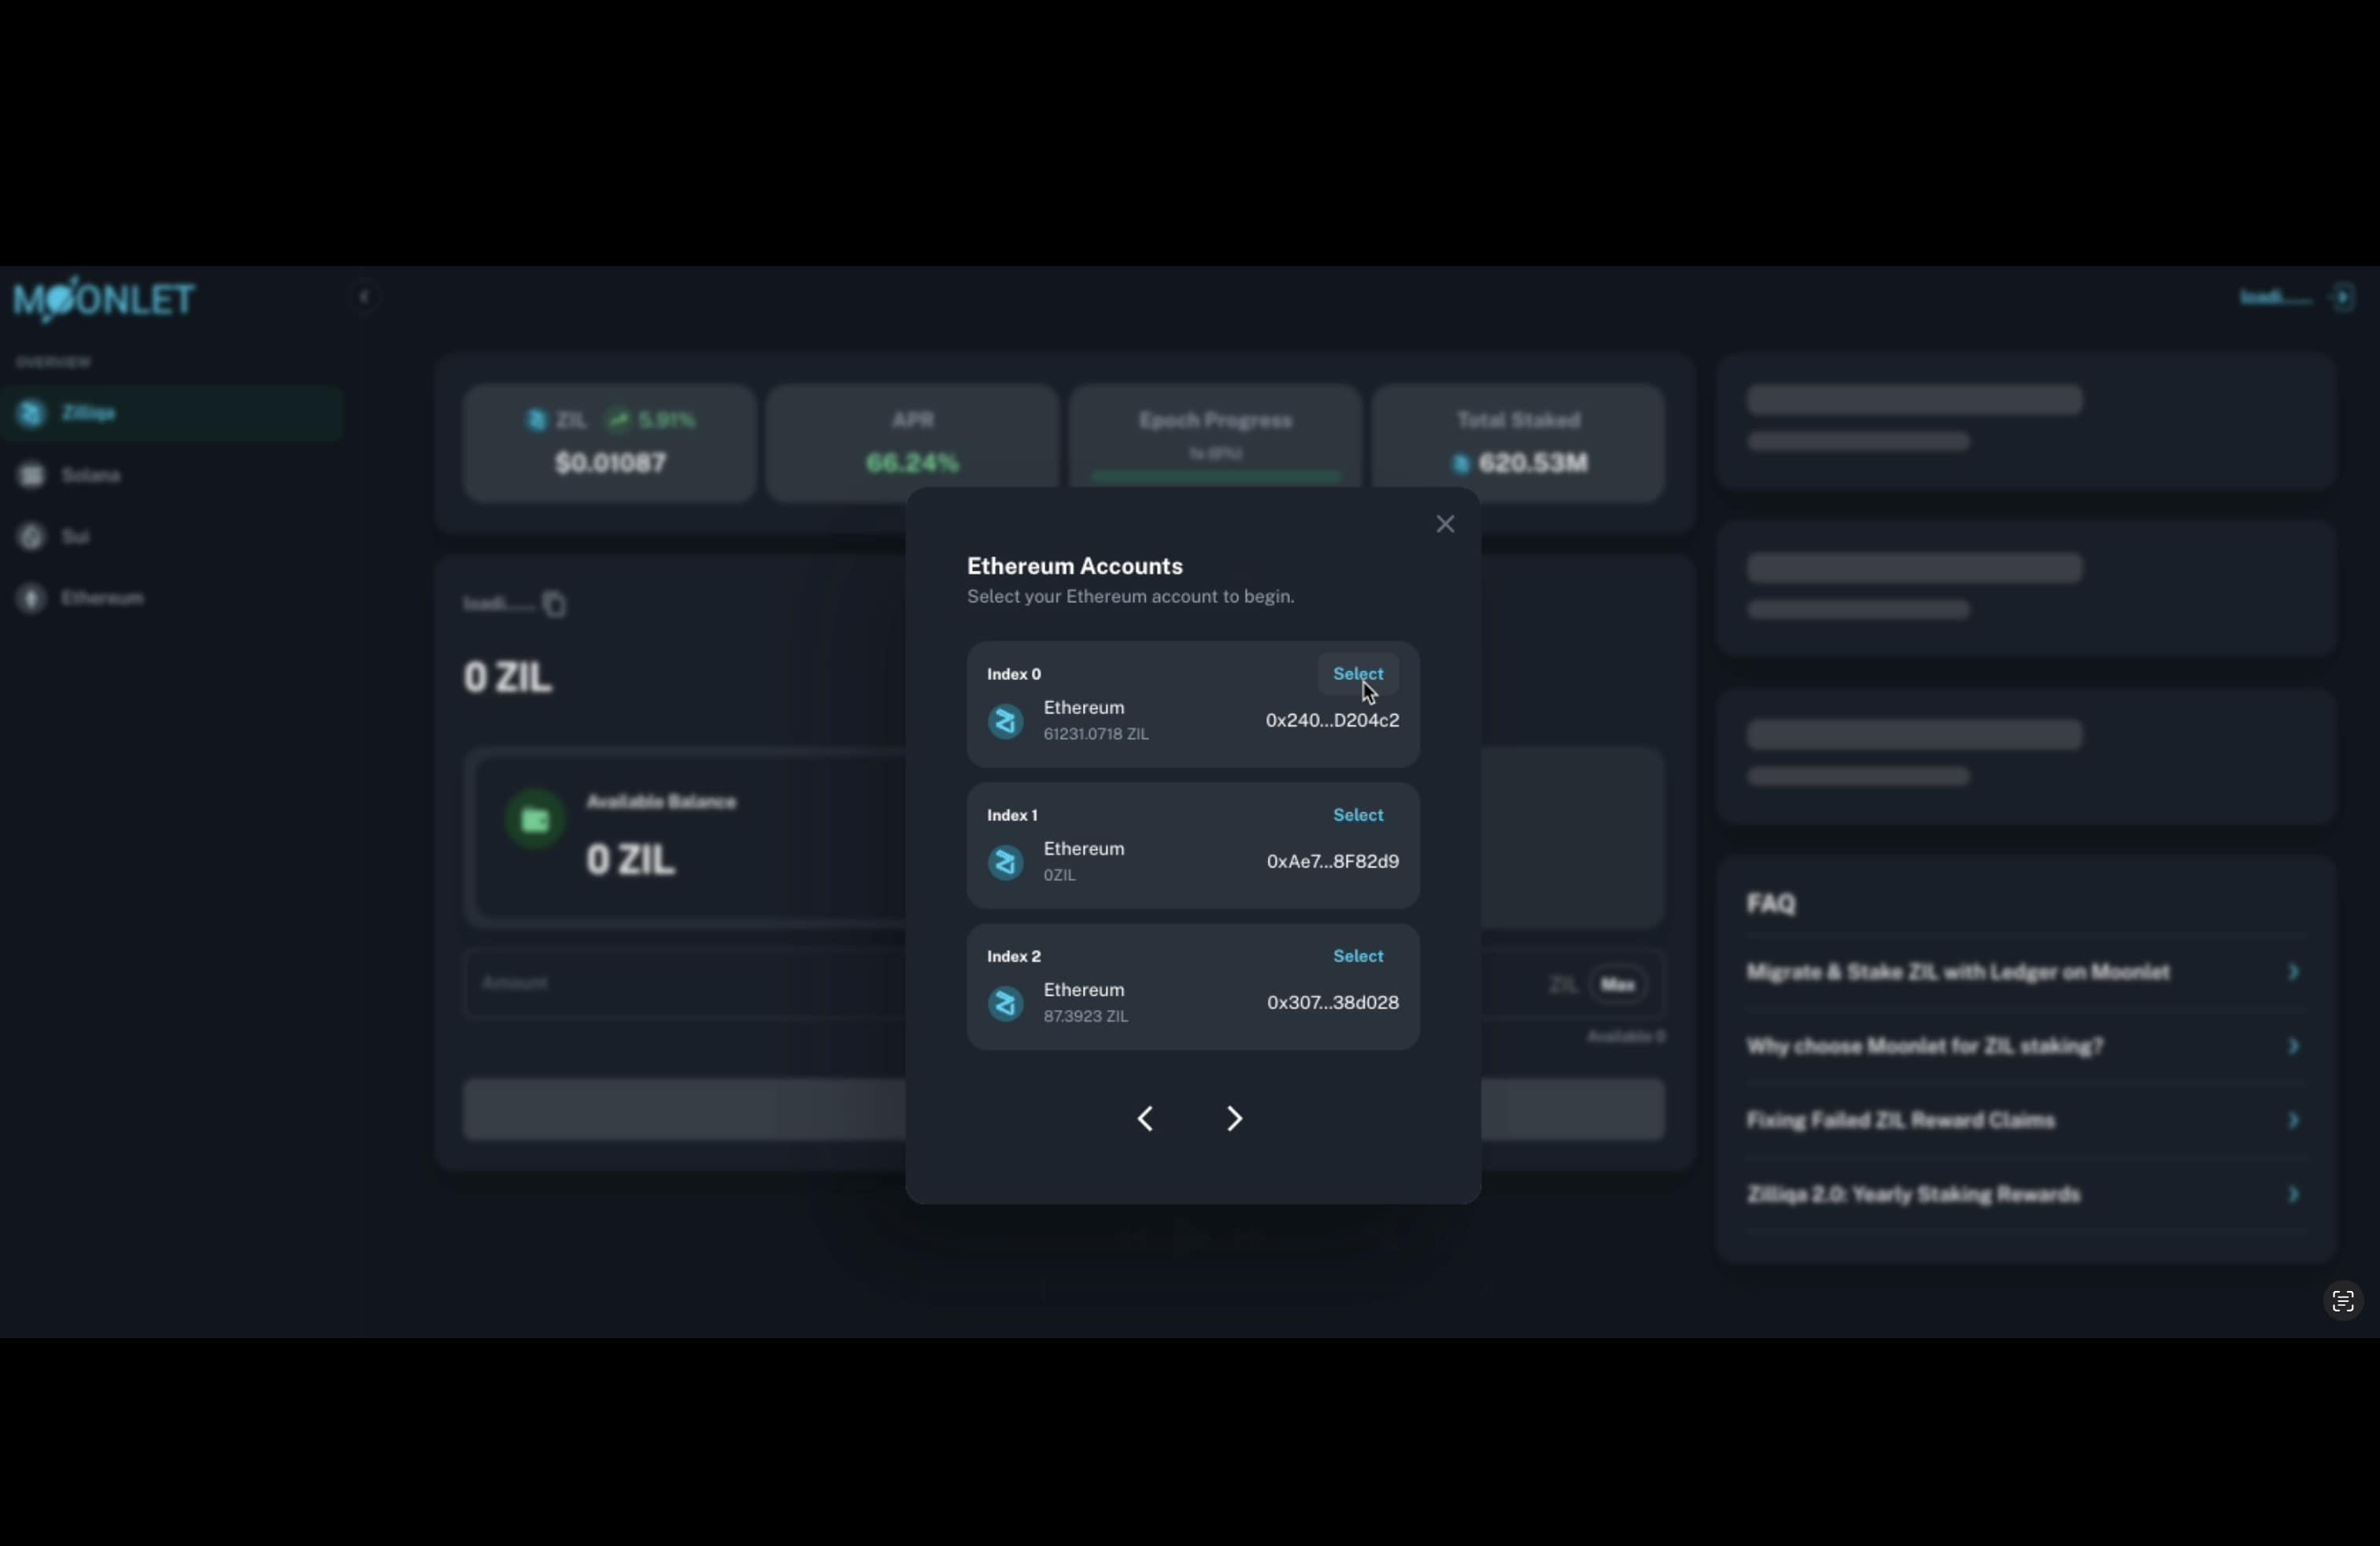
Step 3: Select your account
Next, choose the Zilliqa 2.0 (EVM-compatible) account you wish to use. This account is derived from your Ethereum path on Ledger, as Zilliqa 2.0 uses an Ethereum-style address format.
Follow the prompts on your Ledger device to securely confirm account access. Once verified, your account address and token balance will appear in the pop-up window.
Click “Select” to proceed to the staking interface.
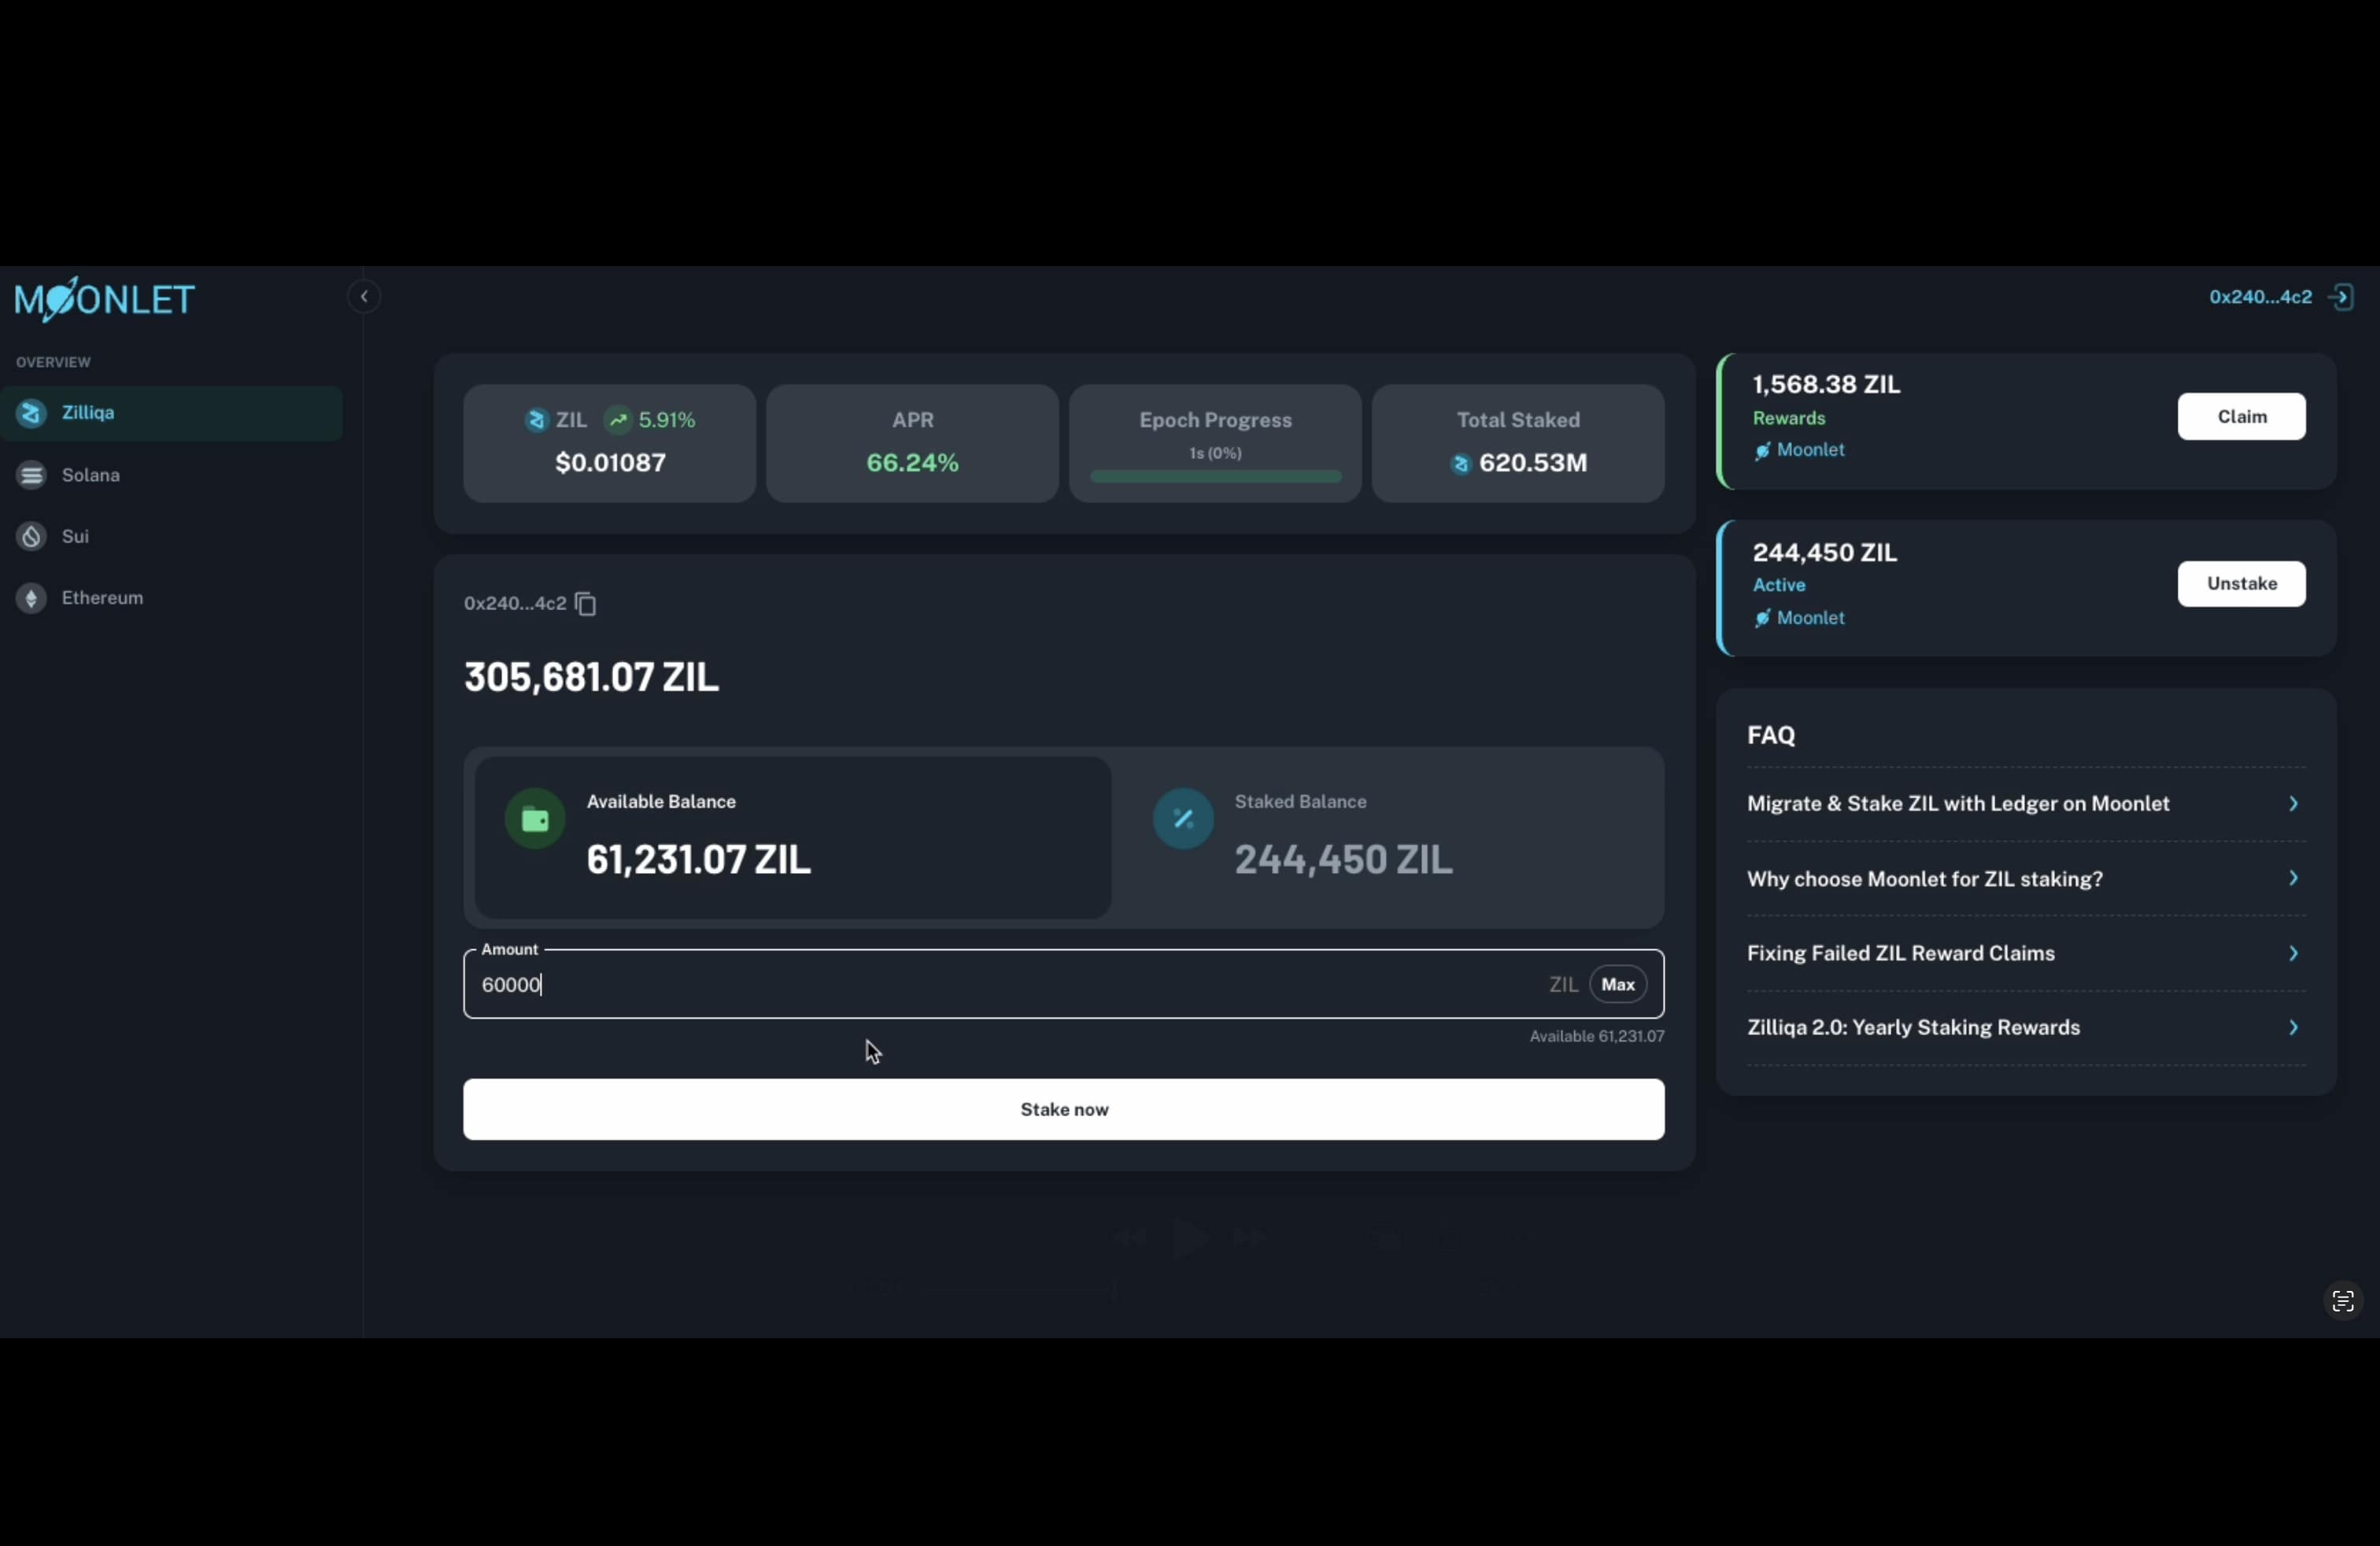
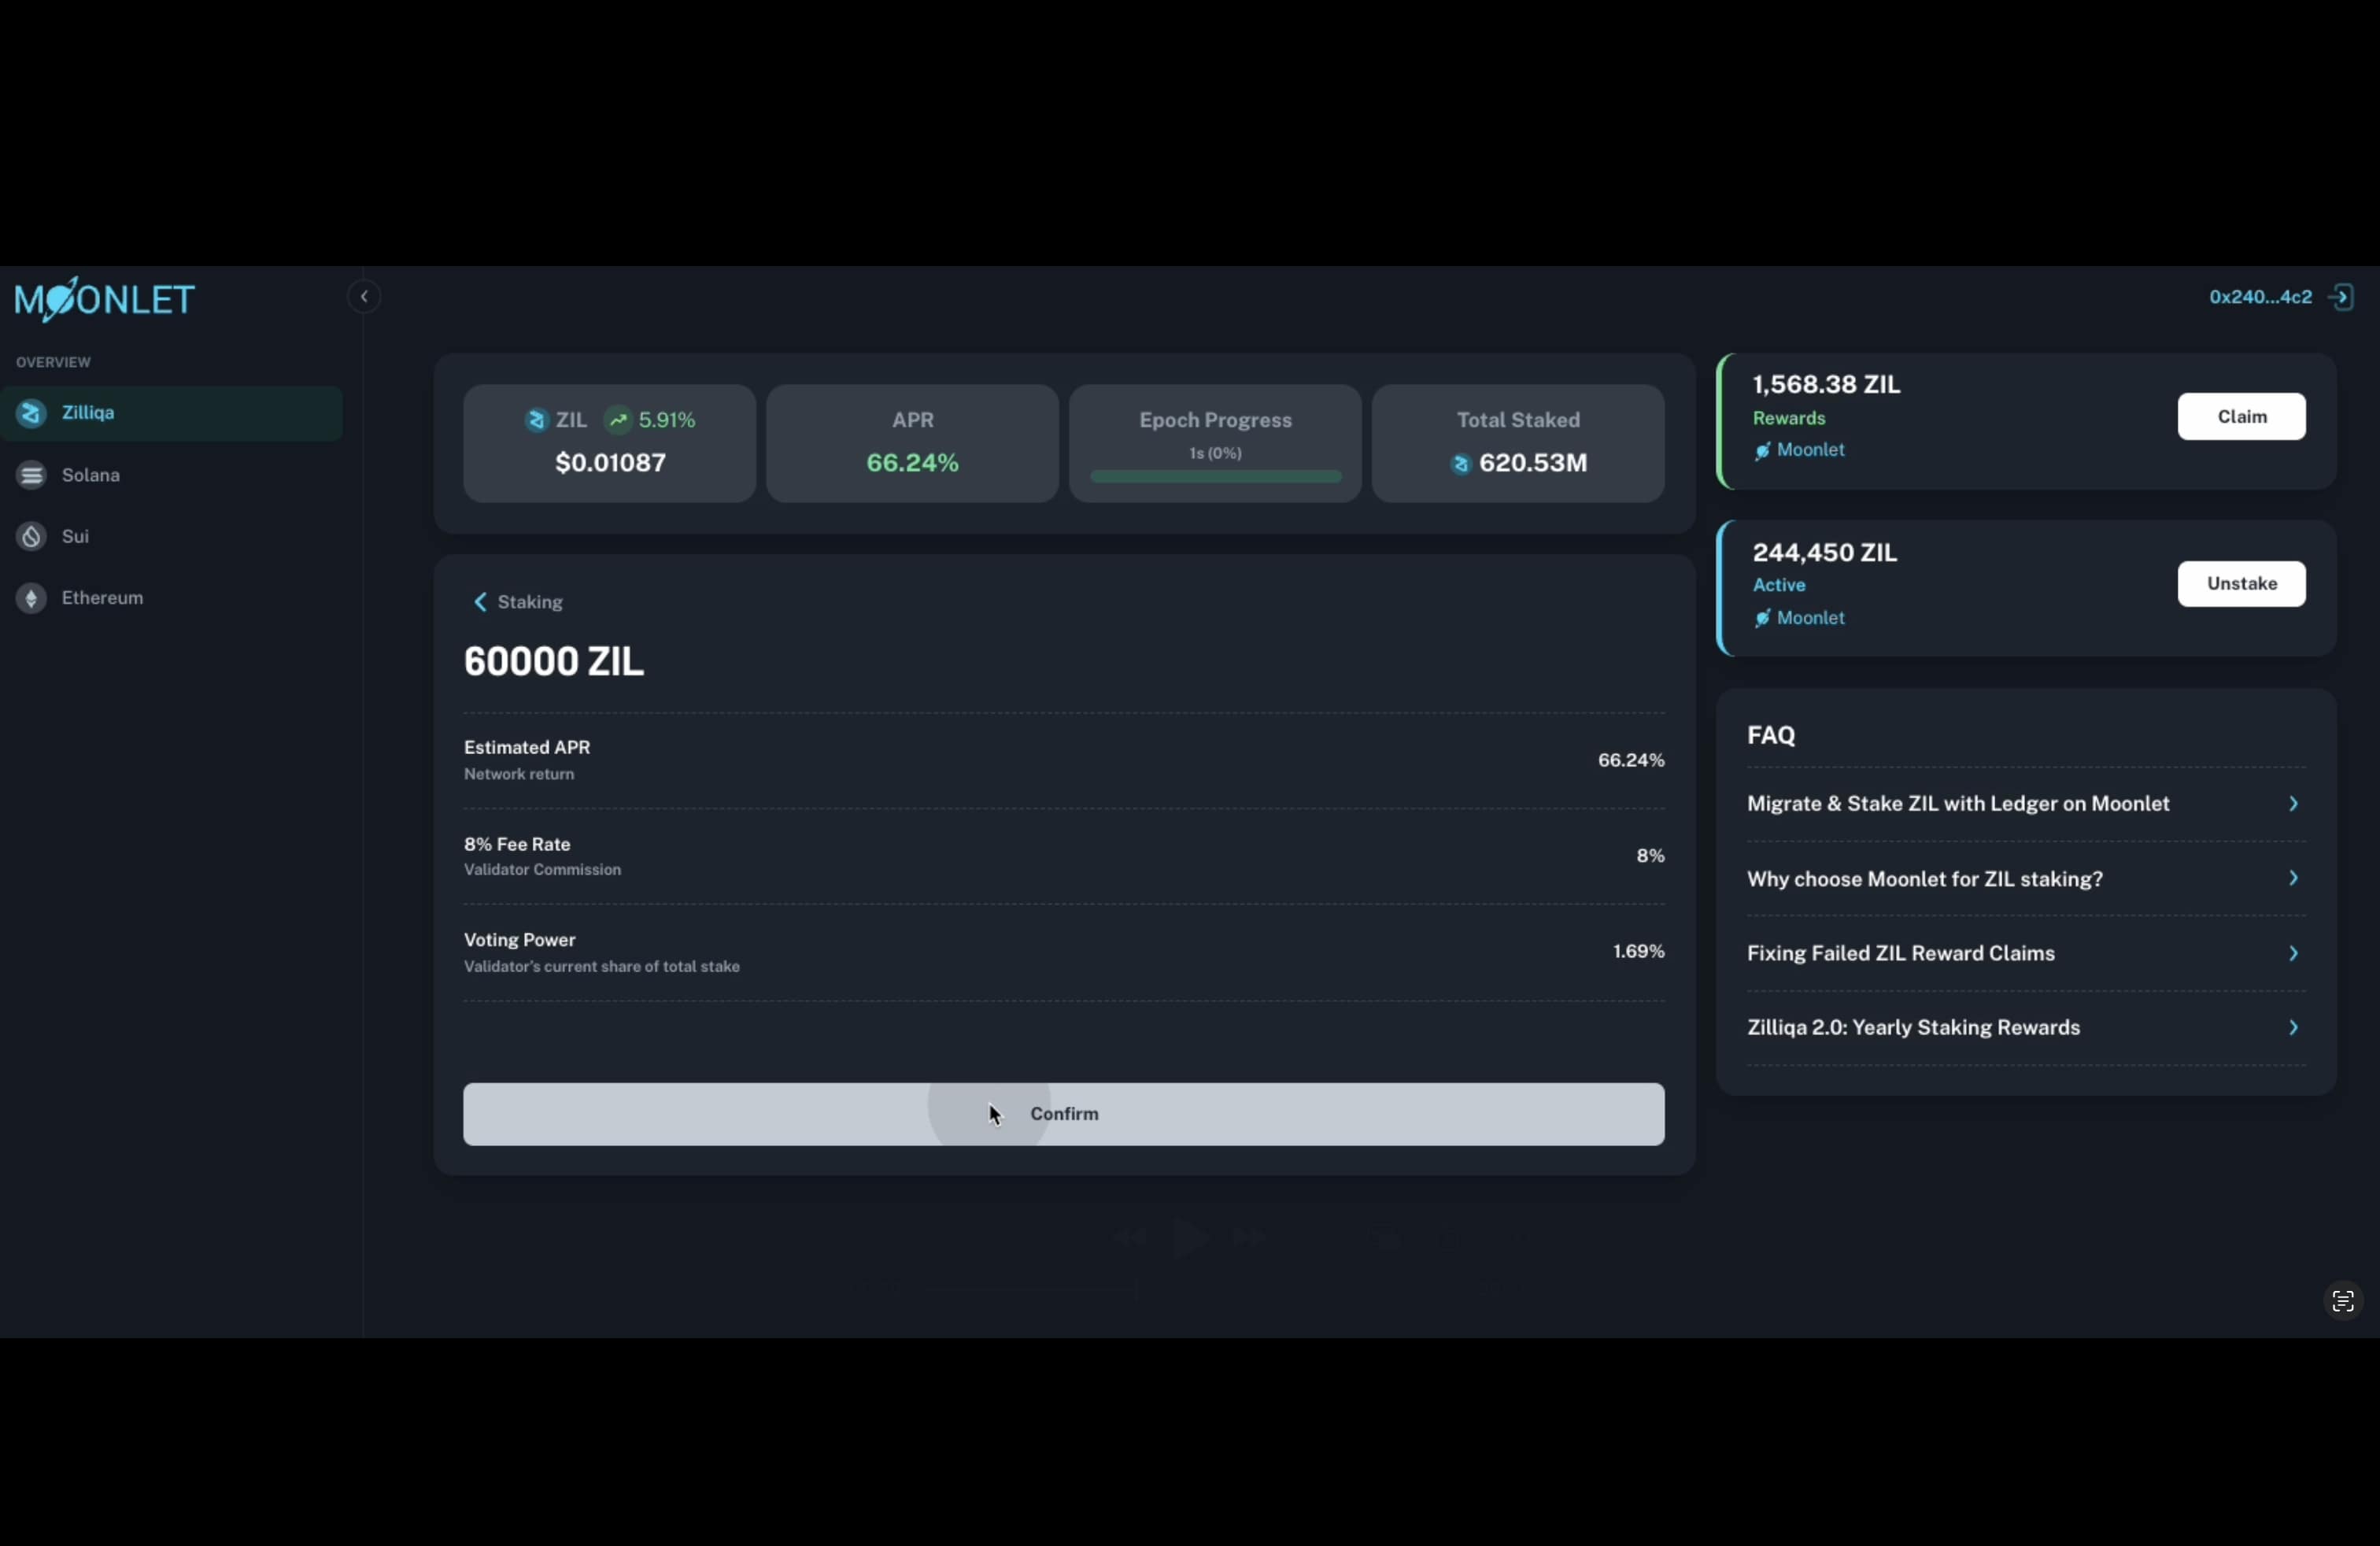
Step 4: Stake Your ZIL
With your Zilliqa 2.0 account connected, the Moonlet Dashboard will display key account information, including your available ZIL balance and any currently staked amount.
Enter the amount of ZIL you wish to stake and click “Stake Now” to initiate the staking process.
On the next screen, you’ll be able to:
-
✅ Review the amount you’re about to stake
-
📈 View the estimated APR
-
💸 See the Moonlet validator fee
-
🗳️ Check the validator’s voting power on the network
Confirm the details and proceed when ready.
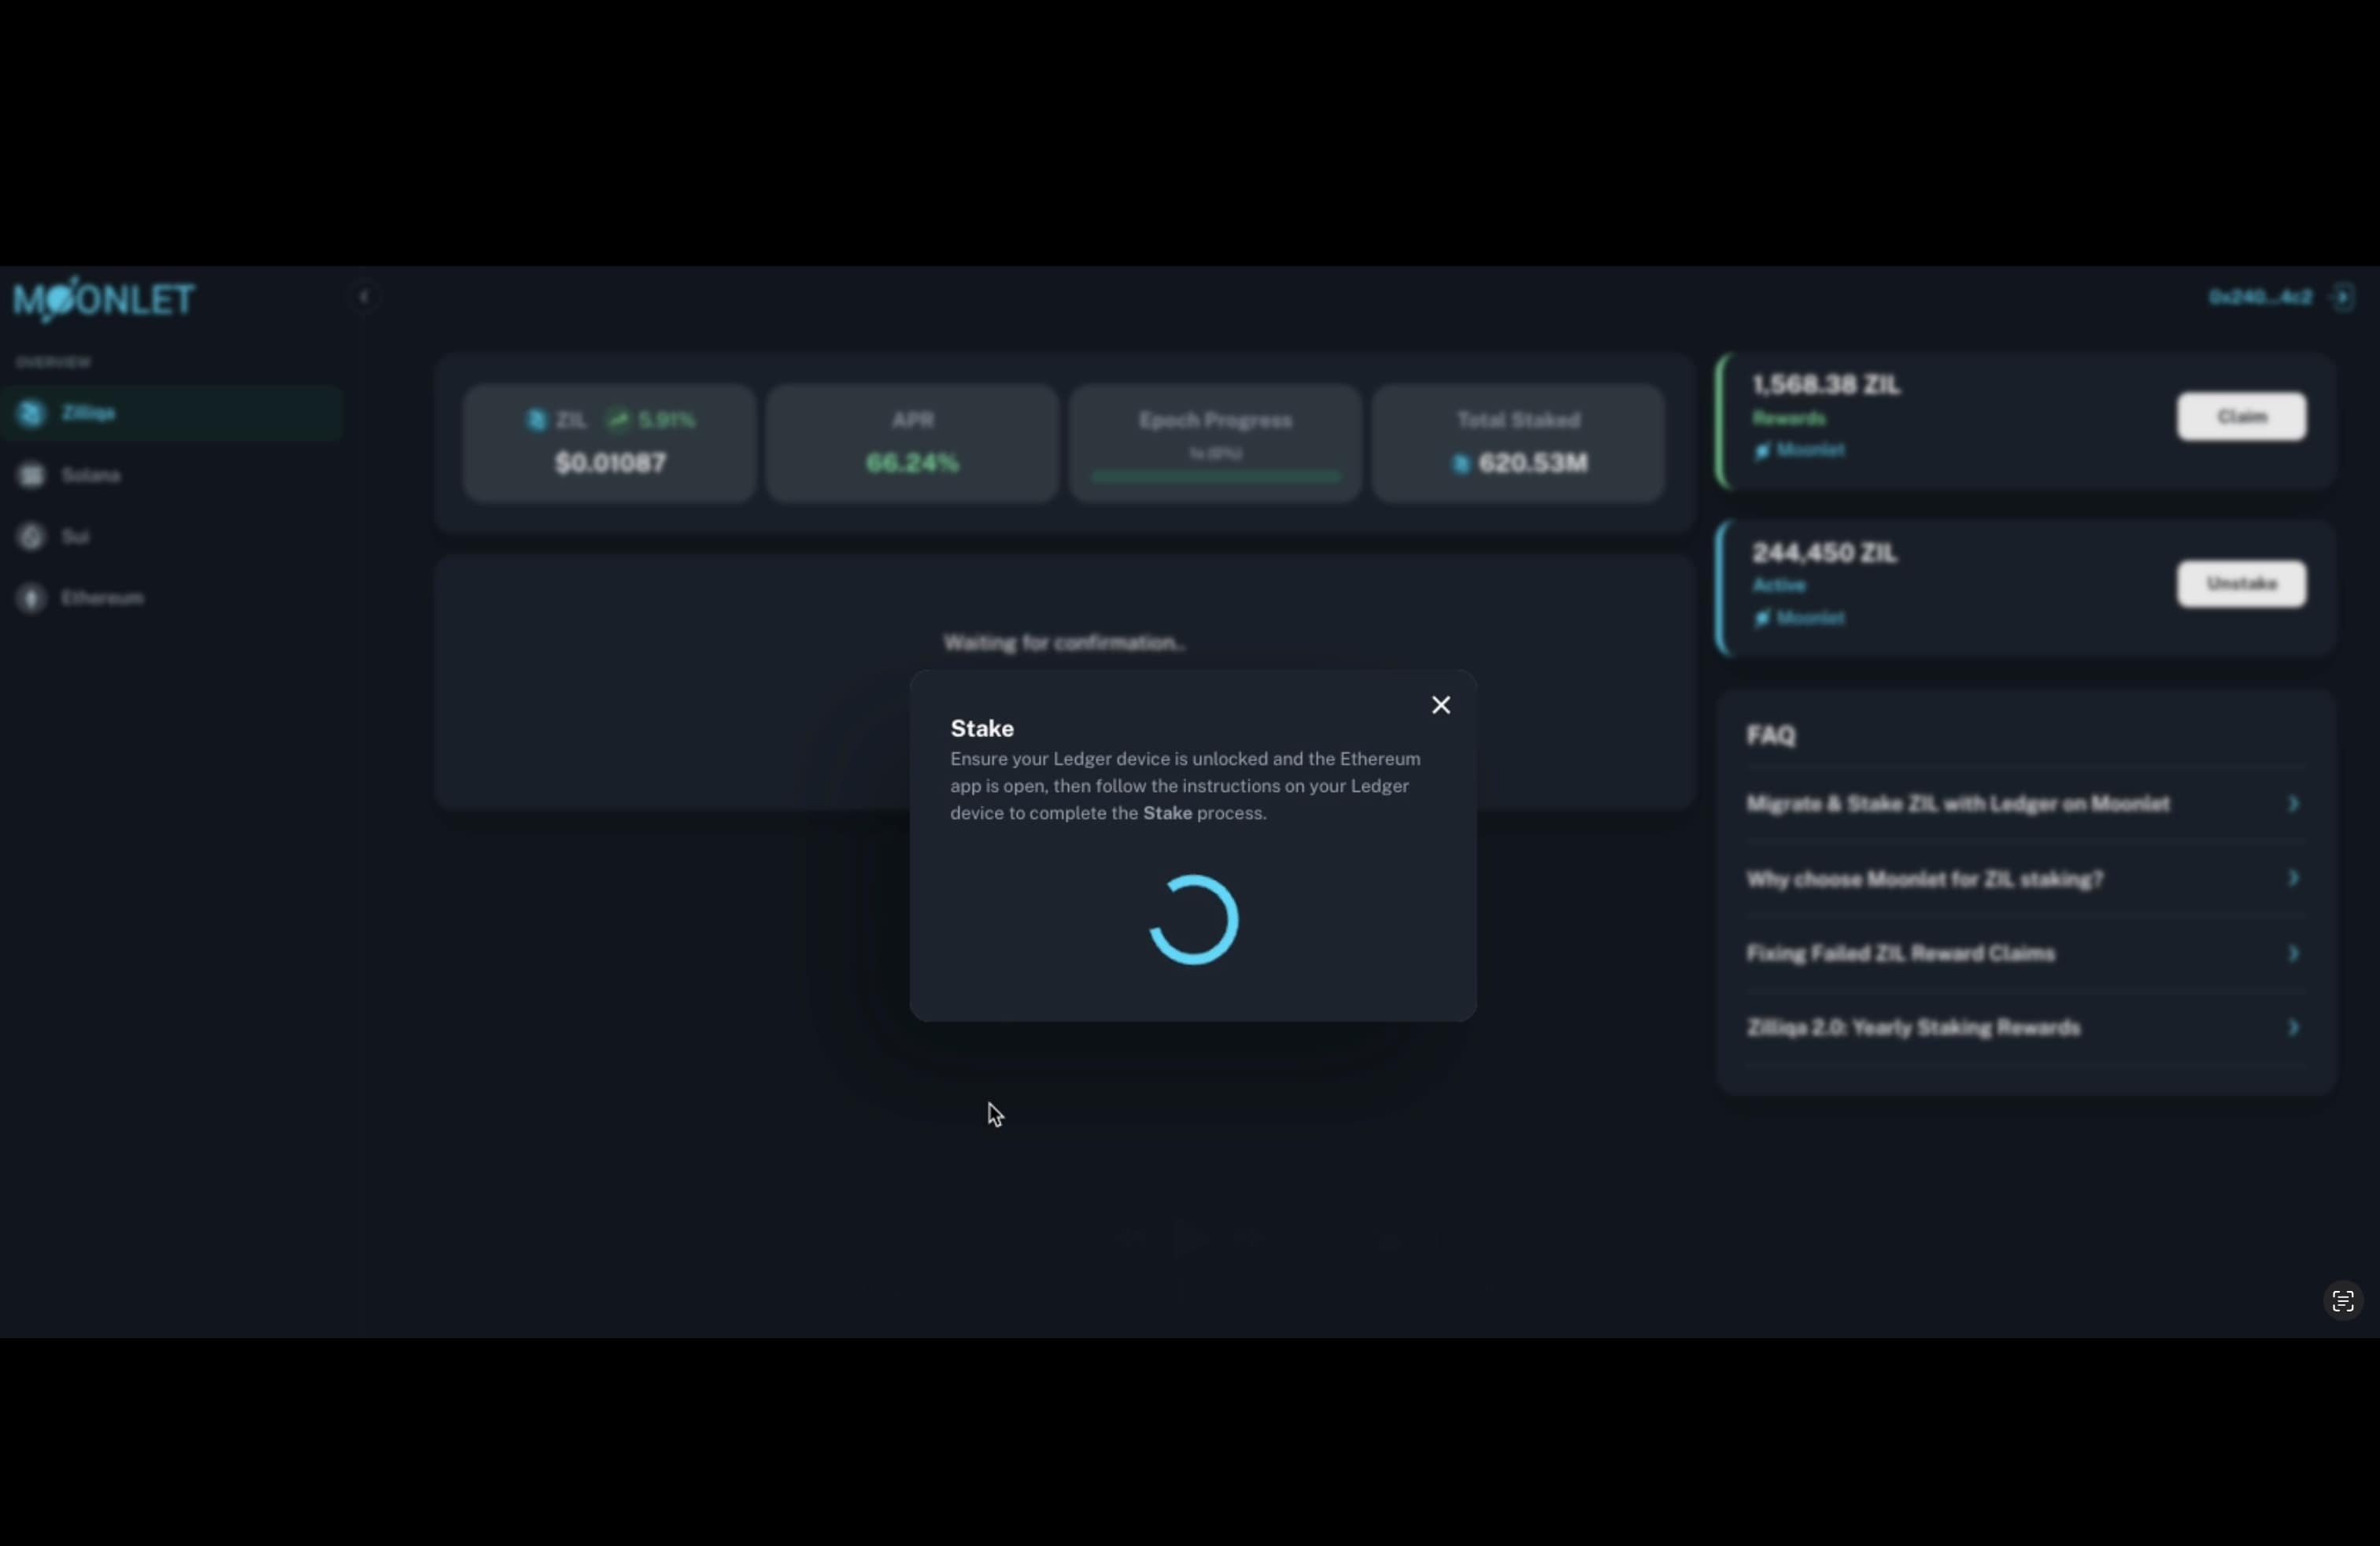
Step 5: Ledger confirmations
At this step, ensure your Ledger device is unlocked and the Ethereum app is open, as Zilliqa 2.0 runs on an EVM-compatible framework.
Follow the prompts on your Ledger device to review and sign the transaction securely.
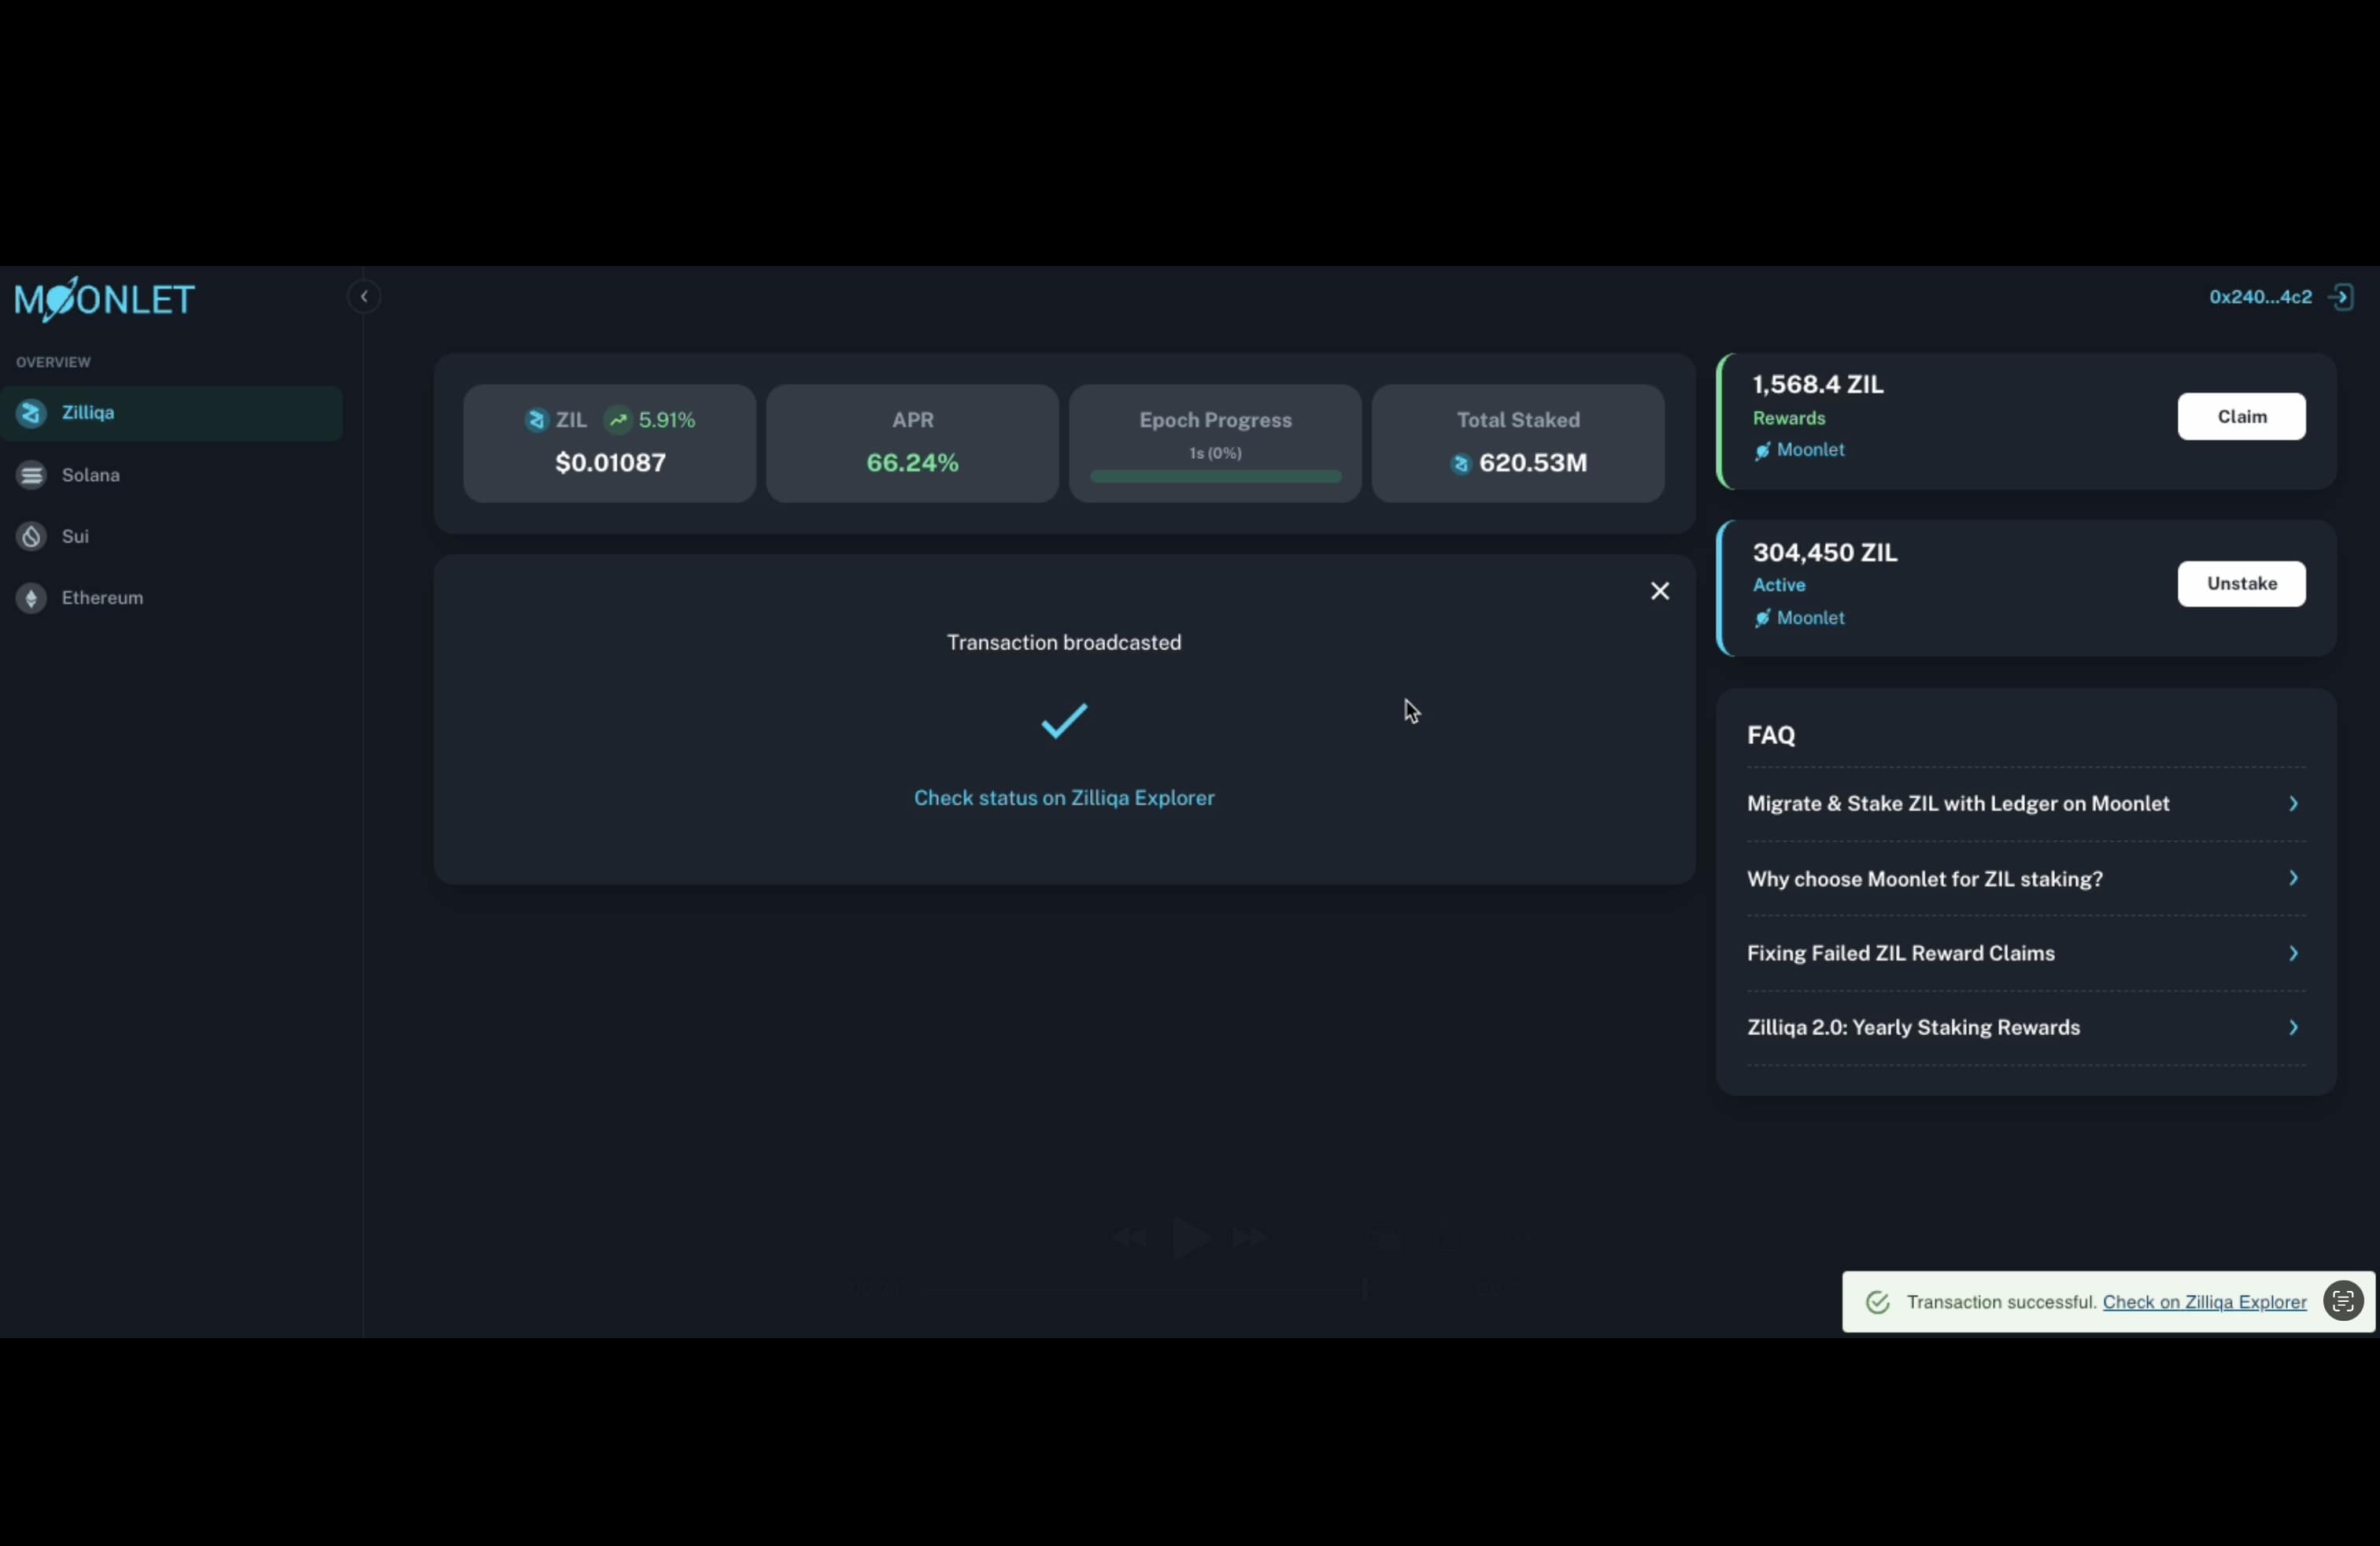
Once signed, the transaction will be broadcast to the blockchain, and confirmation should complete within a few seconds.
Afterward, close the confirmation overlay, and the Moonlet Dashboard will automatically refresh to display updated details, including:
-
✅ Your available balance
-
📊 Your staked balance
-
🎁 Your earned rewards
-
🧾 Your active staking positions
You're now successfully staking on Zilliqa 2.0 via Moonlet!

If you need help at any point, feel free to use our Ask AI feature for instant, context-aware guidance.
If your issue requires human assistance, you can easily raise a support ticket through Ask AI, and a member of our team will follow up with you directly.