Step-by-Step: Migrate ZIL to Zilliqa 2.0 Using Ledger
Introduction
Zilliqa 2.0 introduces a powerful new Proof-of-Stake architecture with enhanced interoperability and efficiency. To support this upgrade, Moonlet offers a secure, self-custodial staking dashboard at stake.moonlet.io, designed to help users seamlessly migrate and stake their ZIL tokens without relinquishing control of their assets.
A self-custodial staking dashboard means that users connect directly from wallets they control—whether browser-based or hardware wallets like Ledger—without ever handing over custody to a third party. This ensures full control, improved transparency, and minimized counterparty risk.
With Moonlet's infrastructure-grade validator services and this user-first approach, migrating to Zilliqa 2.0 is not only secure but also optimized for long-term staking rewards and network participation.
Prerequisites
Before proceeding, please ensure the following:
-
This guide is exclusively for users who manage their ZIL tokens via a Ledger hardware wallet. If you're using a software wallet (e.g., mobile wallet with mnemonic), refer to the separate migration guide for non-Ledger users.
-
Supported Ledger devices include:
-
Ledger Nano S
-
Ledger Nano X
-
Ledger Flex
-
Ledger Stax
-
-
Ensure your Ledger firmware is up to date.
-
You need both apps installed on your Ledger:
-
Install the Ethereum app via Ledger Live — Zilliqa 2.0 is an EVM-compatible network, so it uses the Ethereum app for all operations on the new chain.
-
Install the Zilliqa legacy app — it is still required to initiate the migration process from the old network.
-
In case the apps are not yet installed or you're unsure about their version, open Ledger Live and install or update both the Zilliqa and Ethereum apps to the most recent release.
-
-
Use Google Chrome or Brave for the best compatibility with stake.moonlet.io.
-
For security and stability reasons, Ledger devices must be connected to your laptop or desktop via a USB cable. Bluetooth connections are not supported for this operation.
Step-by-step
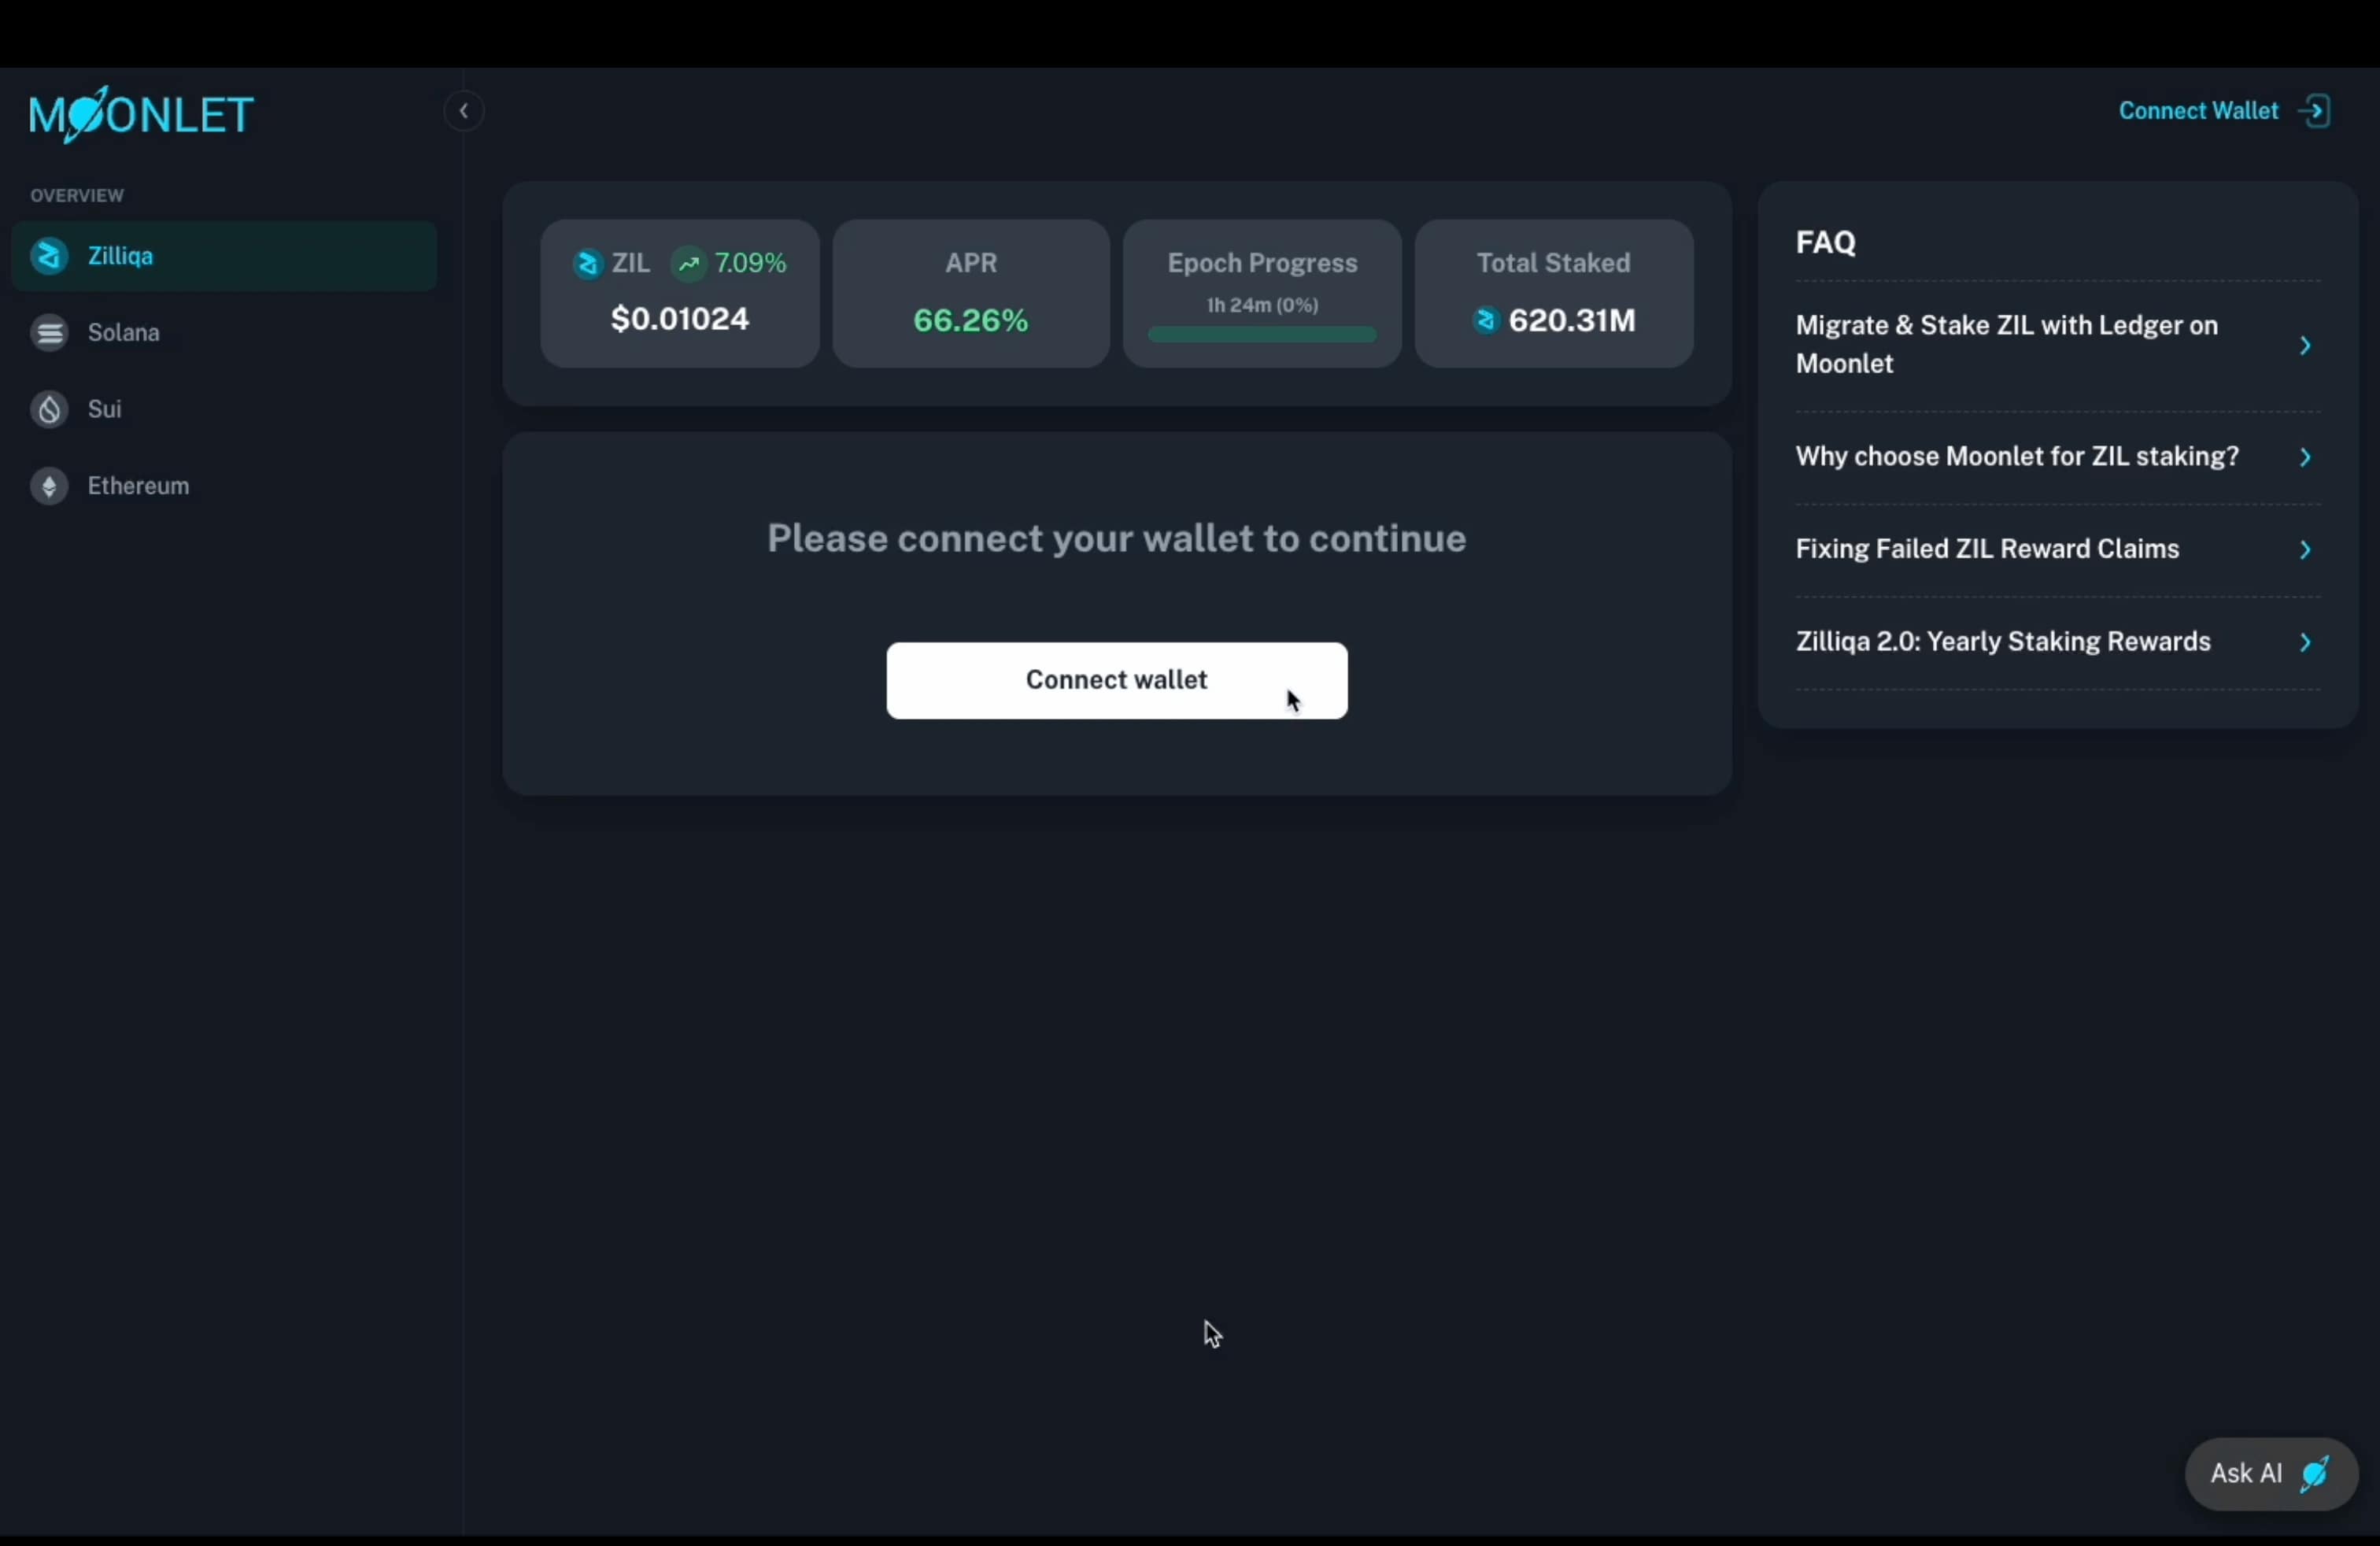
Step 1: Access the Moonlet Dashboard
Go to stake.moonlet.io and select Zilliqa from the side menu. This is the official self-custodial tool you'll use to migrate your ZIL tokens from the legacy network to Zilliqa 2.0, as well as to stake them securely via your Ledger device.
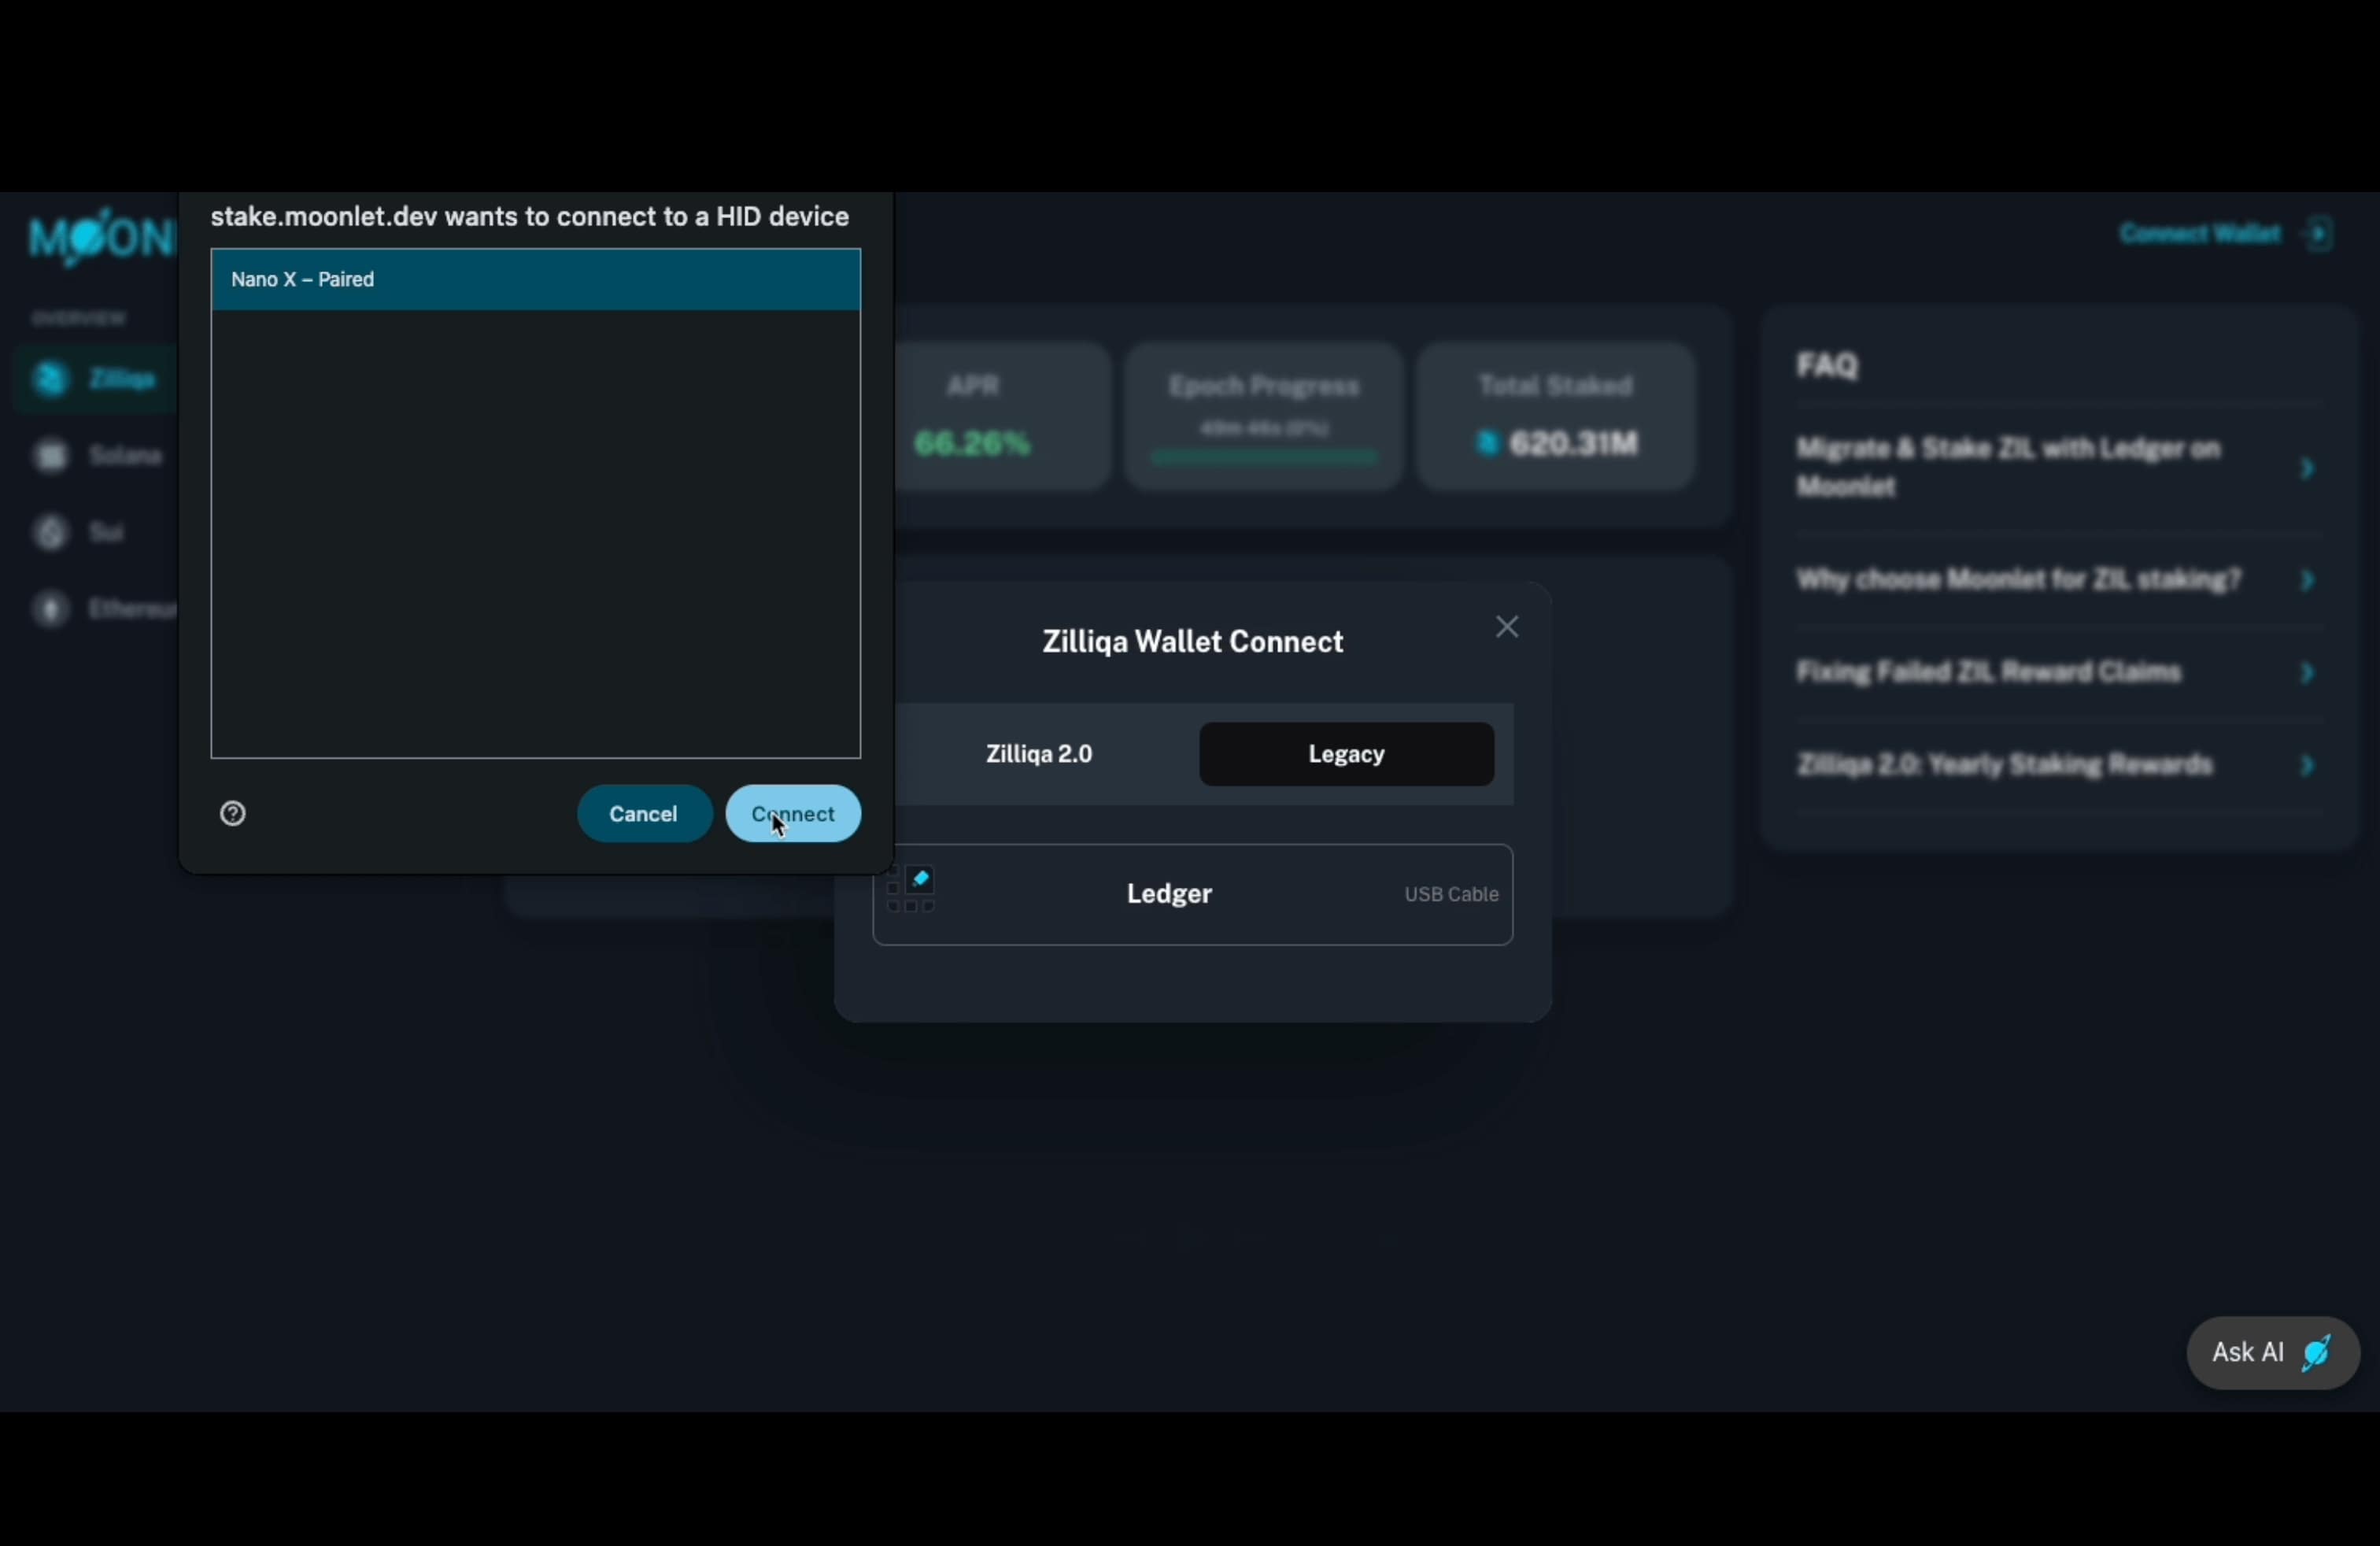
Step 2: Connect Your Legacy Wallet
Click “Connect Wallet”, then navigate to the “Legacy” tab in the pop-up window. Select your connection method — only USB cable is supported. Bluetooth is not available due to security and stability considerations.
Once selected, confirm the connection in your browser’s native pop-up window and click “Connect” to authorize access. Then, follow the prompts on your Ledger device to approve the connection.
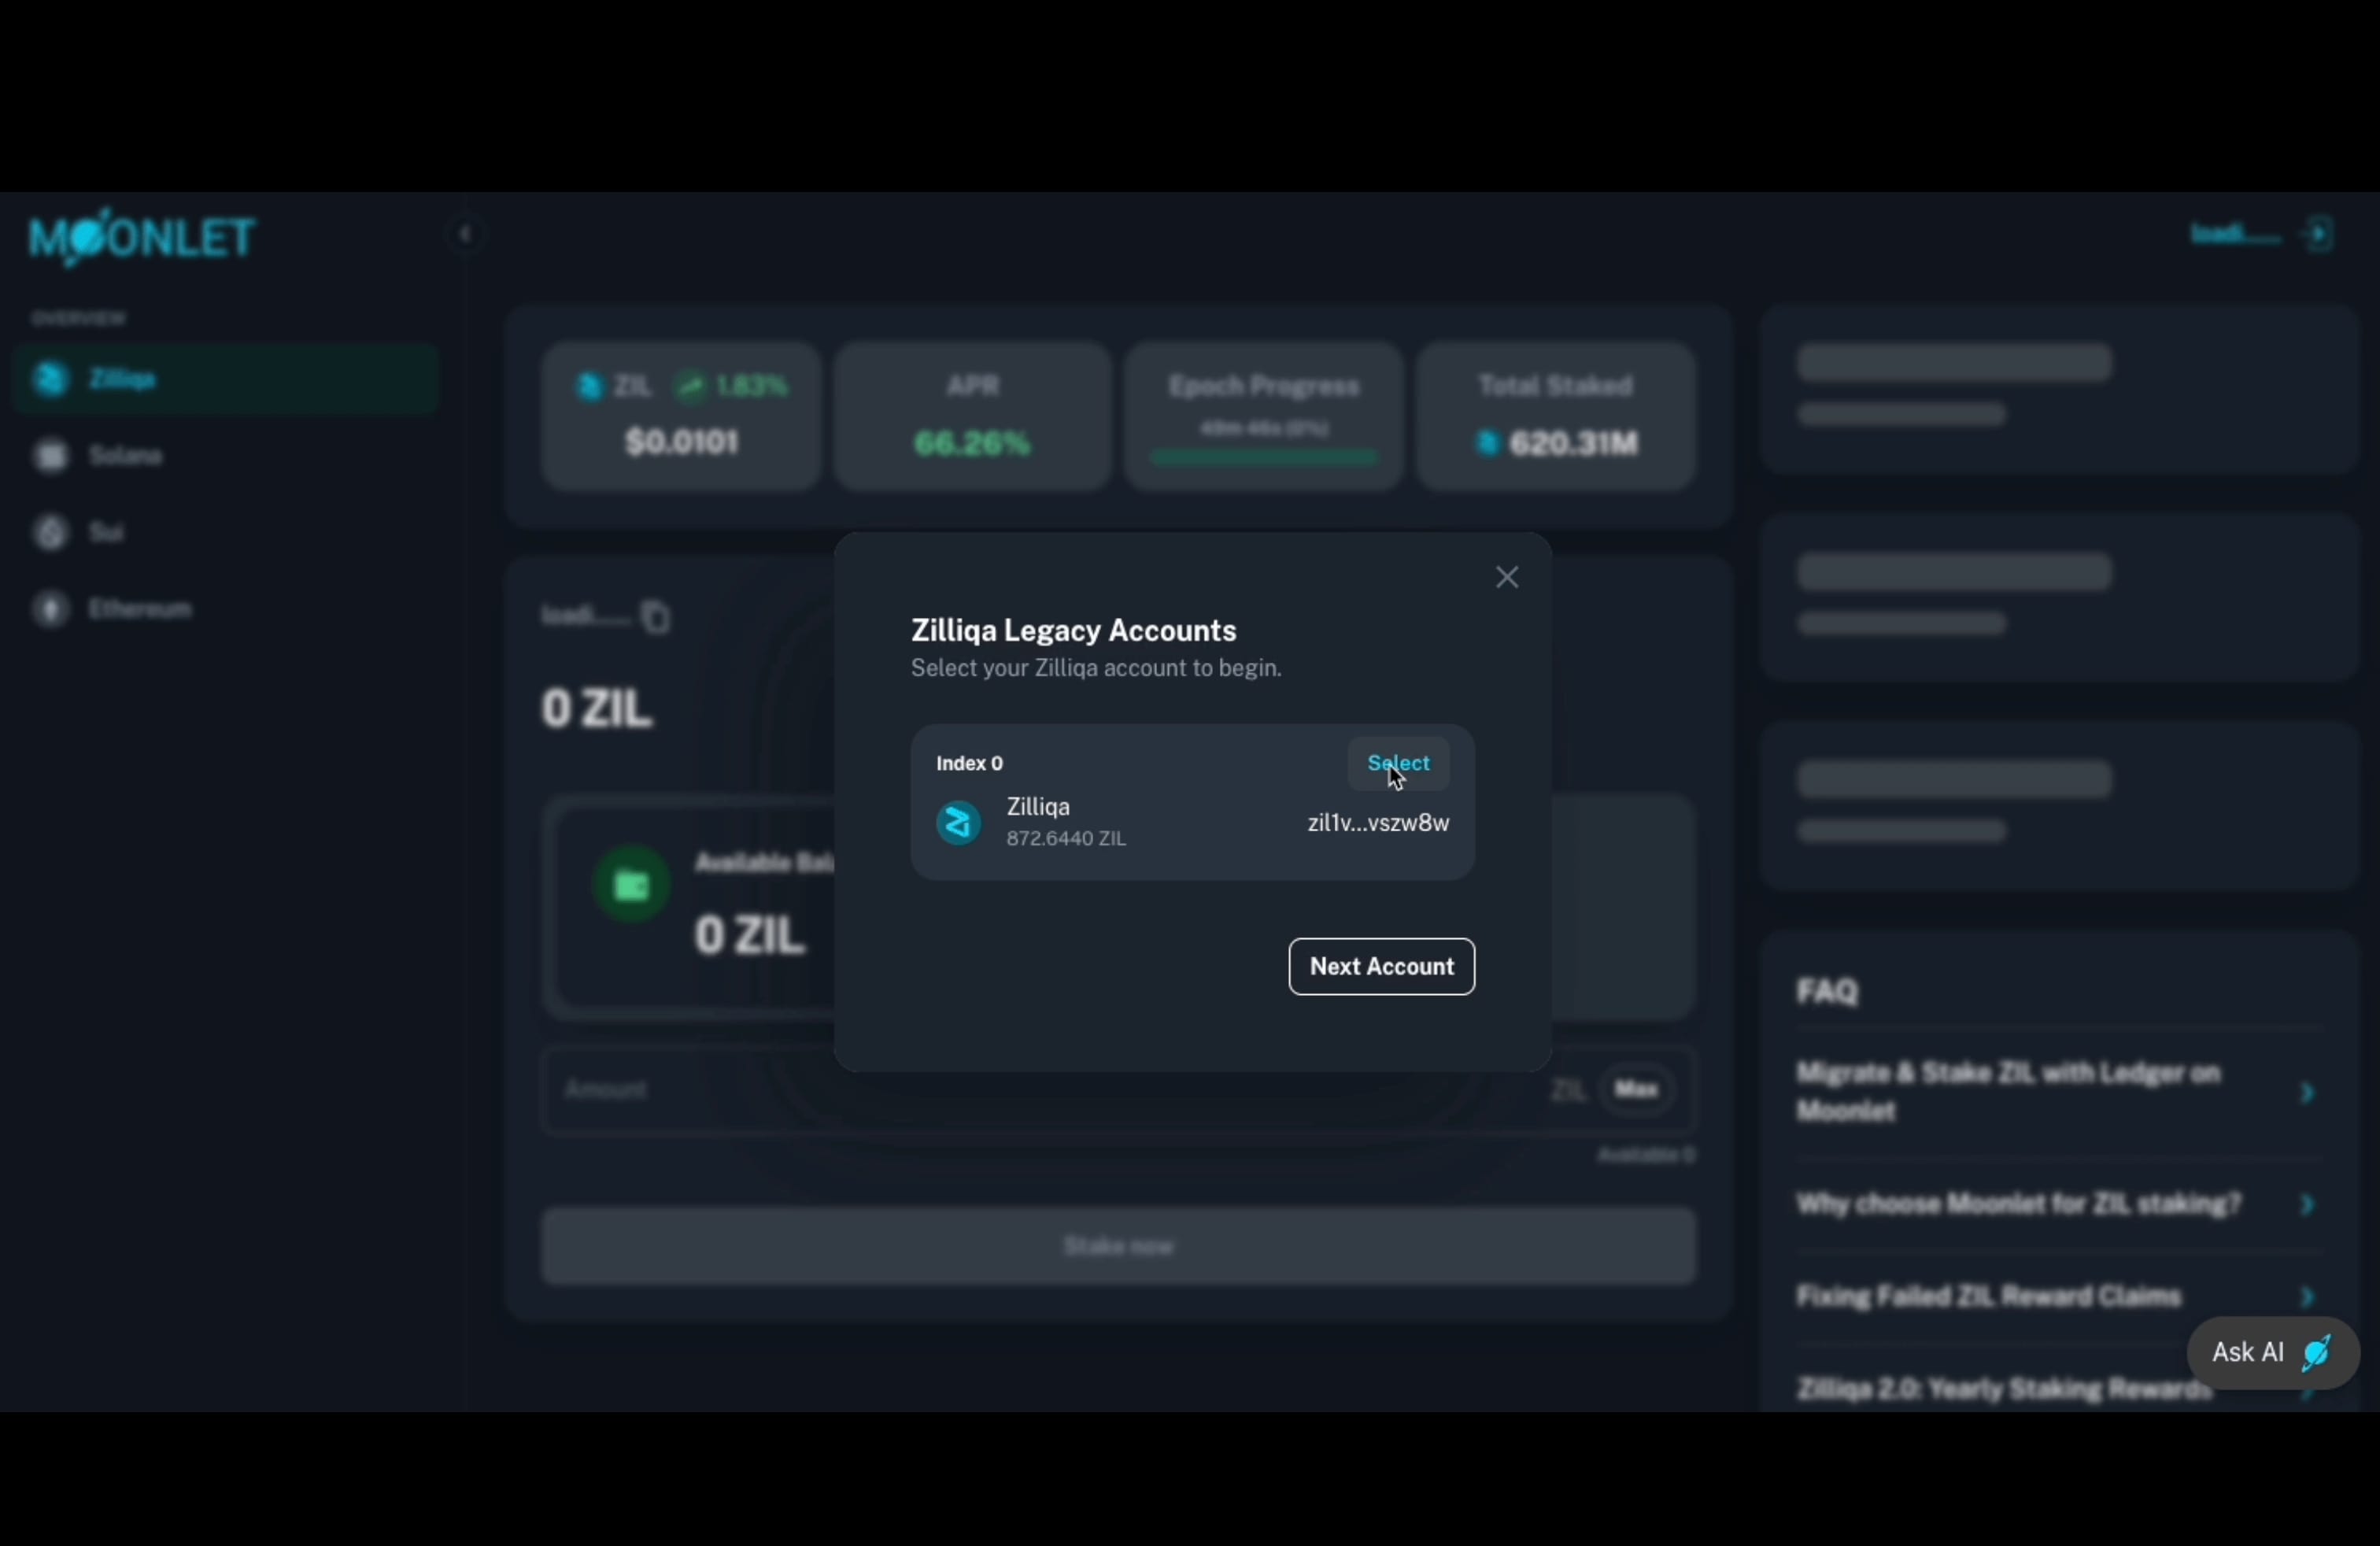
Step 3: Select Your Zilliqa Legacy Account
In this step, choose the Zilliqa legacy account you wish to use. Follow the prompts on your Ledger device to confirm account access. Once confirmed, your account address and balance will appear in the pop-up window. Click “Select” to proceed.
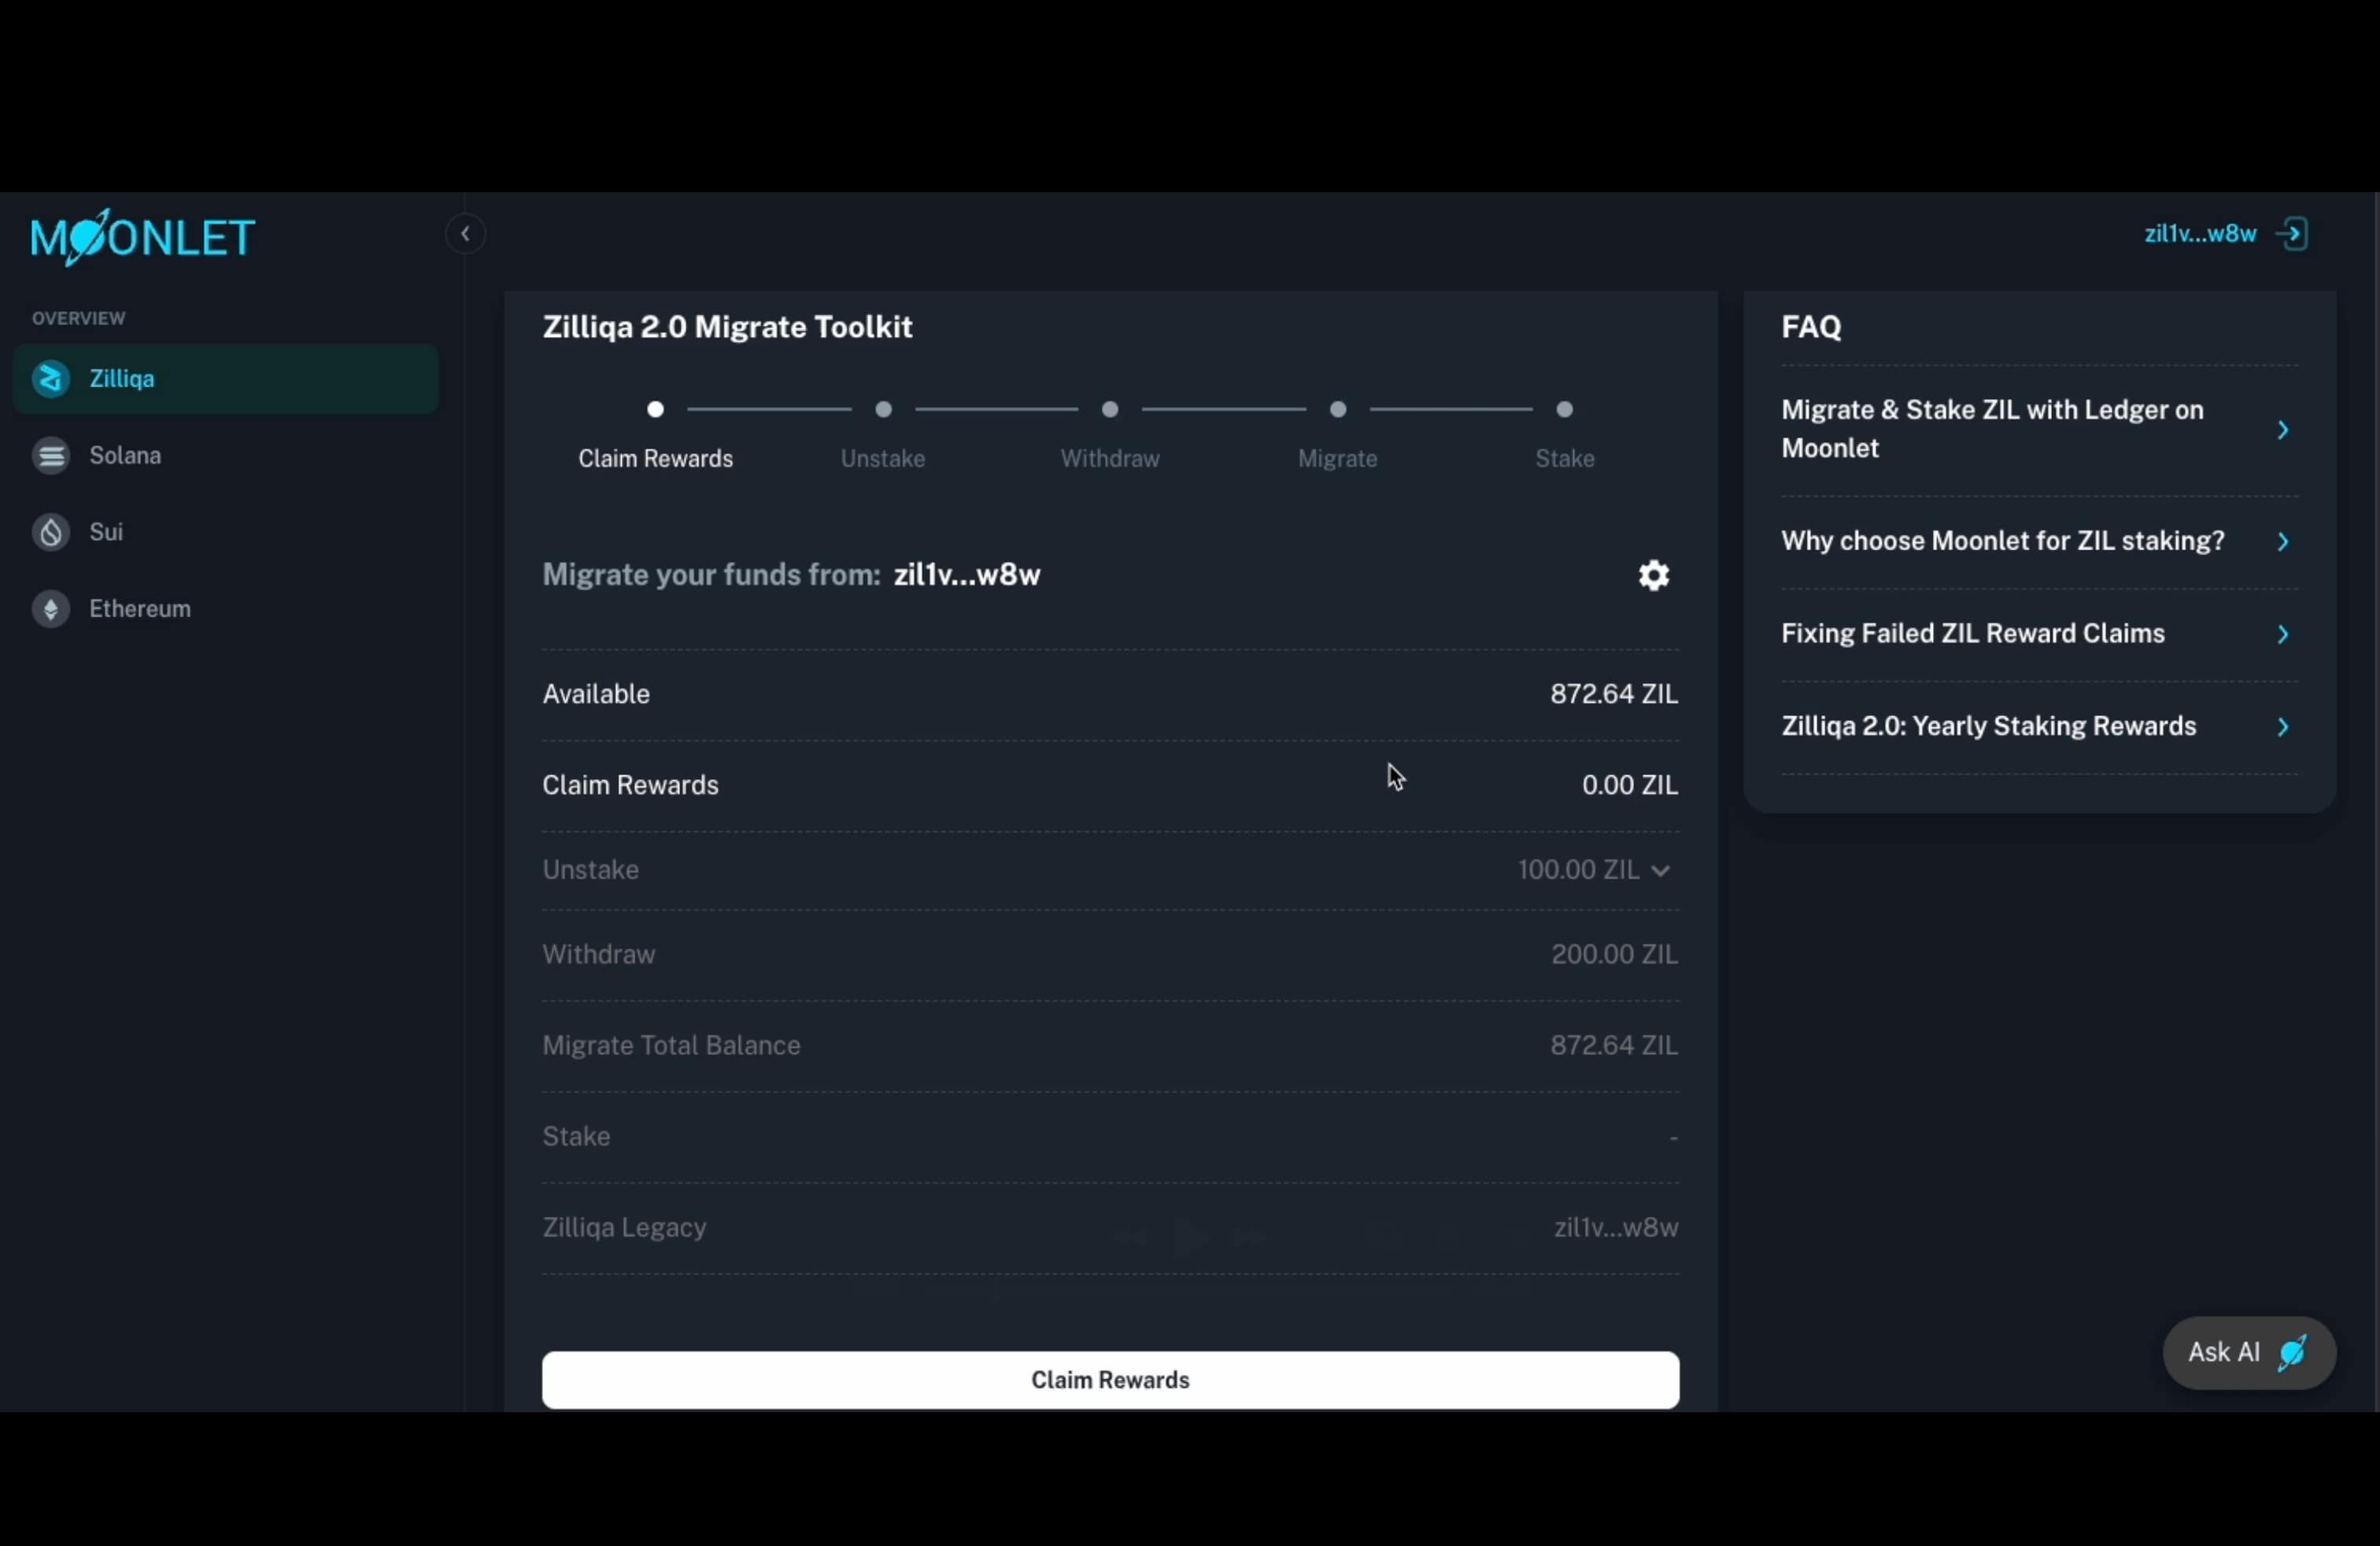
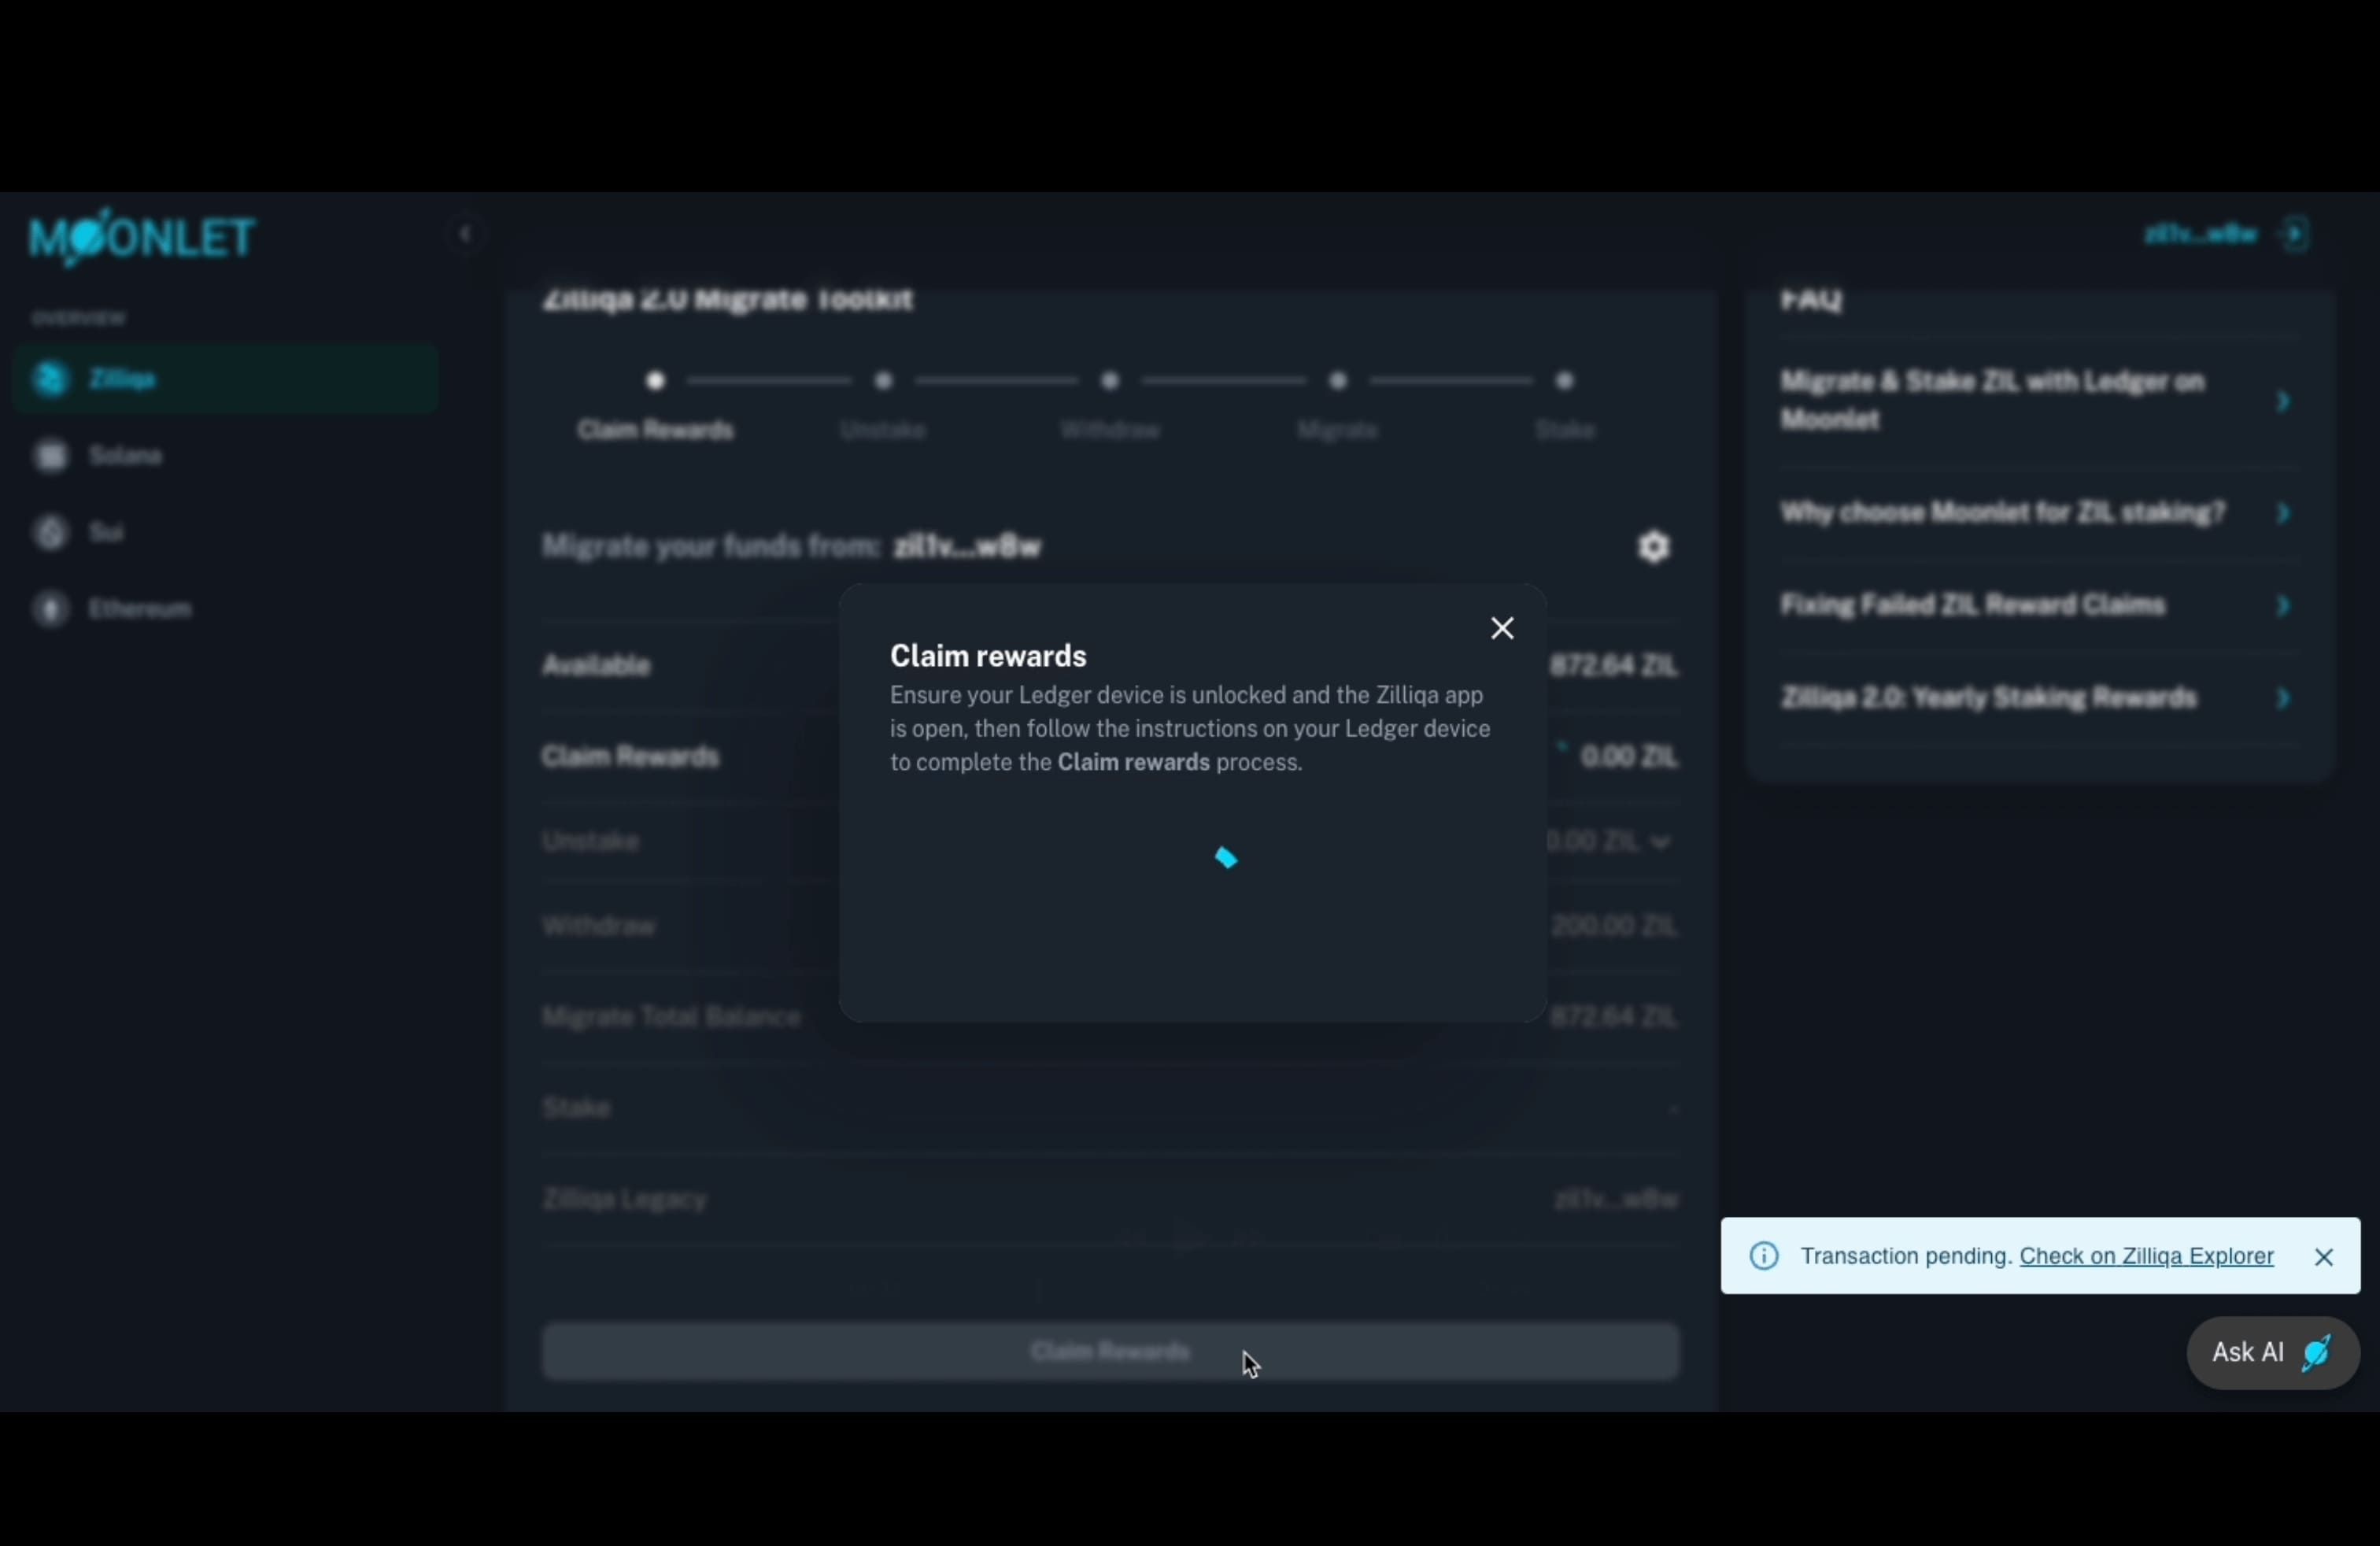
Step 4: Claim Rewards — First Step in the Migration Flow
The migration process begins with claiming any available staking rewards. Click “Claim Rewards” and ensure your Ledger device is unlocked with the Zilliqa (legacy) app open. Follow the on-screen instructions and confirm the transaction directly on your Ledger device to complete this step.
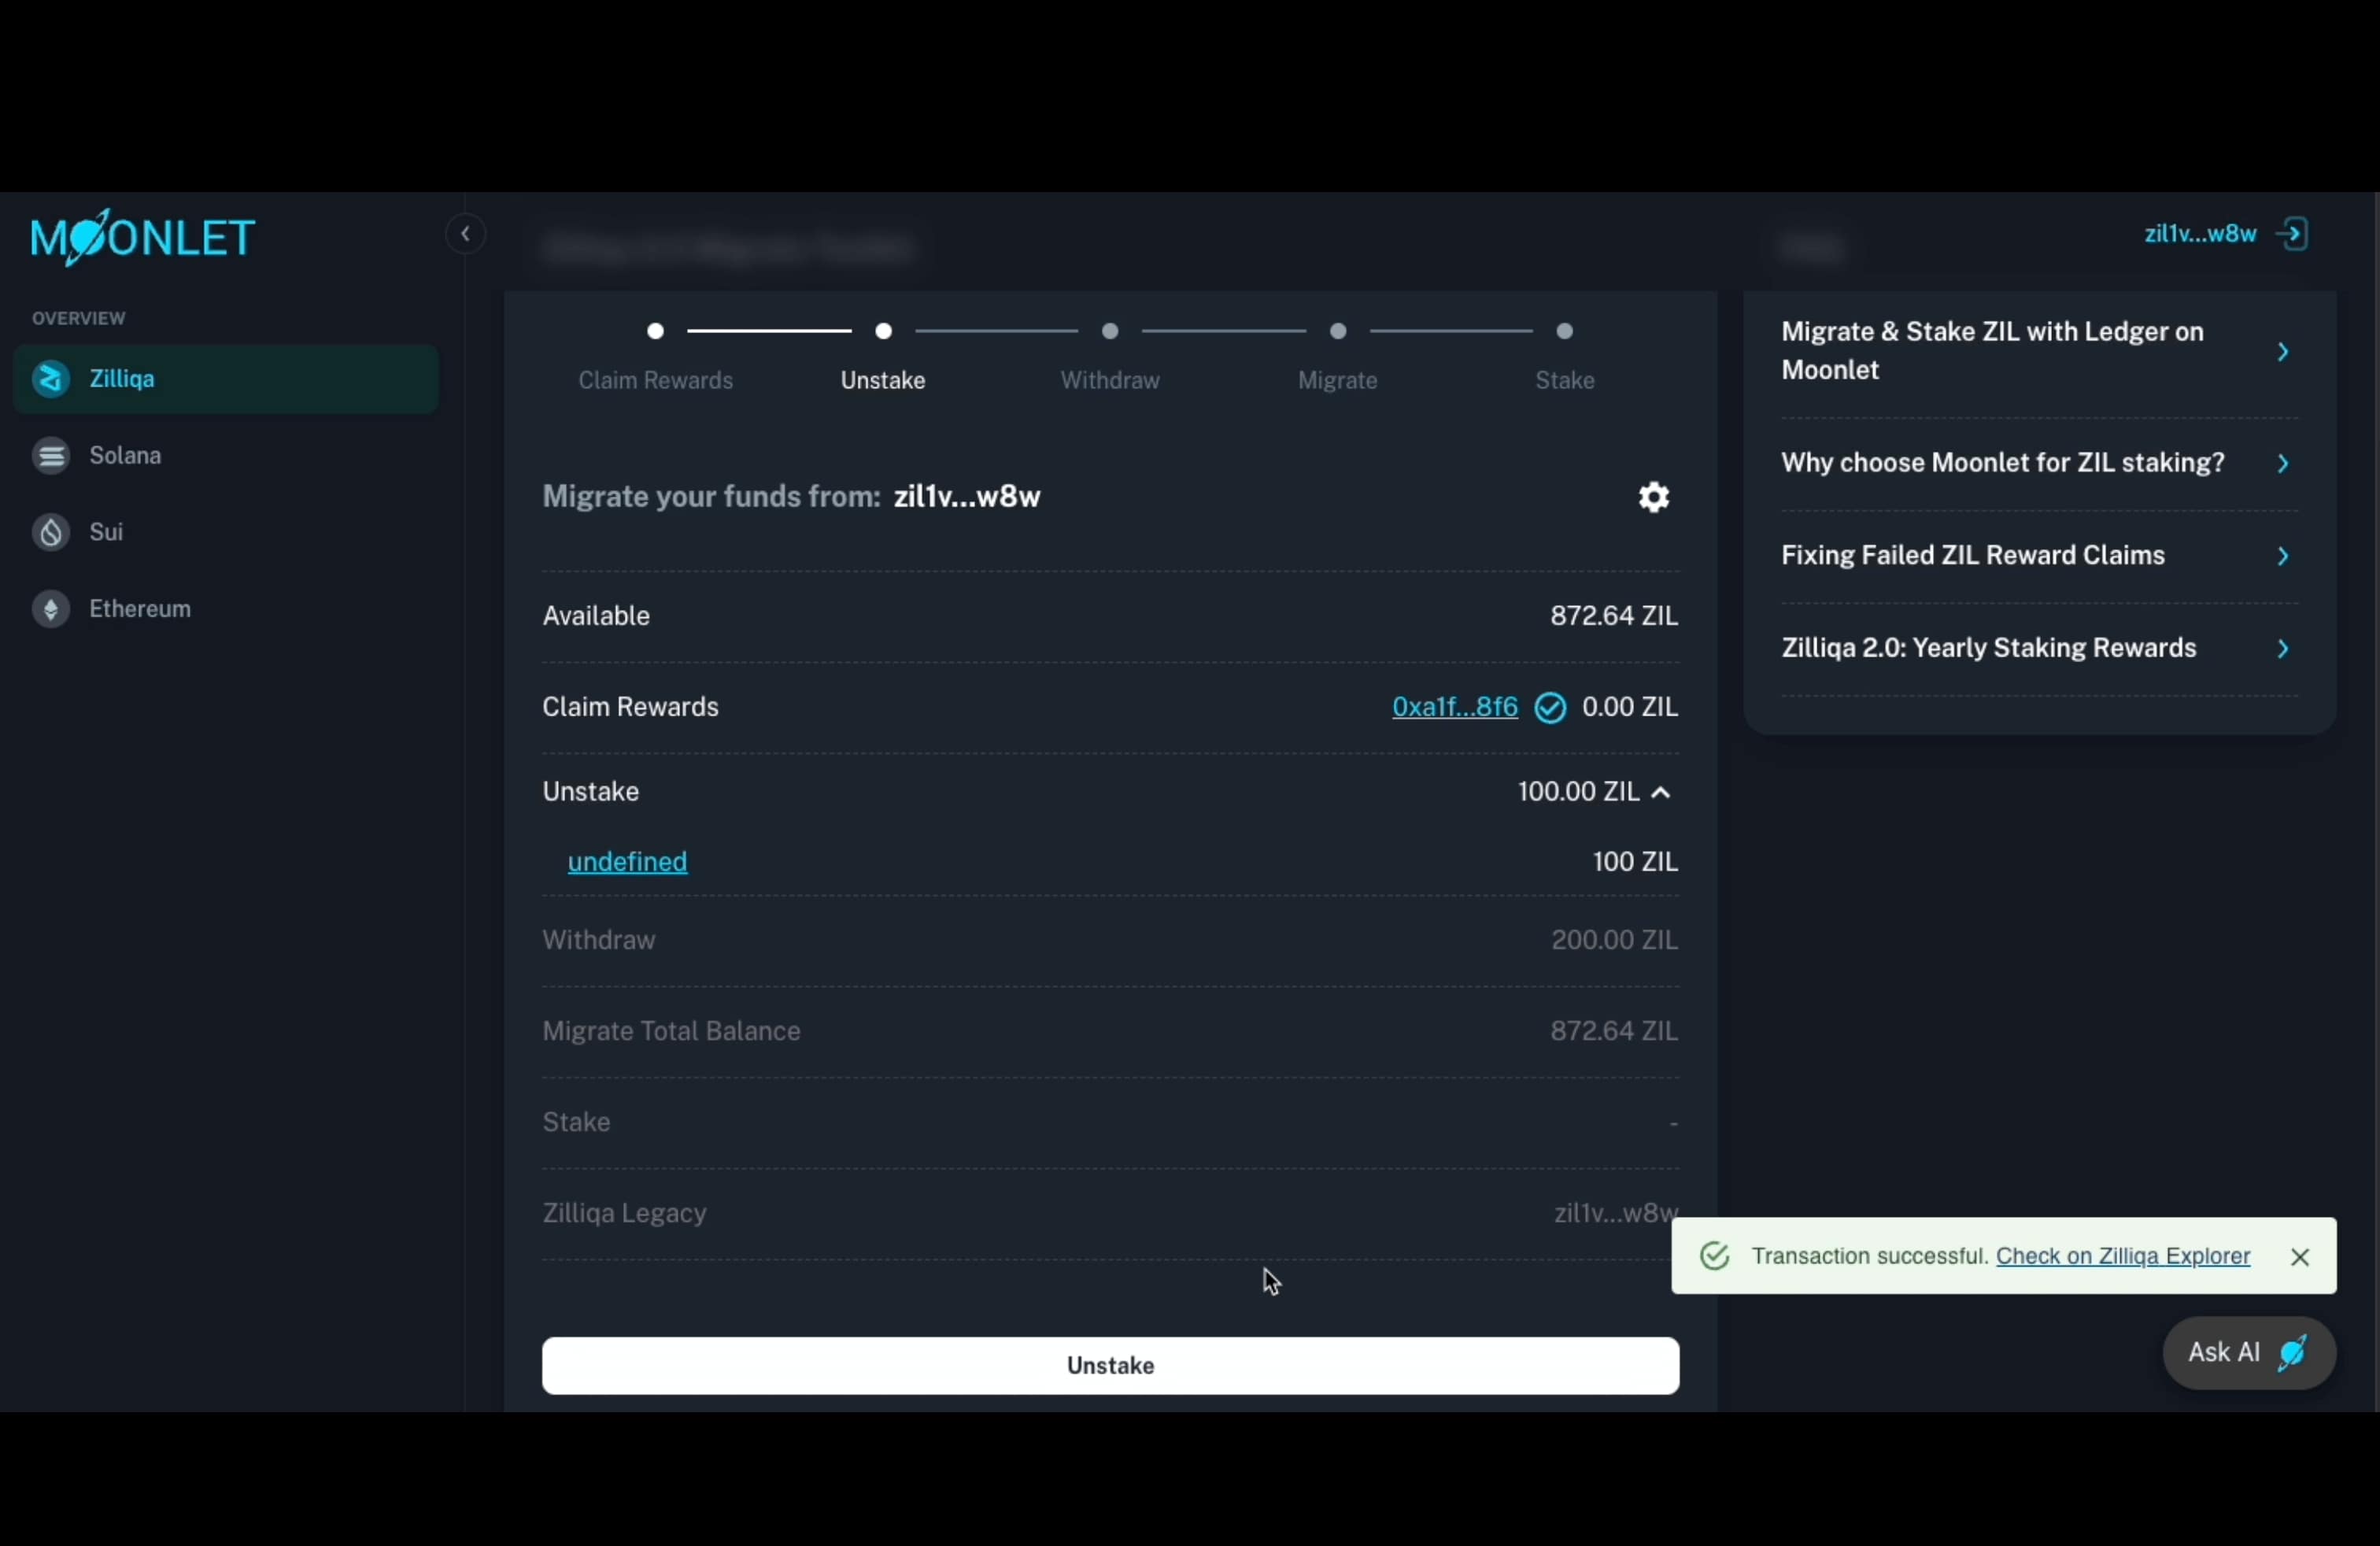
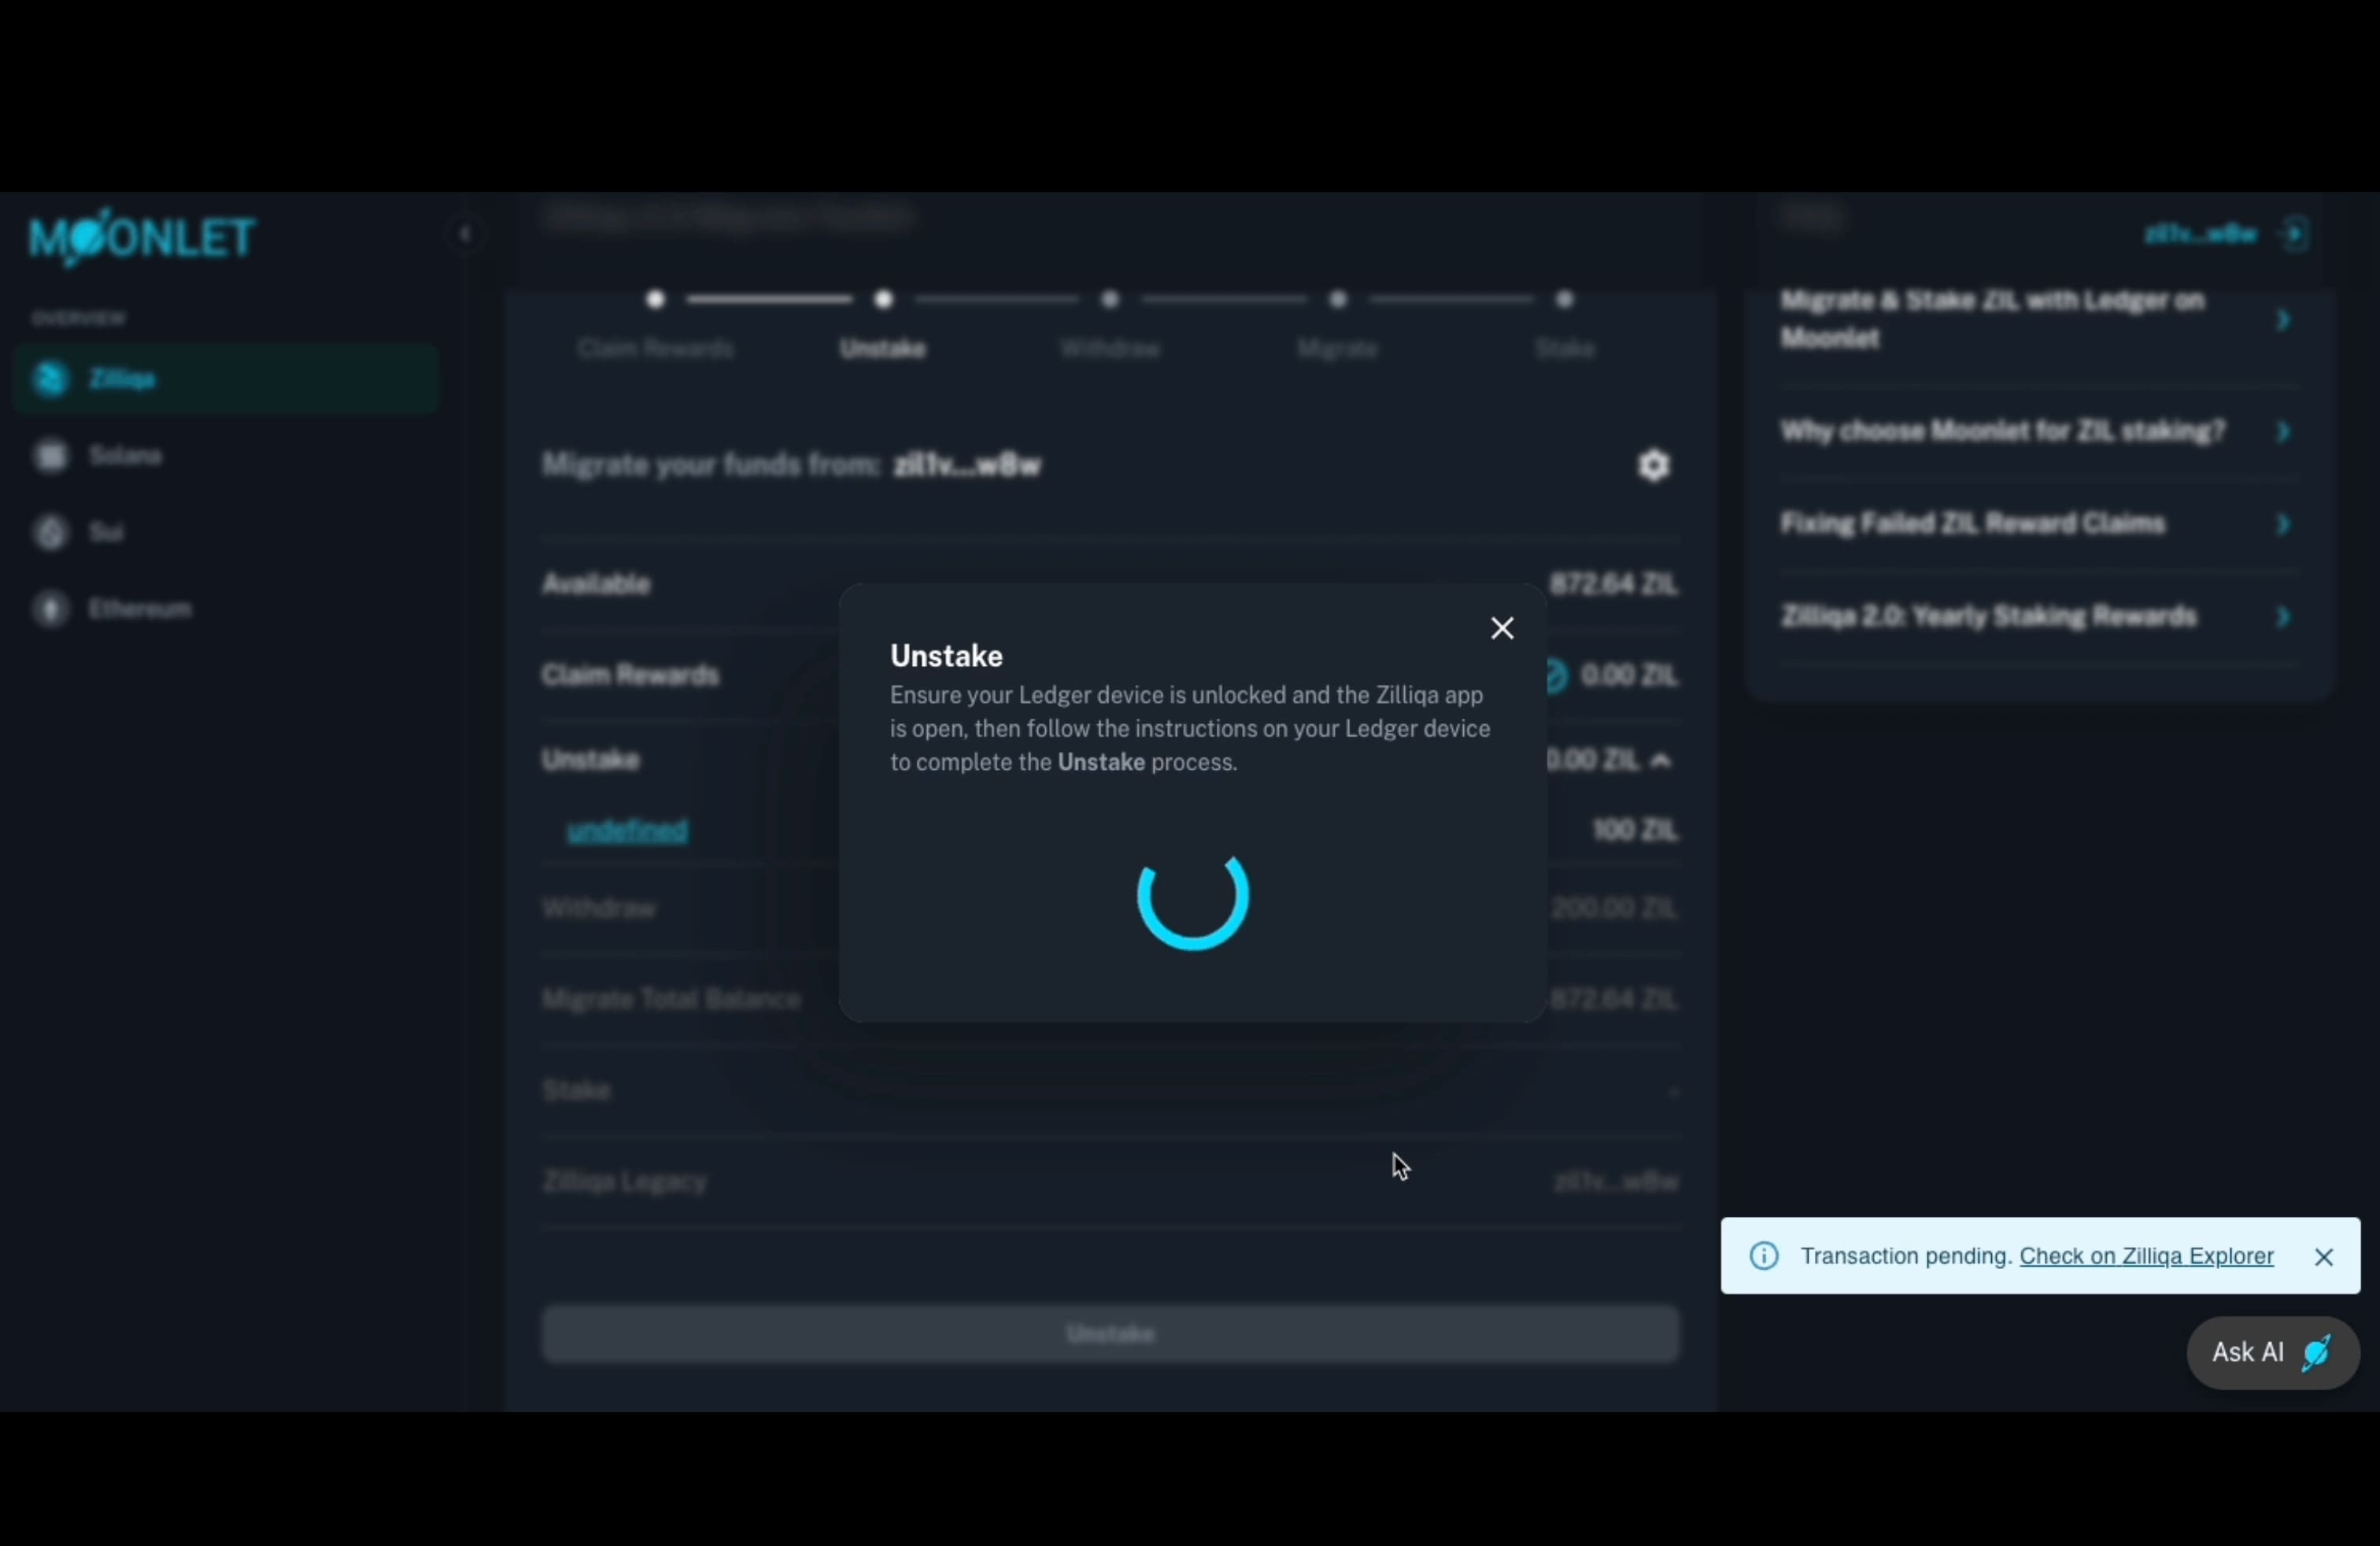
Step 5: Unstake — Second Step in the Migration Flow
In this step, you’ll need to unstake your funds if there are any active delegations. Unstaking on the Zilliqa legacy network is instant, meaning there is no 21-day unbonding period.
If no funds are currently staked, this step will be automatically skipped.
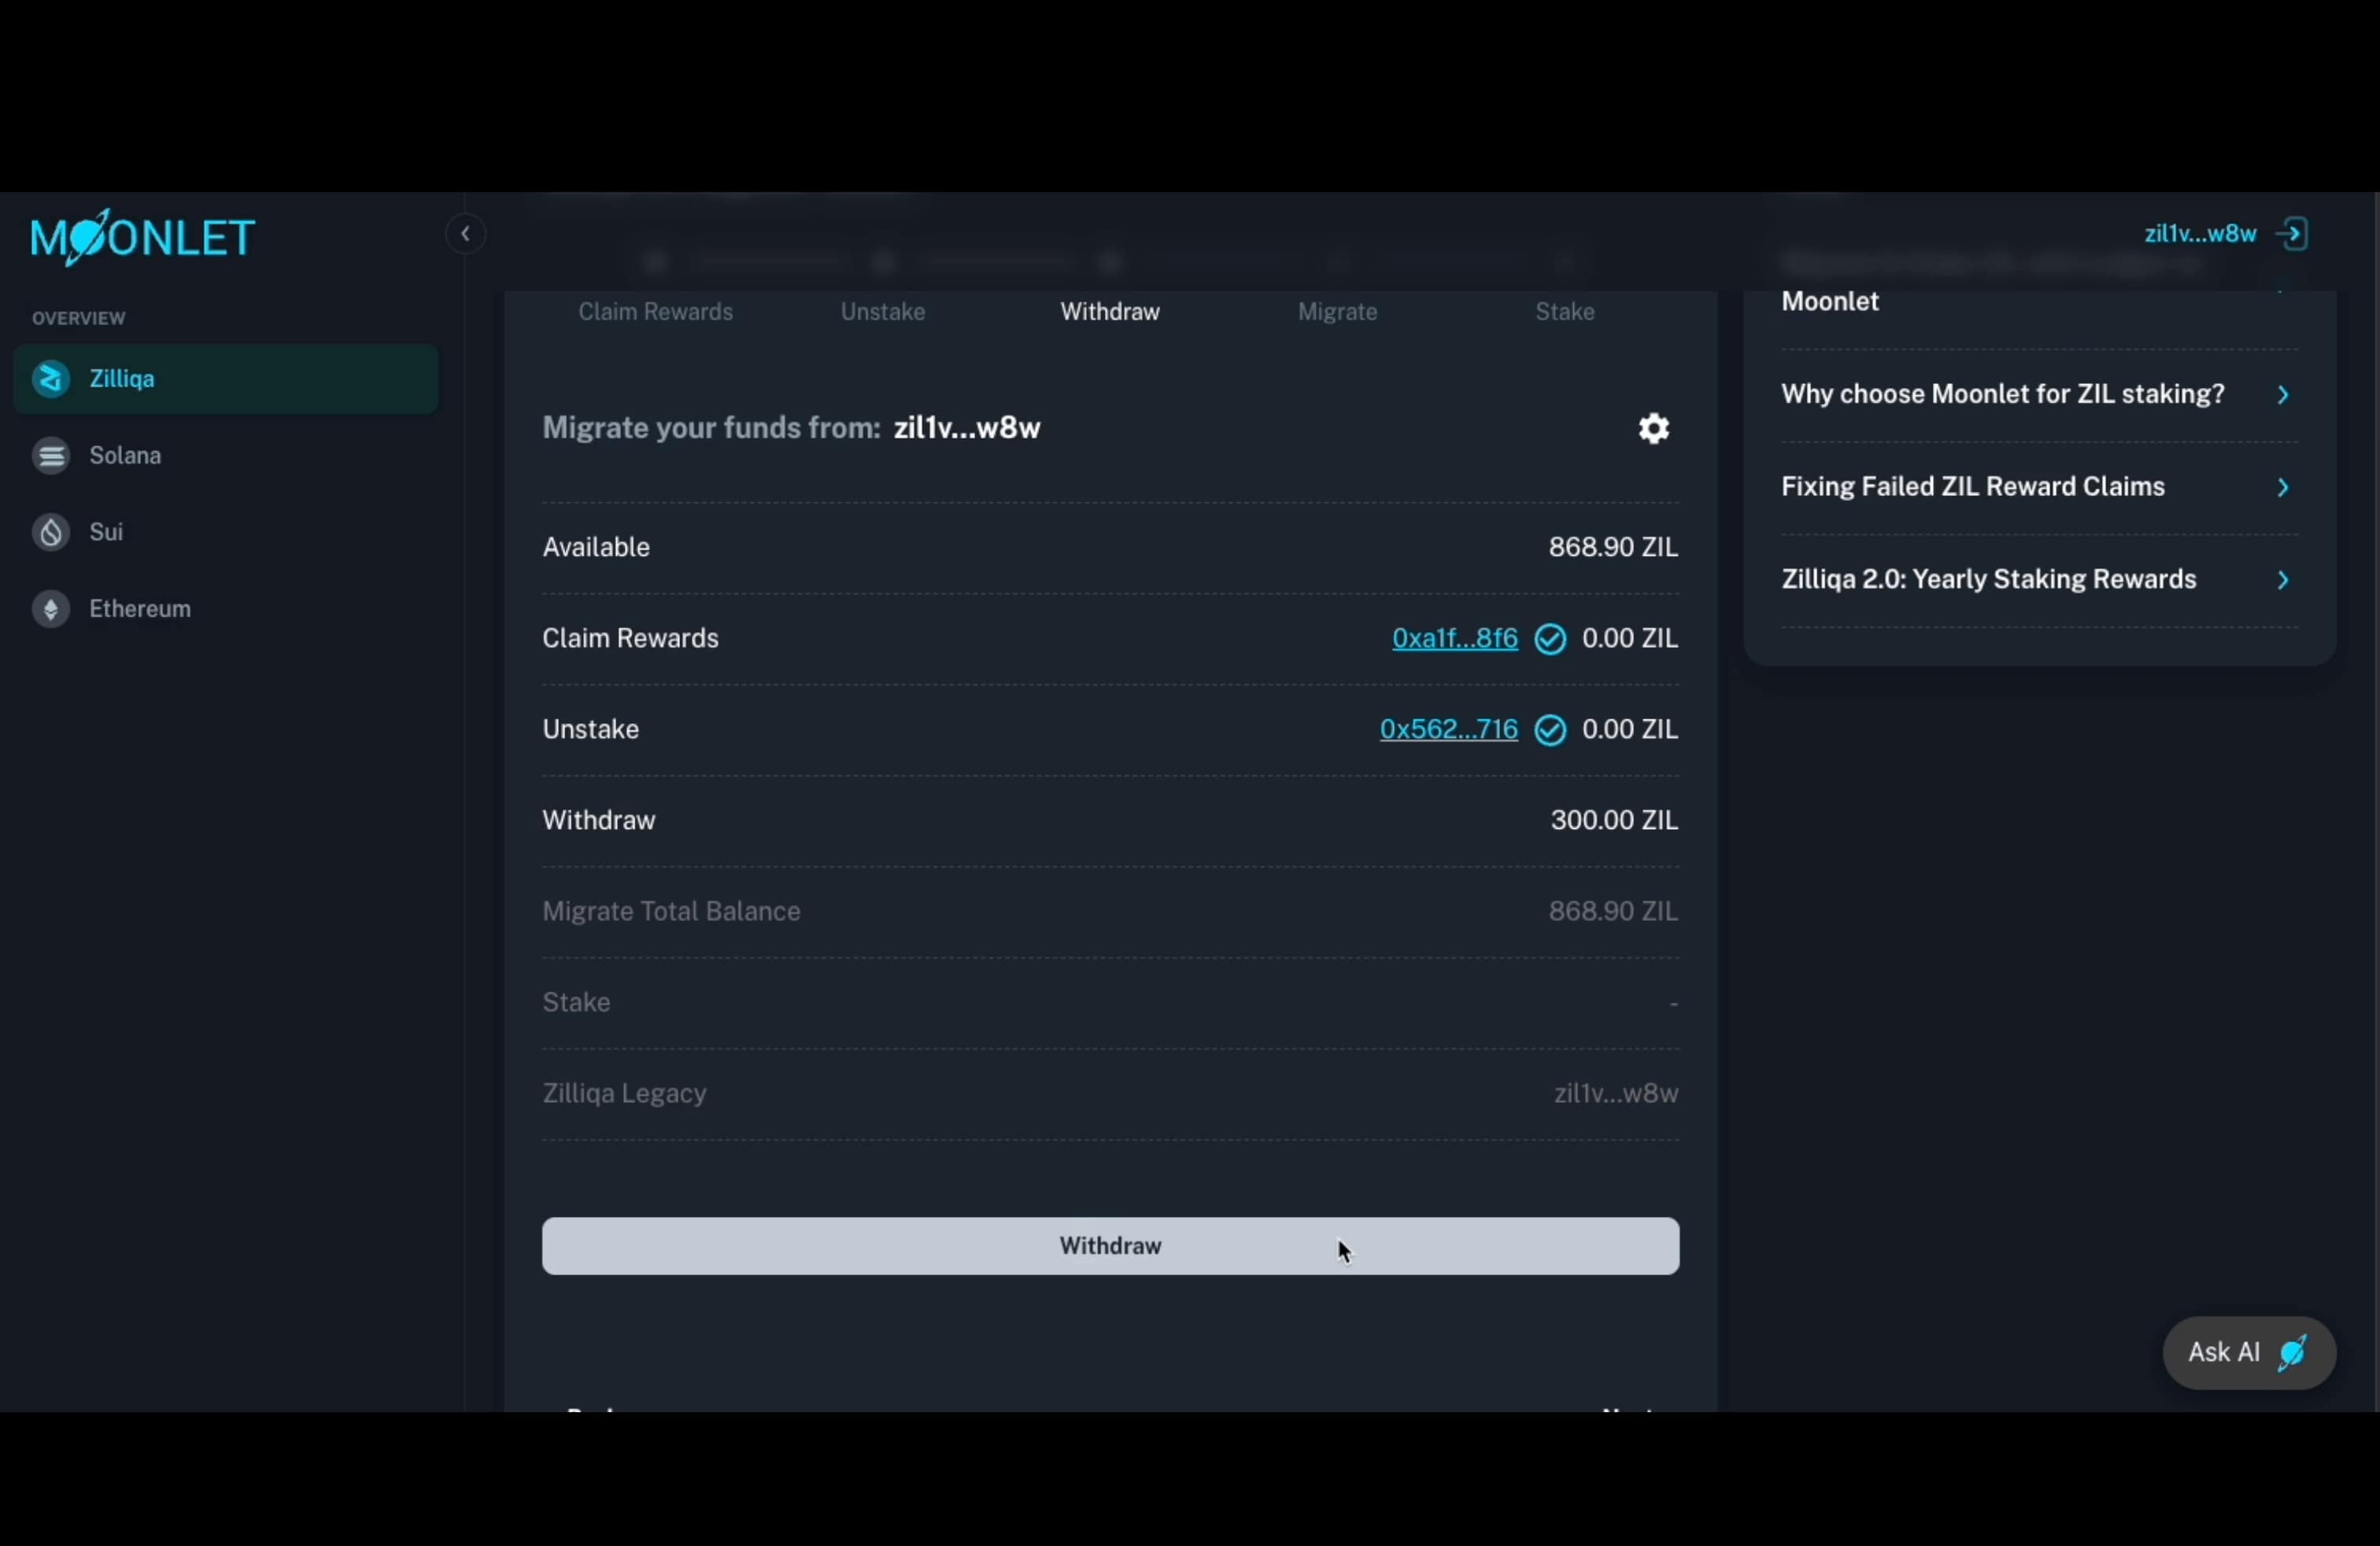
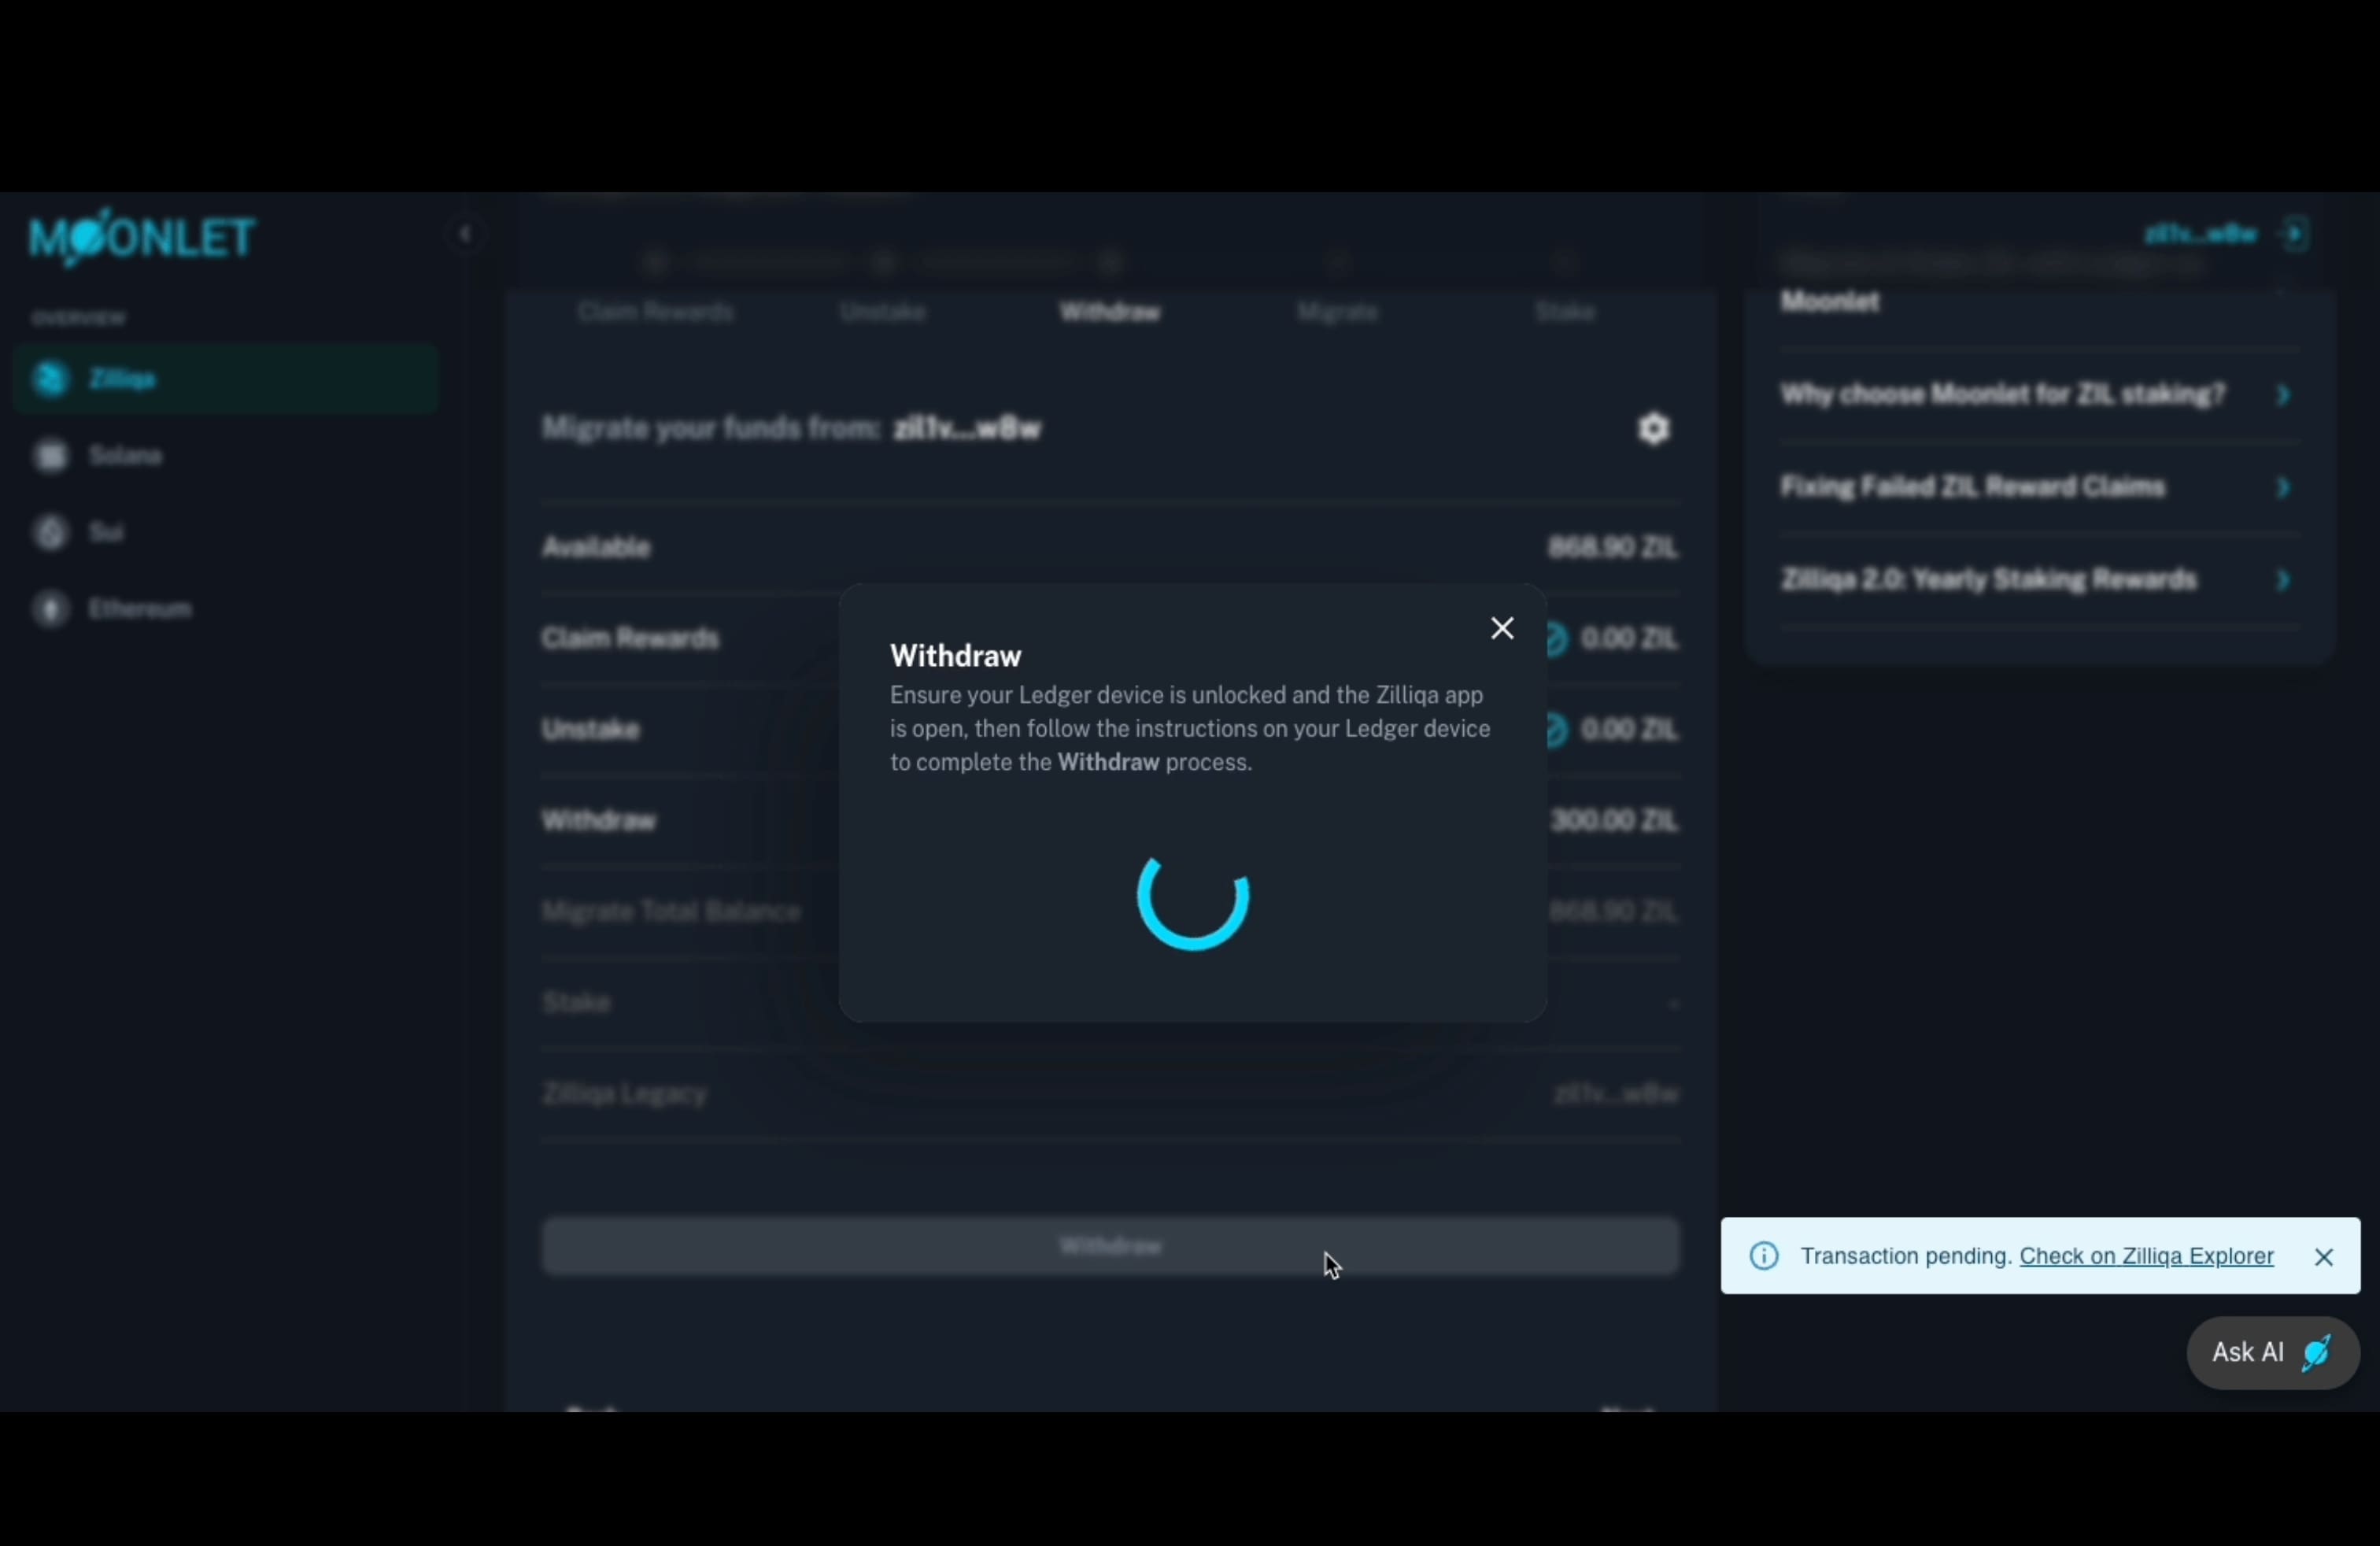
Step 6: Withdraw — Third Step in the Migration Flow
Next, you'll need to withdraw your funds from the staking contract back to your wallet account.
Click “Withdraw”, then follow the on-screen instructions and confirm the transaction on your Ledger device to complete this step.
Step 7: Migrate — Fourth Step in the Migration Flow
🔄 Switching Between Ledger Apps During Migration
Please note that this is the most involved step in the migration process, as it requires switching between two apps on your Ledger device: the Zilliqa Legacy app and the Ethereum app.
While you can also use MetaMask as your Zilliqa 2.0 wallet, we strongly recommend using a hardware wallet like Ledger for enhanced security and reliability.
Here’s what you need to do:
-
Connect your Zilliqa 2.0 wallet using the Ethereum app on your Ledger — this allows you to specify the destination address where your tokens will be migrated.
-
Switch to the Zilliqa Legacy app on your Ledger — this enables you to complete the migration transaction from your legacy account.
This step involves interacting with both apps on your Ledger. Make sure you're comfortable switching between them when prompted by the Moonlet dashboard.
📬 Legacy vs. Zilliqa 2.0 Address Format
A key difference between Zilliqa Legacy and Zilliqa 2.0 is the wallet address format:
-
Zilliqa Legacy uses:
zil1v…w8w -
Zilliqa 2.0 (EVM-compatible) uses:
0x0B2…A4F
Since Zilliqa 2.0 is built on Ethereum Virtual Machine standards, your new wallet address will follow the Ethereum-style format.
✅ Be sure to double-check your destination address after connecting your wallet to ensure you're interacting with the correct Zilliqa 2.0 account.
⚠️ Important Note About Ledger and Secrets
Because you're using the same Ledger device, both your Zilliqa Legacy and Zilliqa 2.0 addresses are generated from the same underlying secret phrase (mnemonic).
-
Your Zilliqa Legacy address is accessed via the Zilliqa app on Ledger.
-
Your Zilliqa 2.0 address is accessed via the Ethereum app, due to the EVM-compatible design.
Even though the addresses look different, they are securely derived from the same seed, and you maintain full control of both through the same Ledger device.
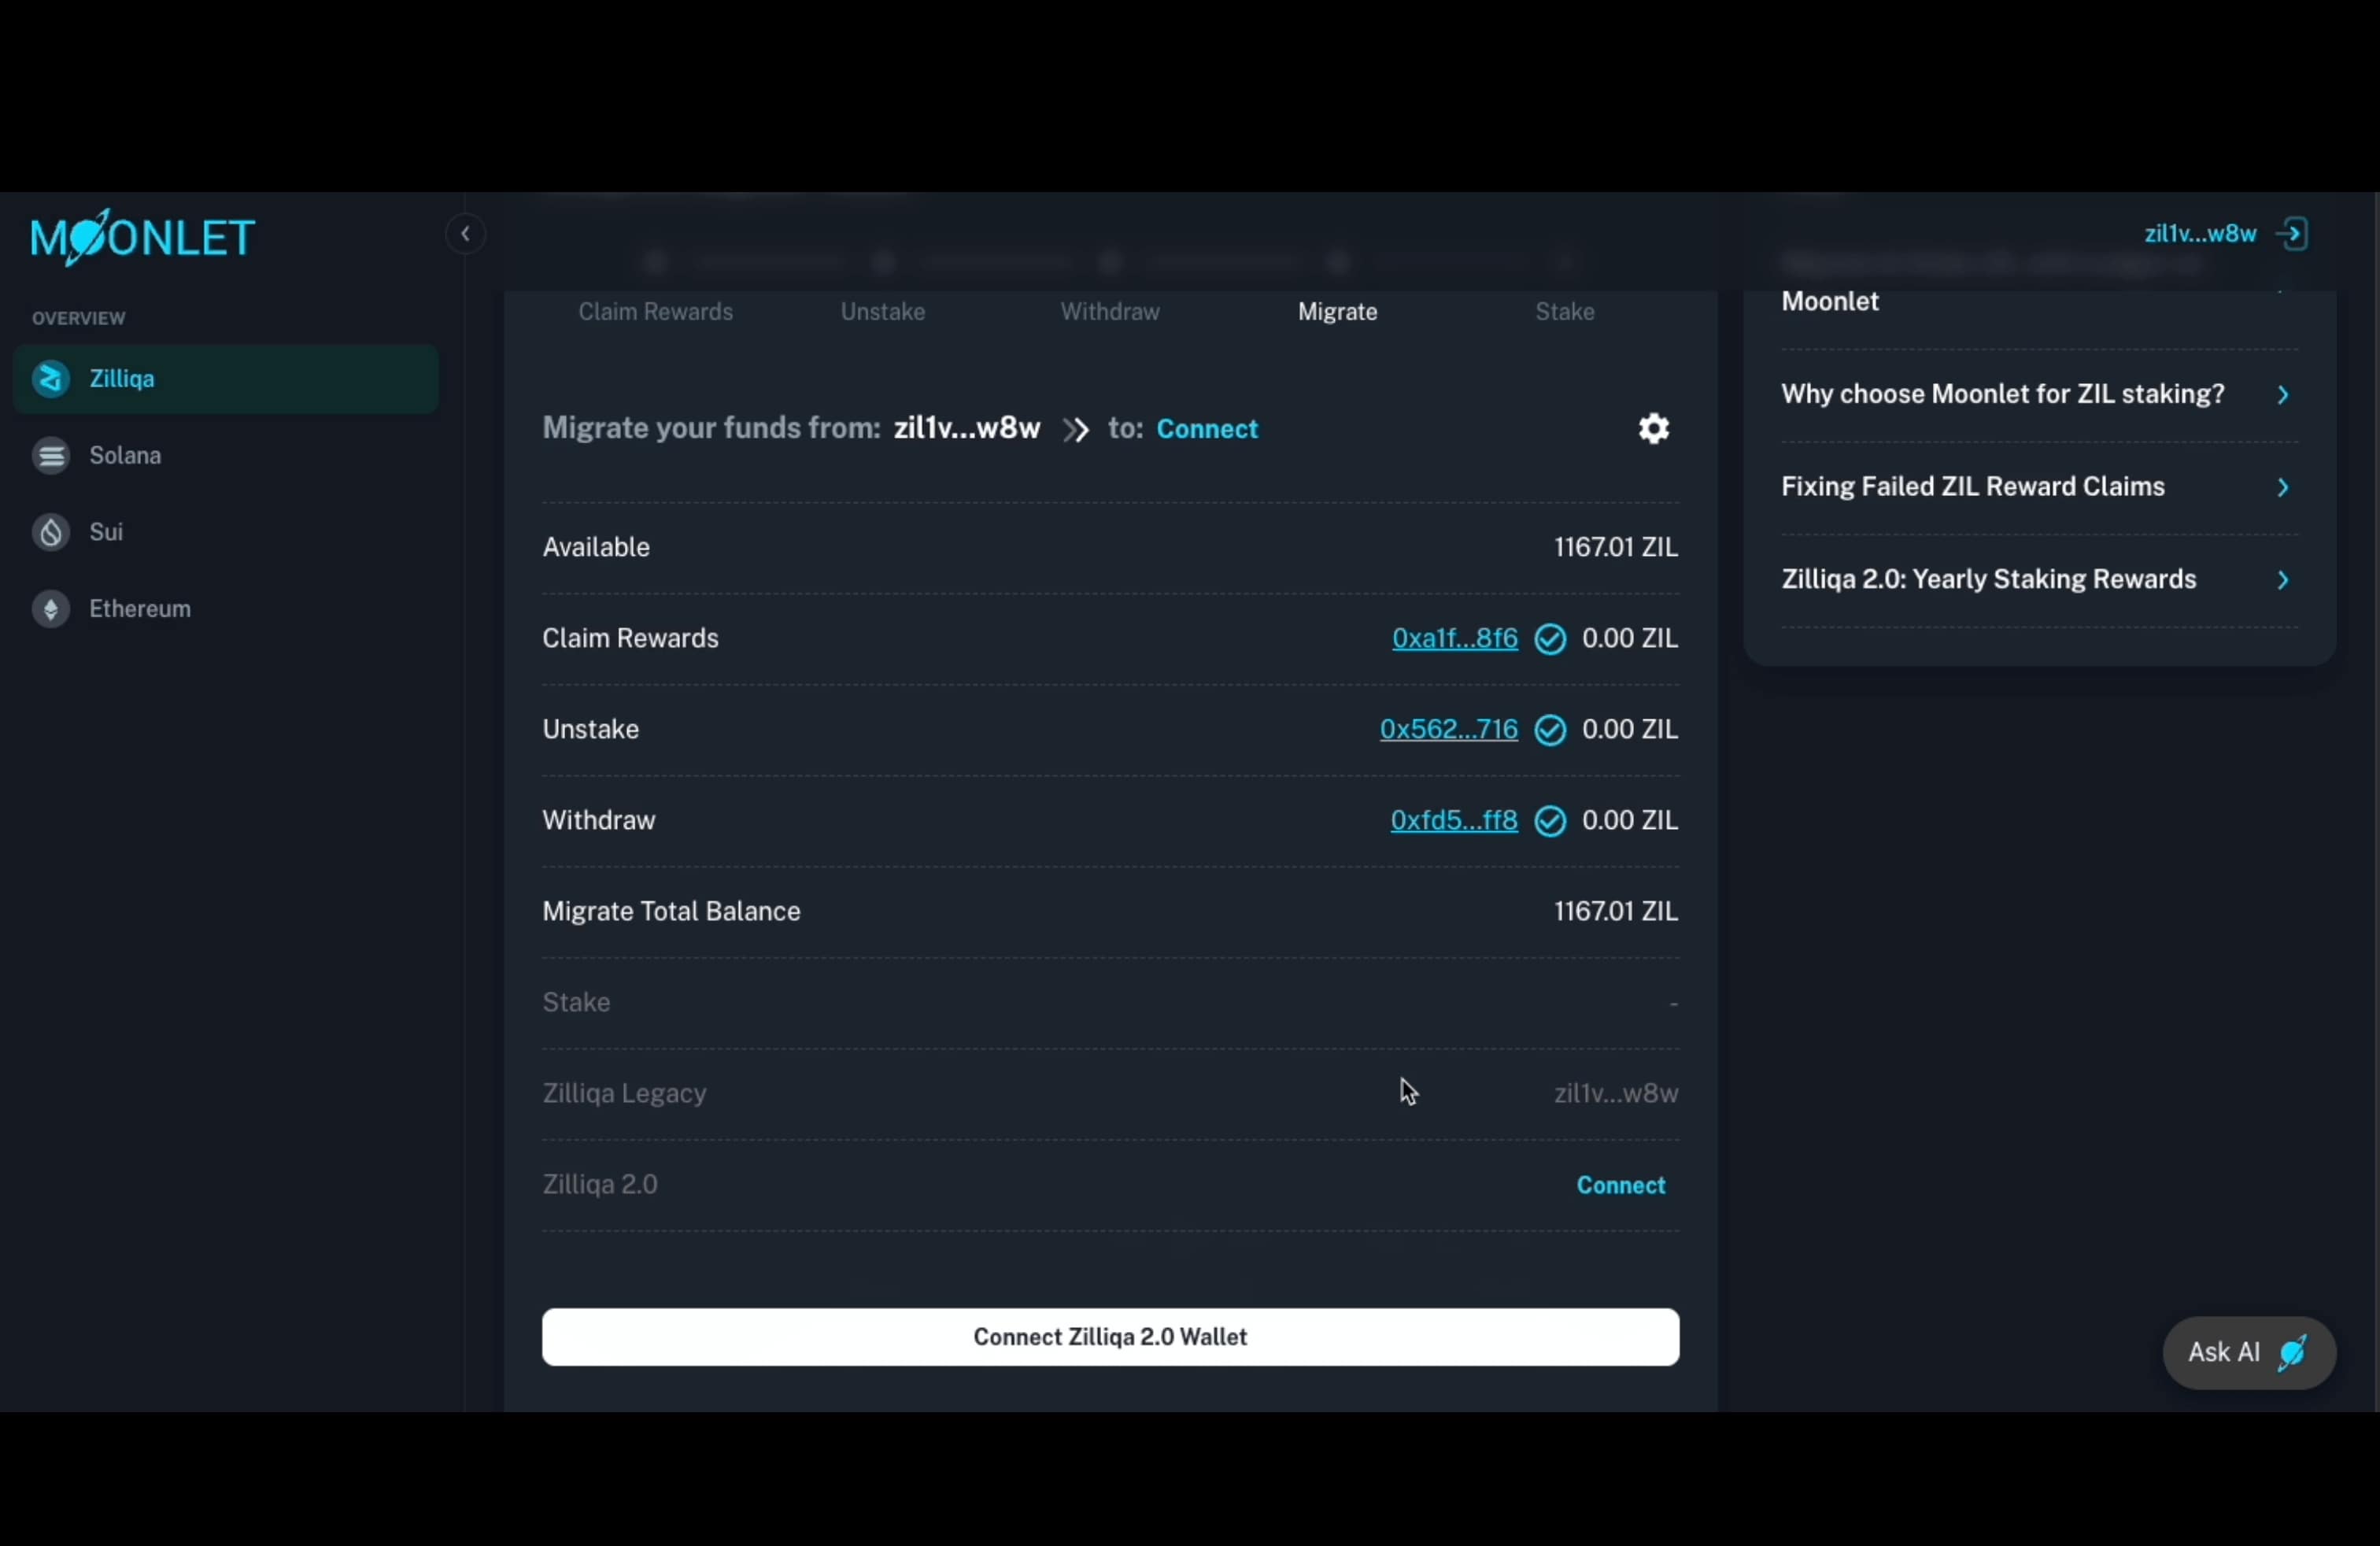
7.1 Connect Zilliqa 2.0 Wallet to get the destination address
Now it's time to initiate the migration of your tokens from the Zilliqa Legacy network to Zilliqa 2.0.
To proceed, click “Connect Zilliqa 2.0 Wallet”. This step allows you to specify the destination address for the migration—essentially telling the system where to send your funds.
Think of it as a "from → to" process:
You're migrating assets from your Zilliqa Legacy account to your Zilliqa 2.0 wallet, and this step is where you’ll retrieve your new destination address on the Zilliqa 2.0 network.
Once you click “Connect Zilliqa 2.0 Wallet”, a pop-up window will appear prompting you to select your preferred wallet. You can choose between Ledger (hardware wallet) or MetaMask (software wallet).
For maximum security, we strongly recommend continuing with Ledger, as it remains one of the most trusted and secure self-custodial hardware wallets available today.
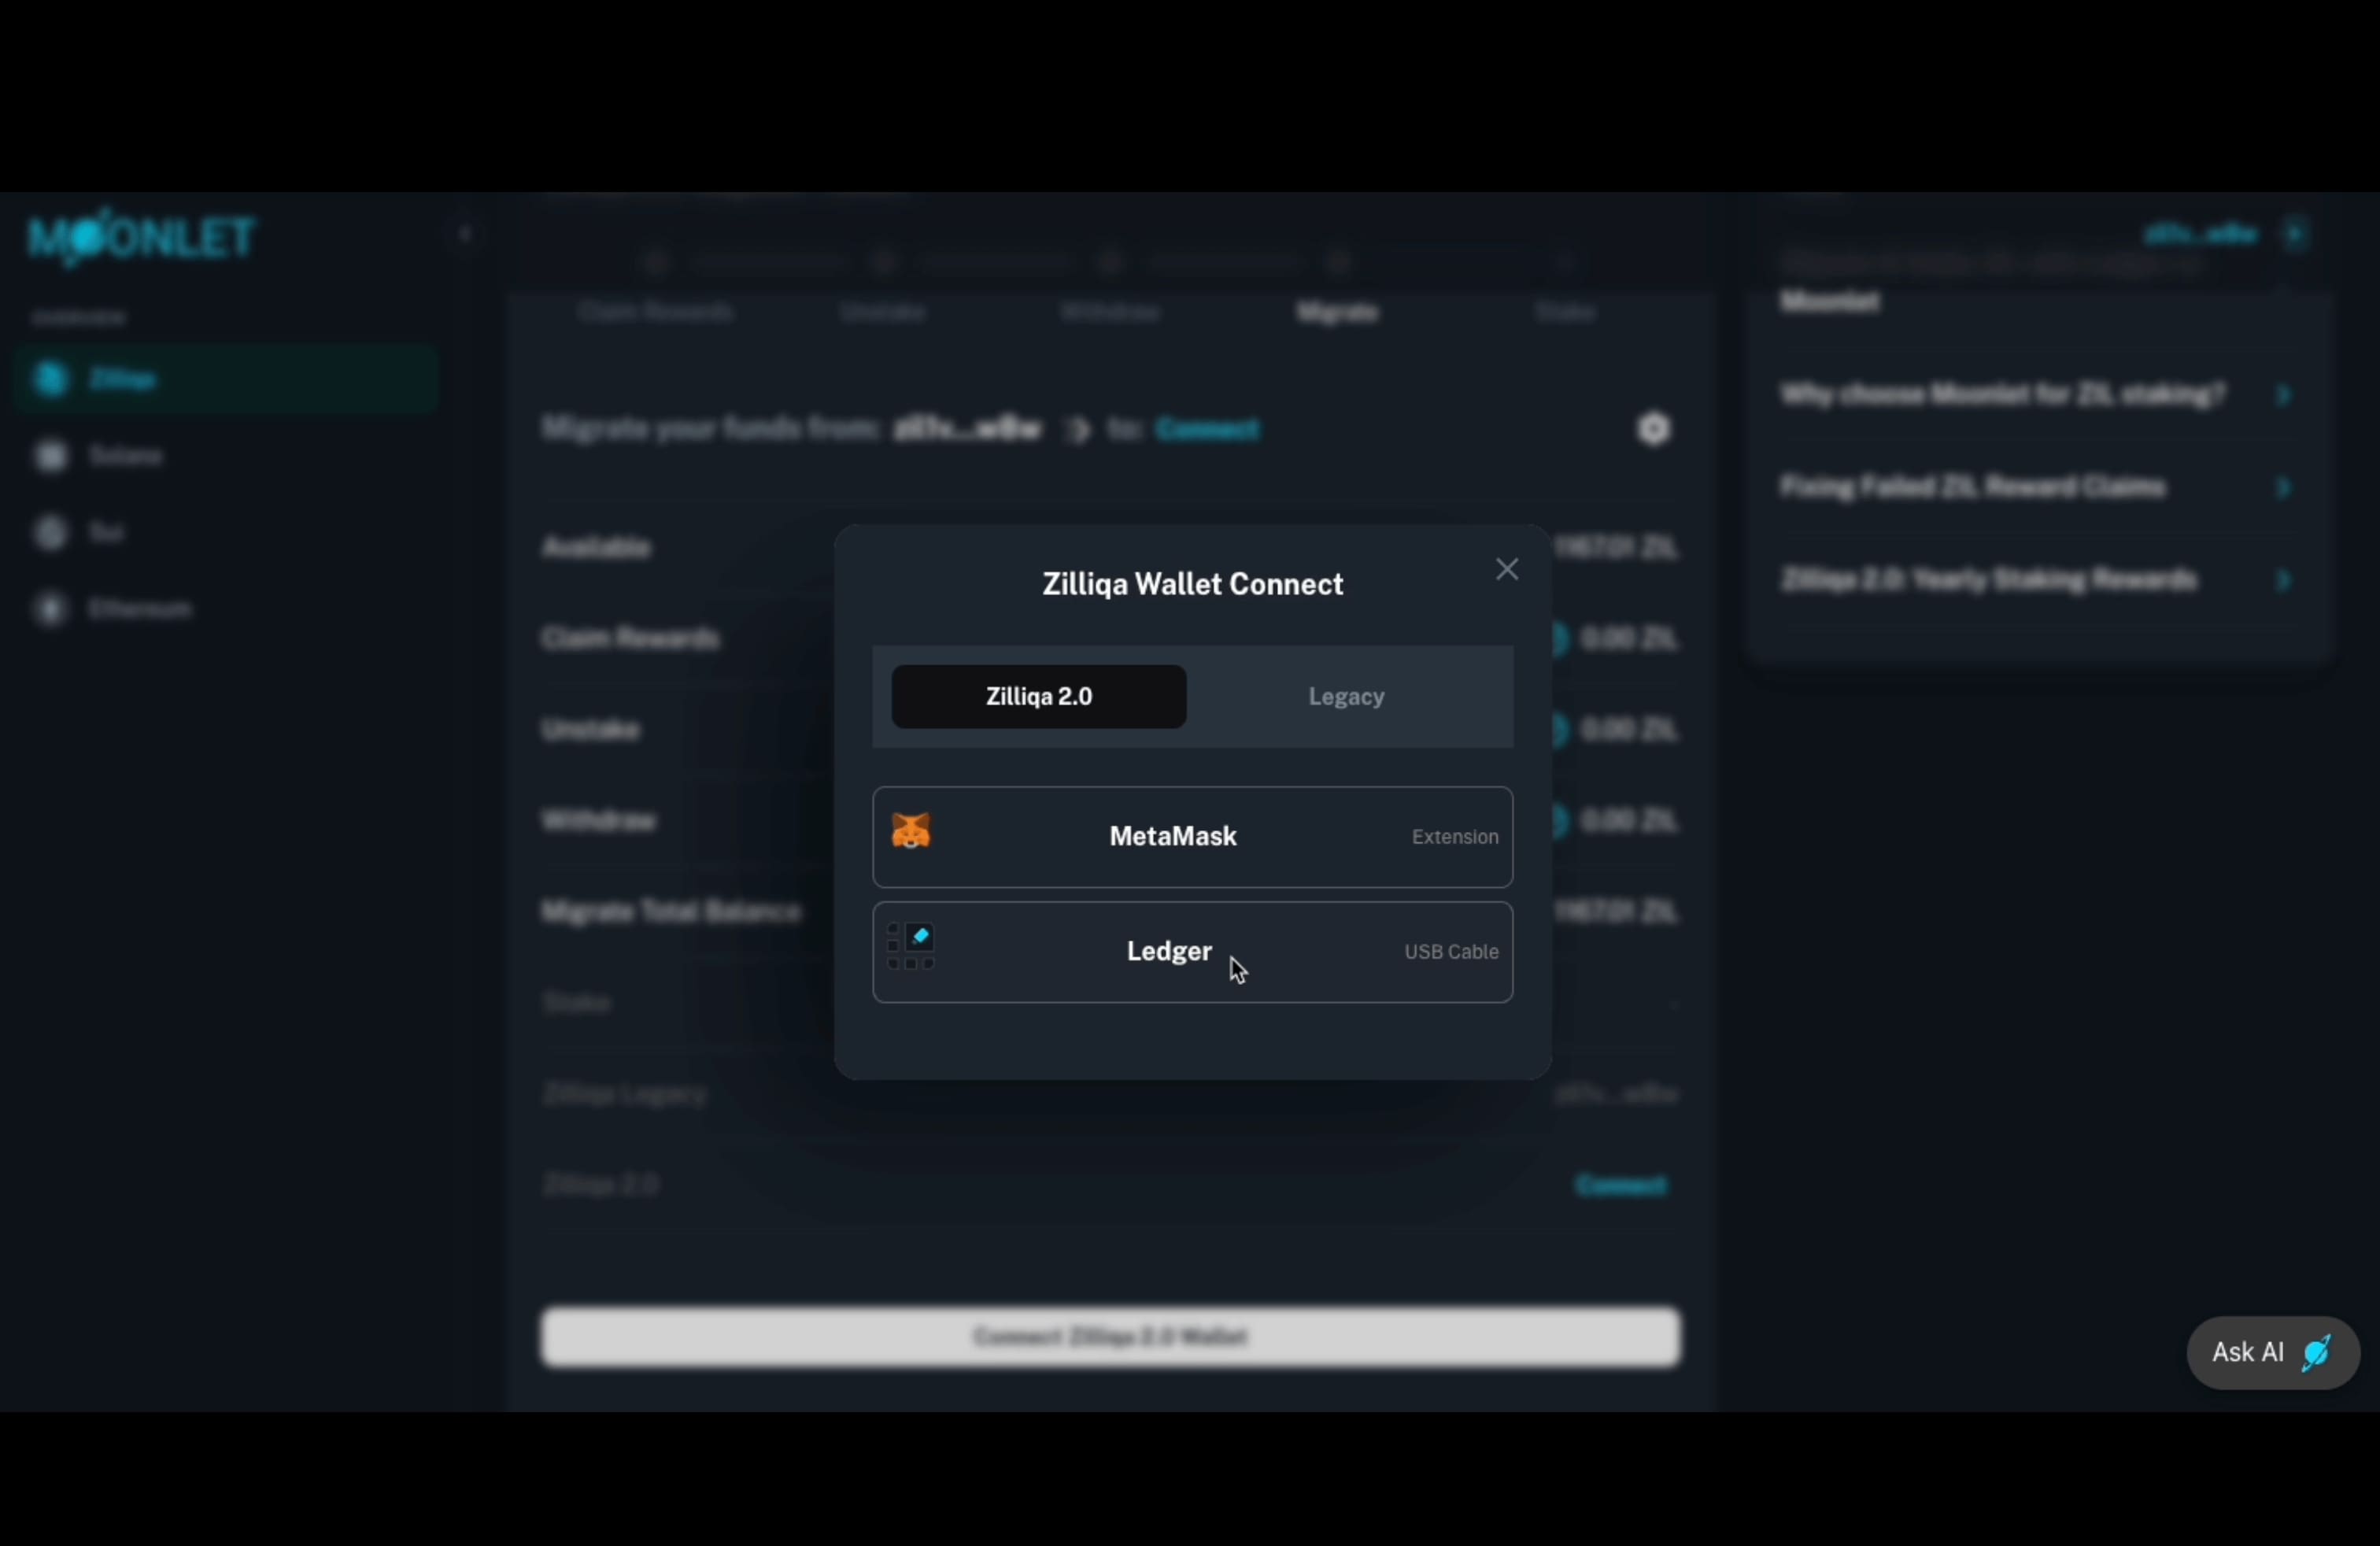
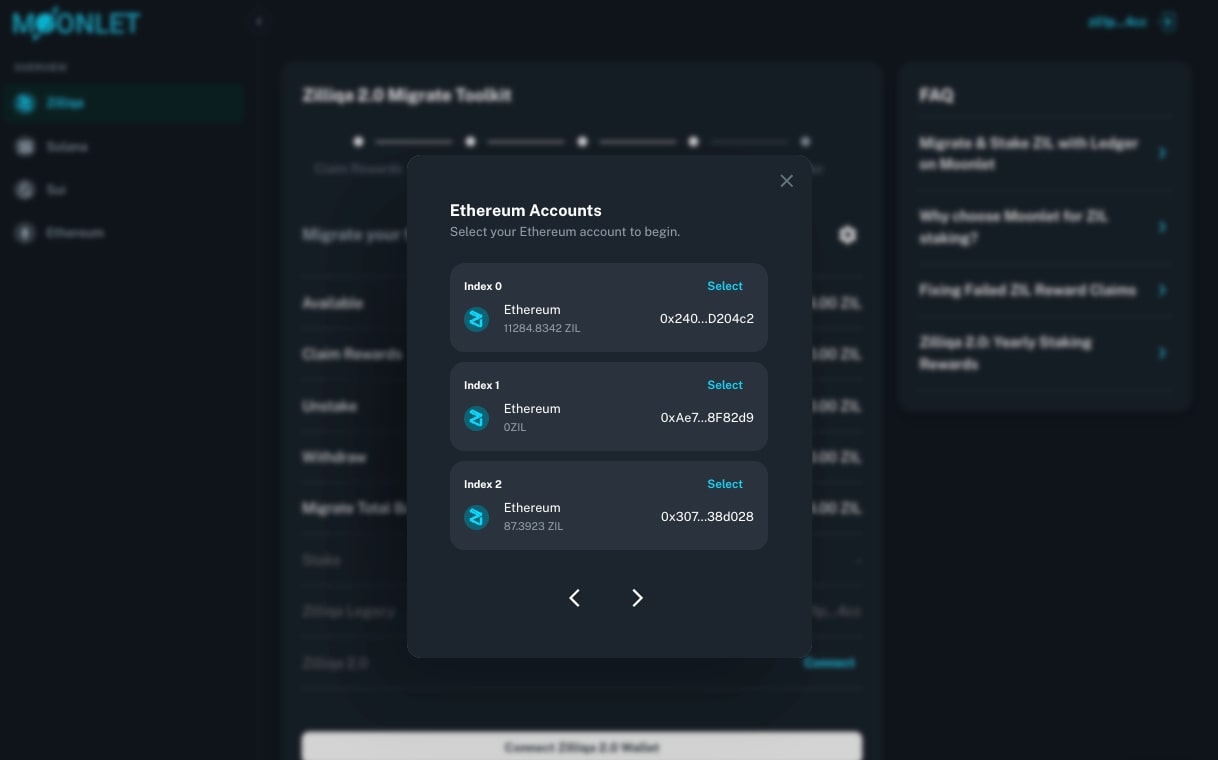
Once you click on Ledger, your device will prompt you to connect, and the system will retrieve your Zilliqa 2.0 destination address. You’ll then be asked to select your account from the pop-up window to proceed.
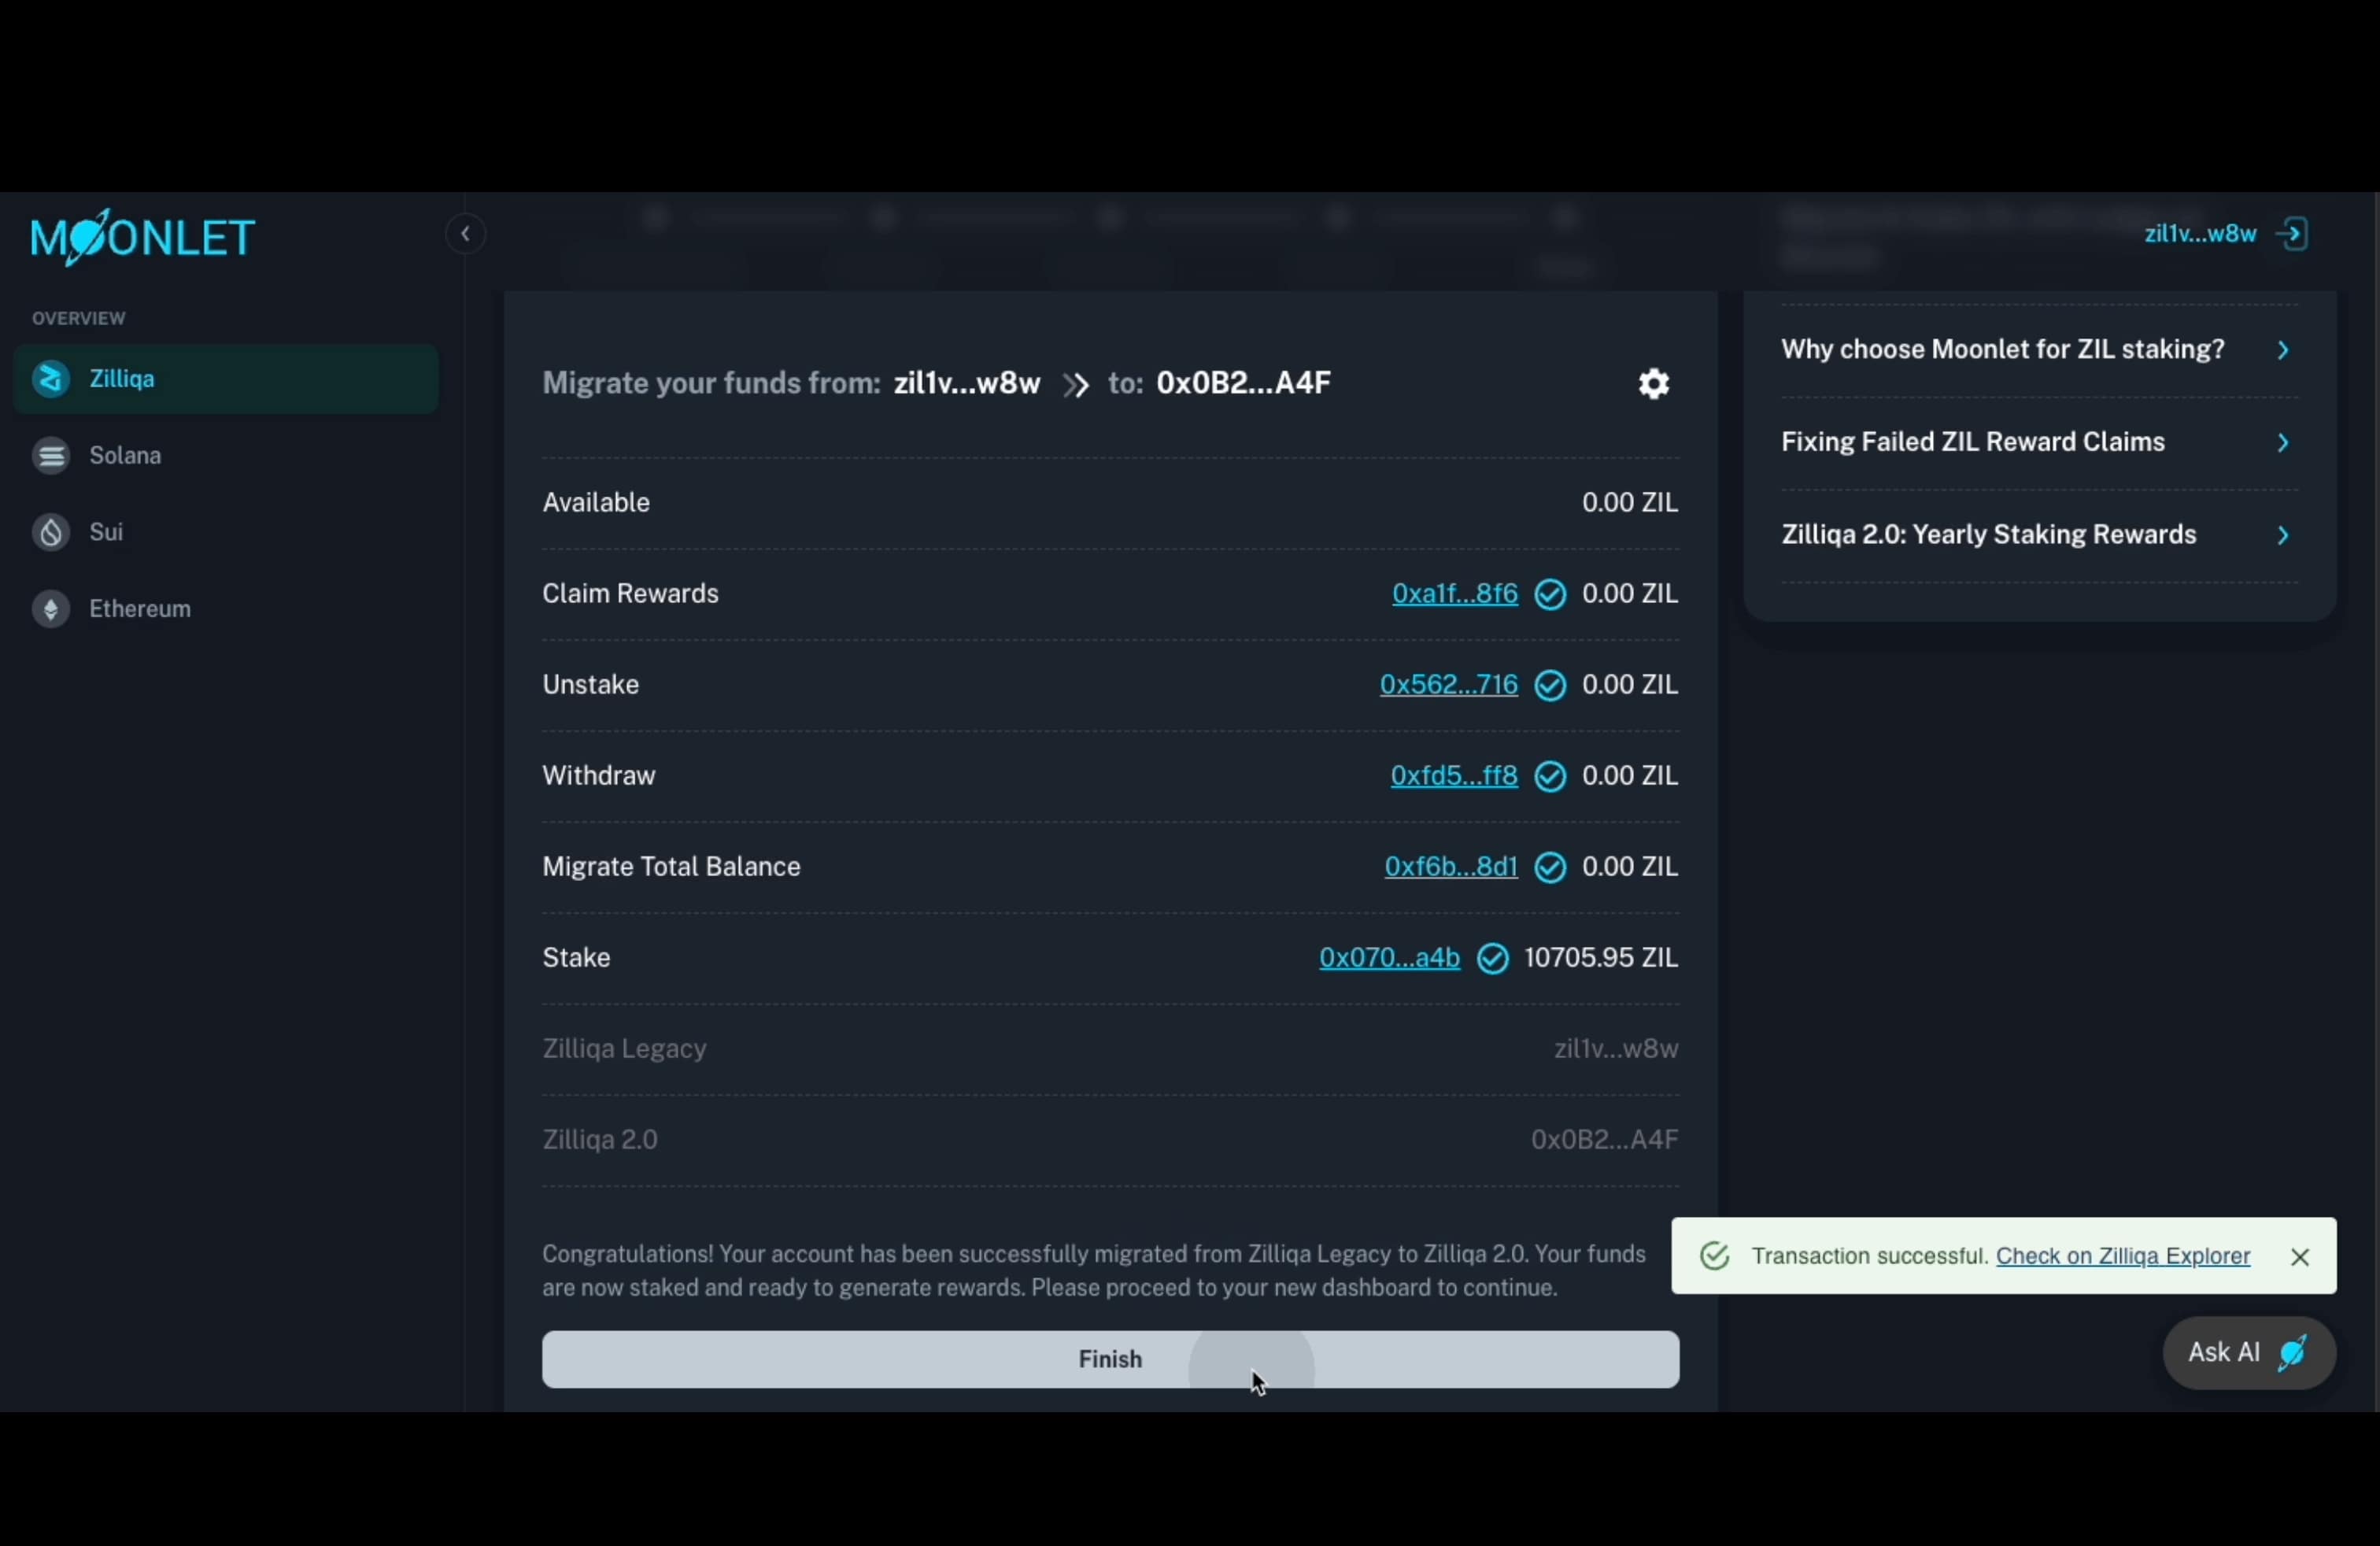
At this point, you’ll see a message at the top of the table:
“Migrate your funds from: zil1v…w8w → to: 0x0B2…A4F”
This confirms that the system now recognizes both the source and destination addresses, and is ready to proceed with the migration.
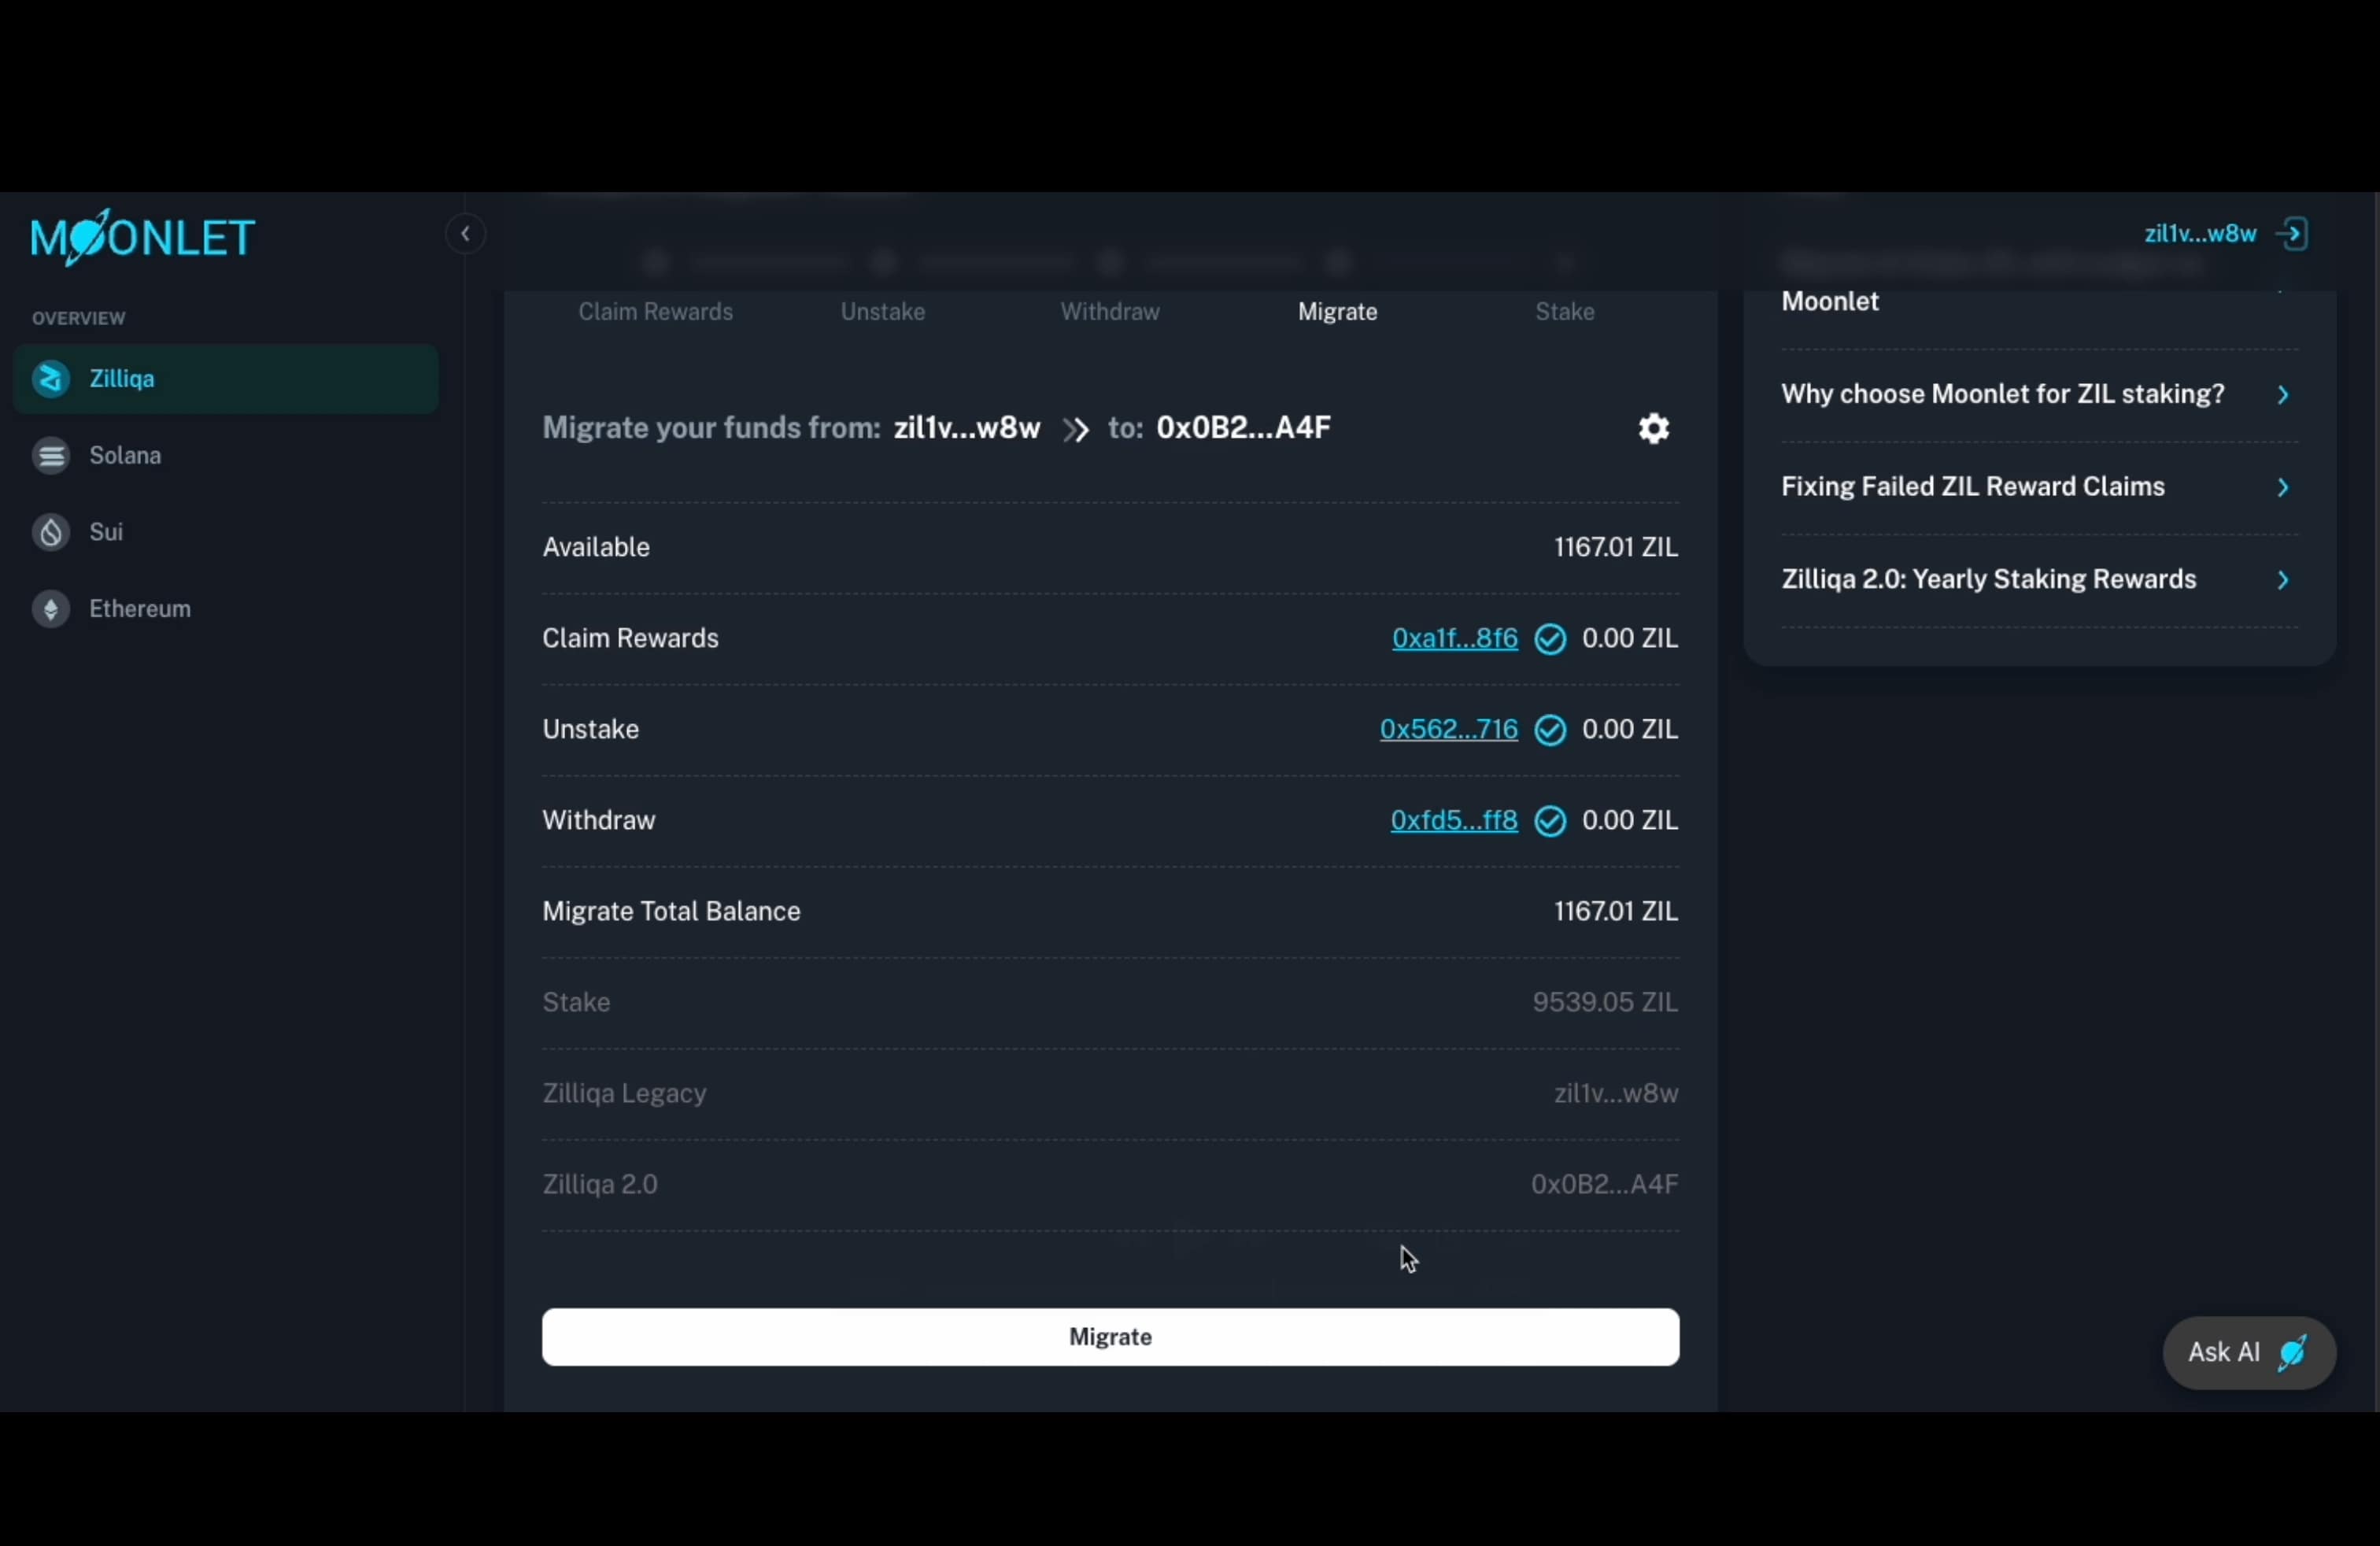
7.2 Finalize Migration via Zilliqa Legacy App on Ledger
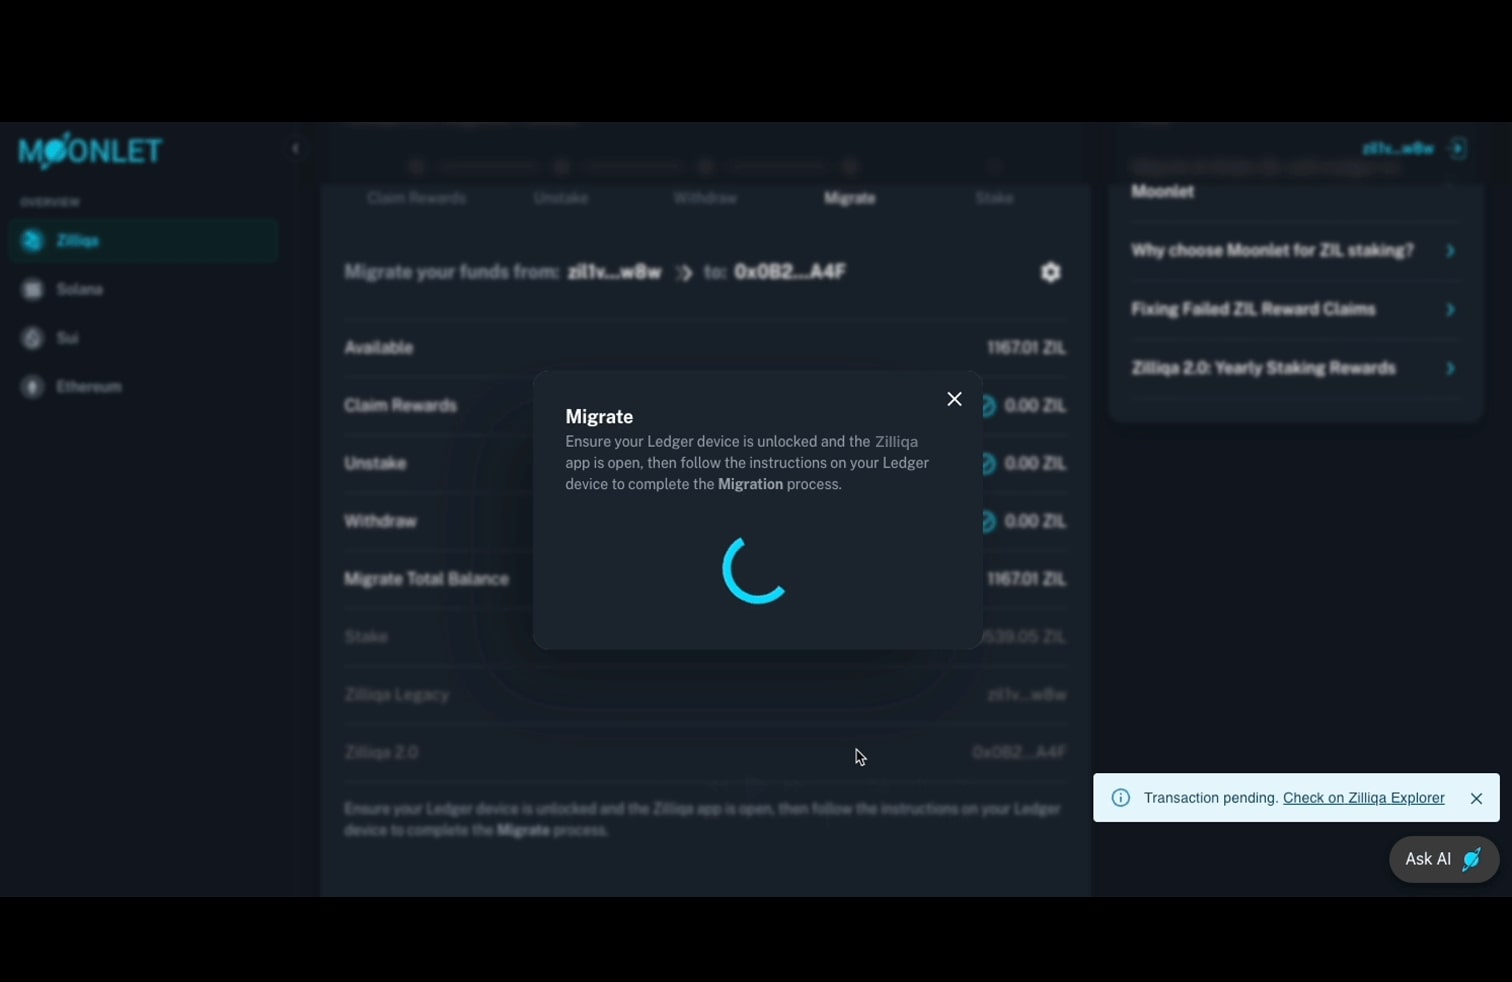
Now, click on “Migrate” to initiate the migration process. In the next pop-up window, you’ll be prompted to switch from the Ethereum app to the Zilliqa Legacy app on your Ledger device.
This step requires you to close the Ethereum app and open the Zilliqa Legacy app, as the actual migration transaction must be signed from your legacy account.
This is the point where some users may get confused, so please read this guide carefully and follow the on-screen instructions to ensure a smooth migration experience.
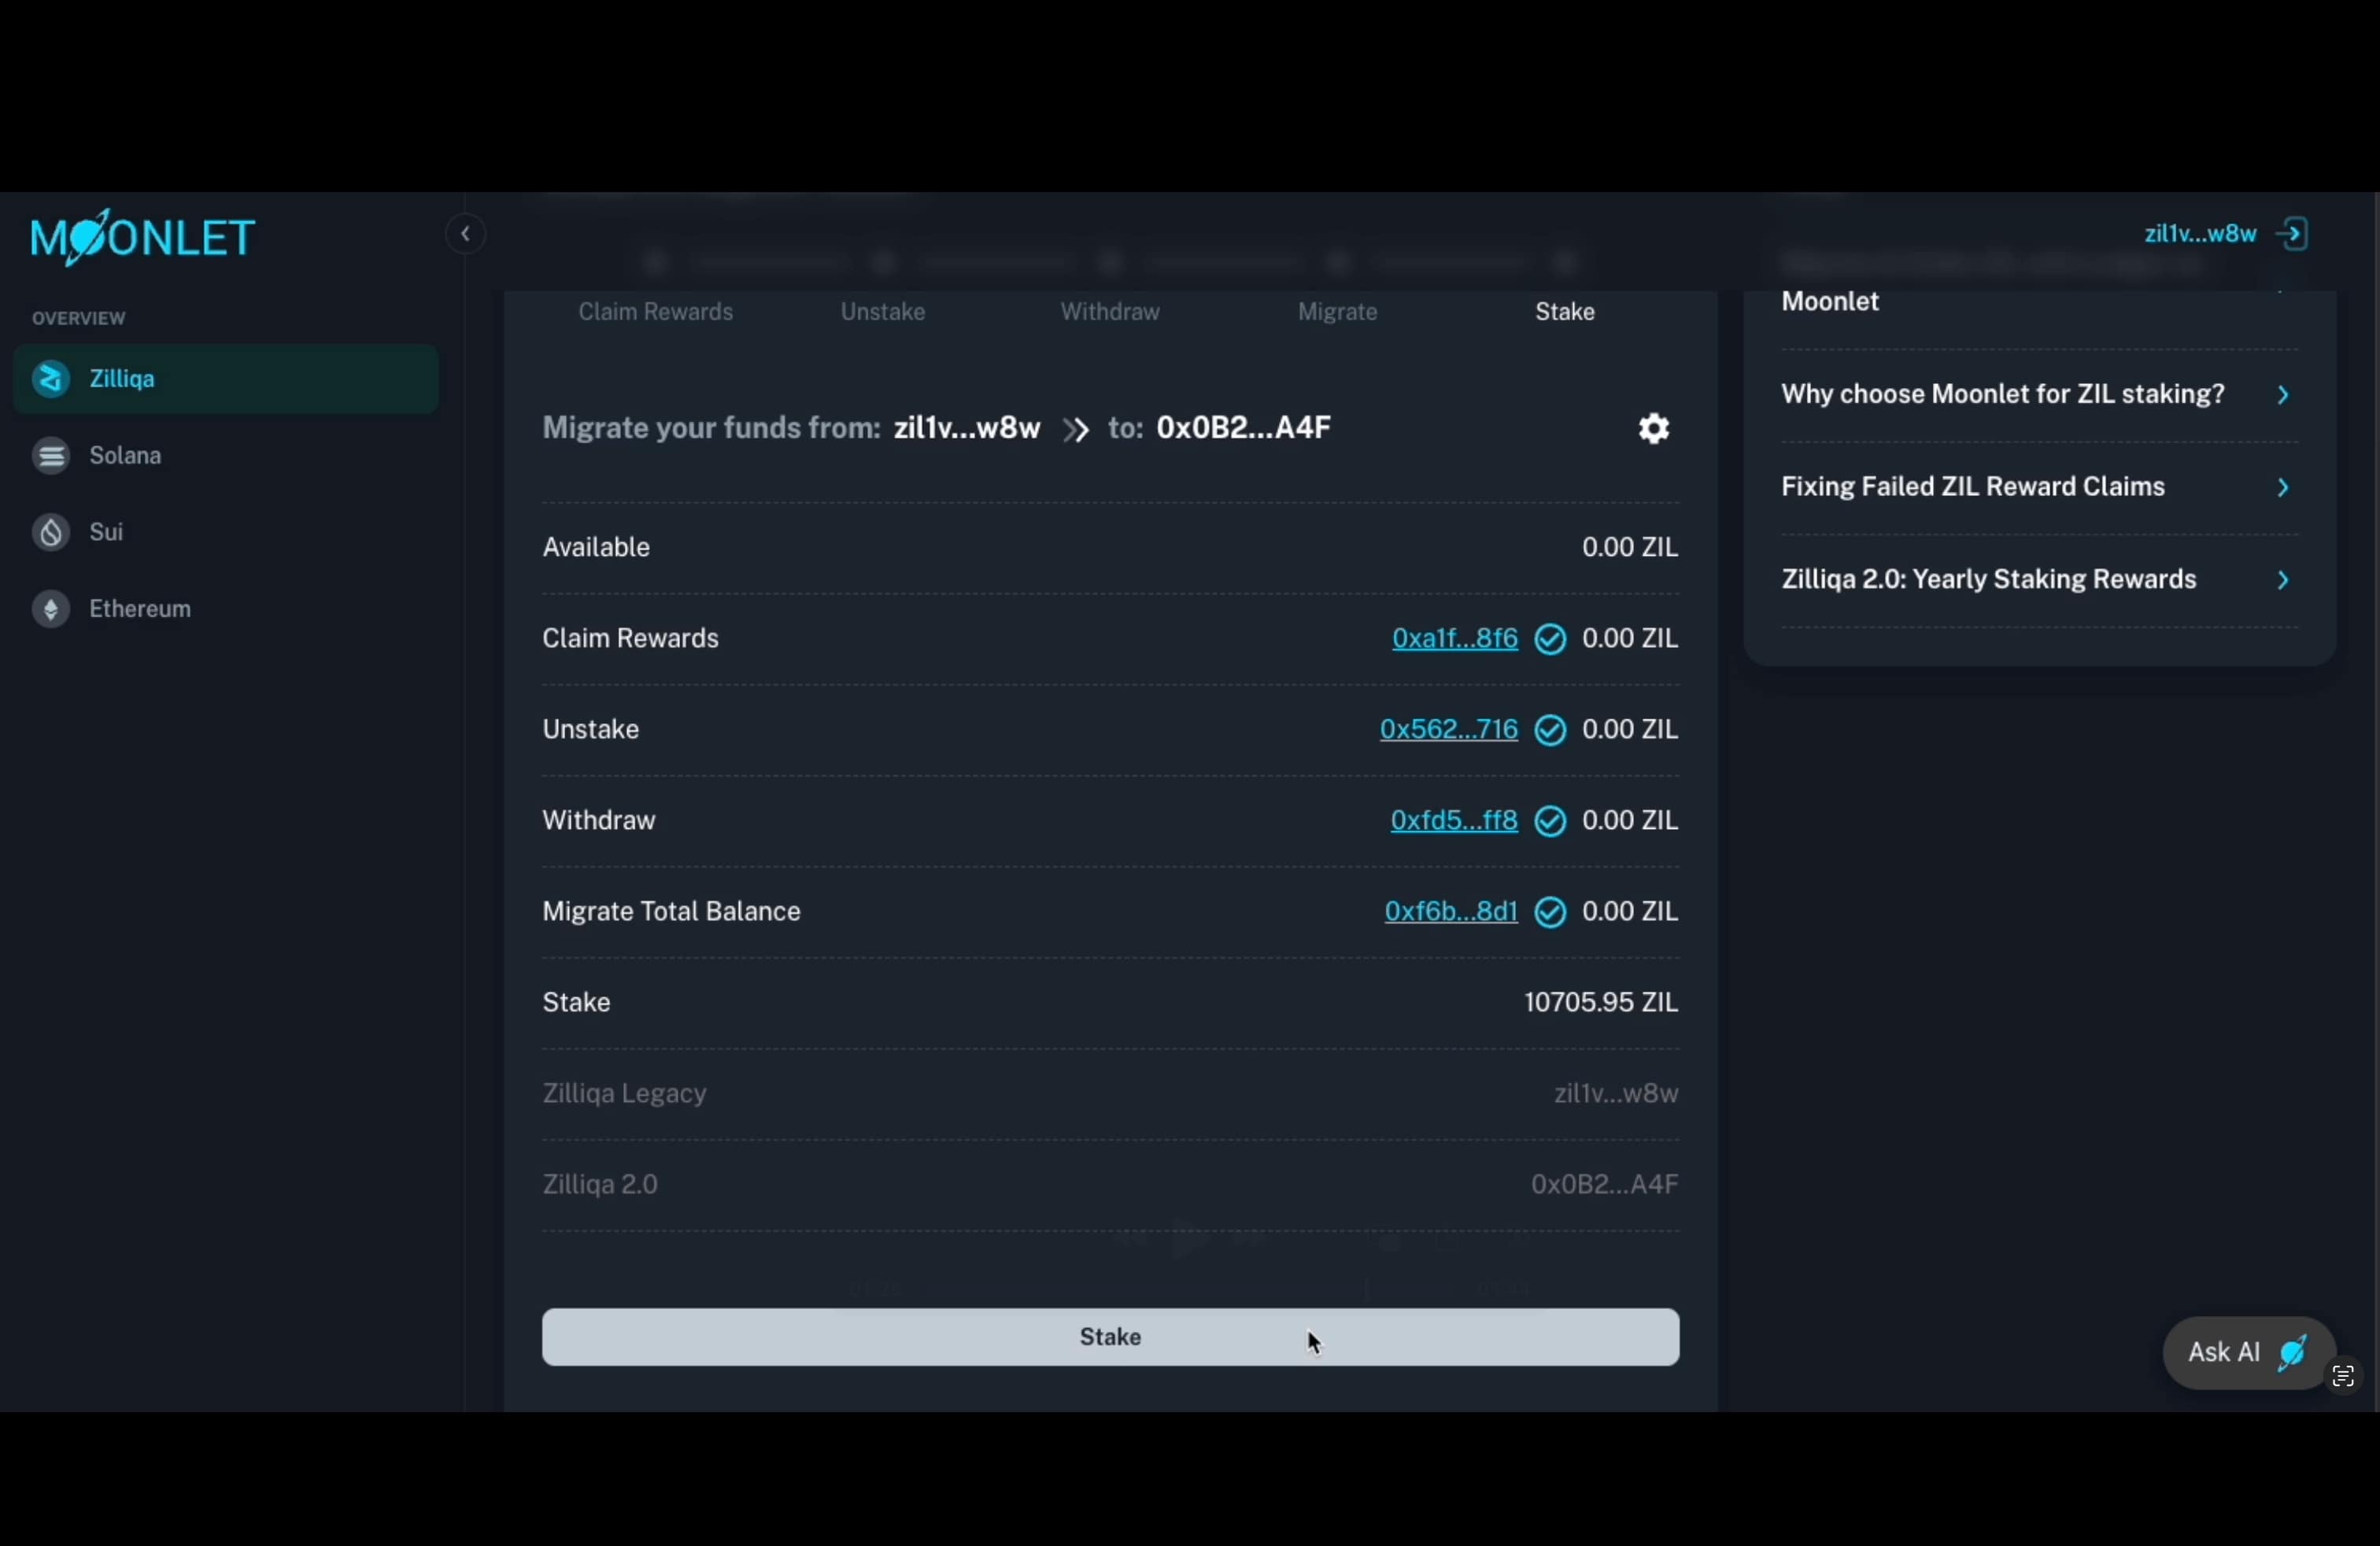
Step 8: Stake — Fifth Step in the Migration Flow
Reaching this point means your funds have been successfully migrated to Zilliqa 2.0. You’re now ready to stake your ZIL with the Moonlet node, gaining access to a secure, seamless, and future-ready staking experience.
Simply click “Stake” to initiate the staking process through the Moonlet Dashboard.
At this stage, you'll need to switch one final time from the Zilliqa Legacy app to the Ethereum app on your Ledger device, since staking occurs on Zilliqa 2.0, which is an EVM-compatible network.
Once you click on “Stake”, the system will present two options to help you choose how much ZIL you’d like to delegate:
-
“I’d like to stake a new amount on Zilliqa 2.0” – This option gives you full flexibility to enter a custom amount of ZIL to stake, based on your preferences or strategy.
-
“I’d like to stake the maximum amount for best gains” – This option allows you to stake your entire available balance, maximizing your potential rewards based on the current Zilliqa 2.0 APR.
Choose the option that best suits your goals, then proceed with the staking flow.
A pop-up window will guide you through the process, and you’ll need to follow the instructions and confirm the transaction on your Ledger device.
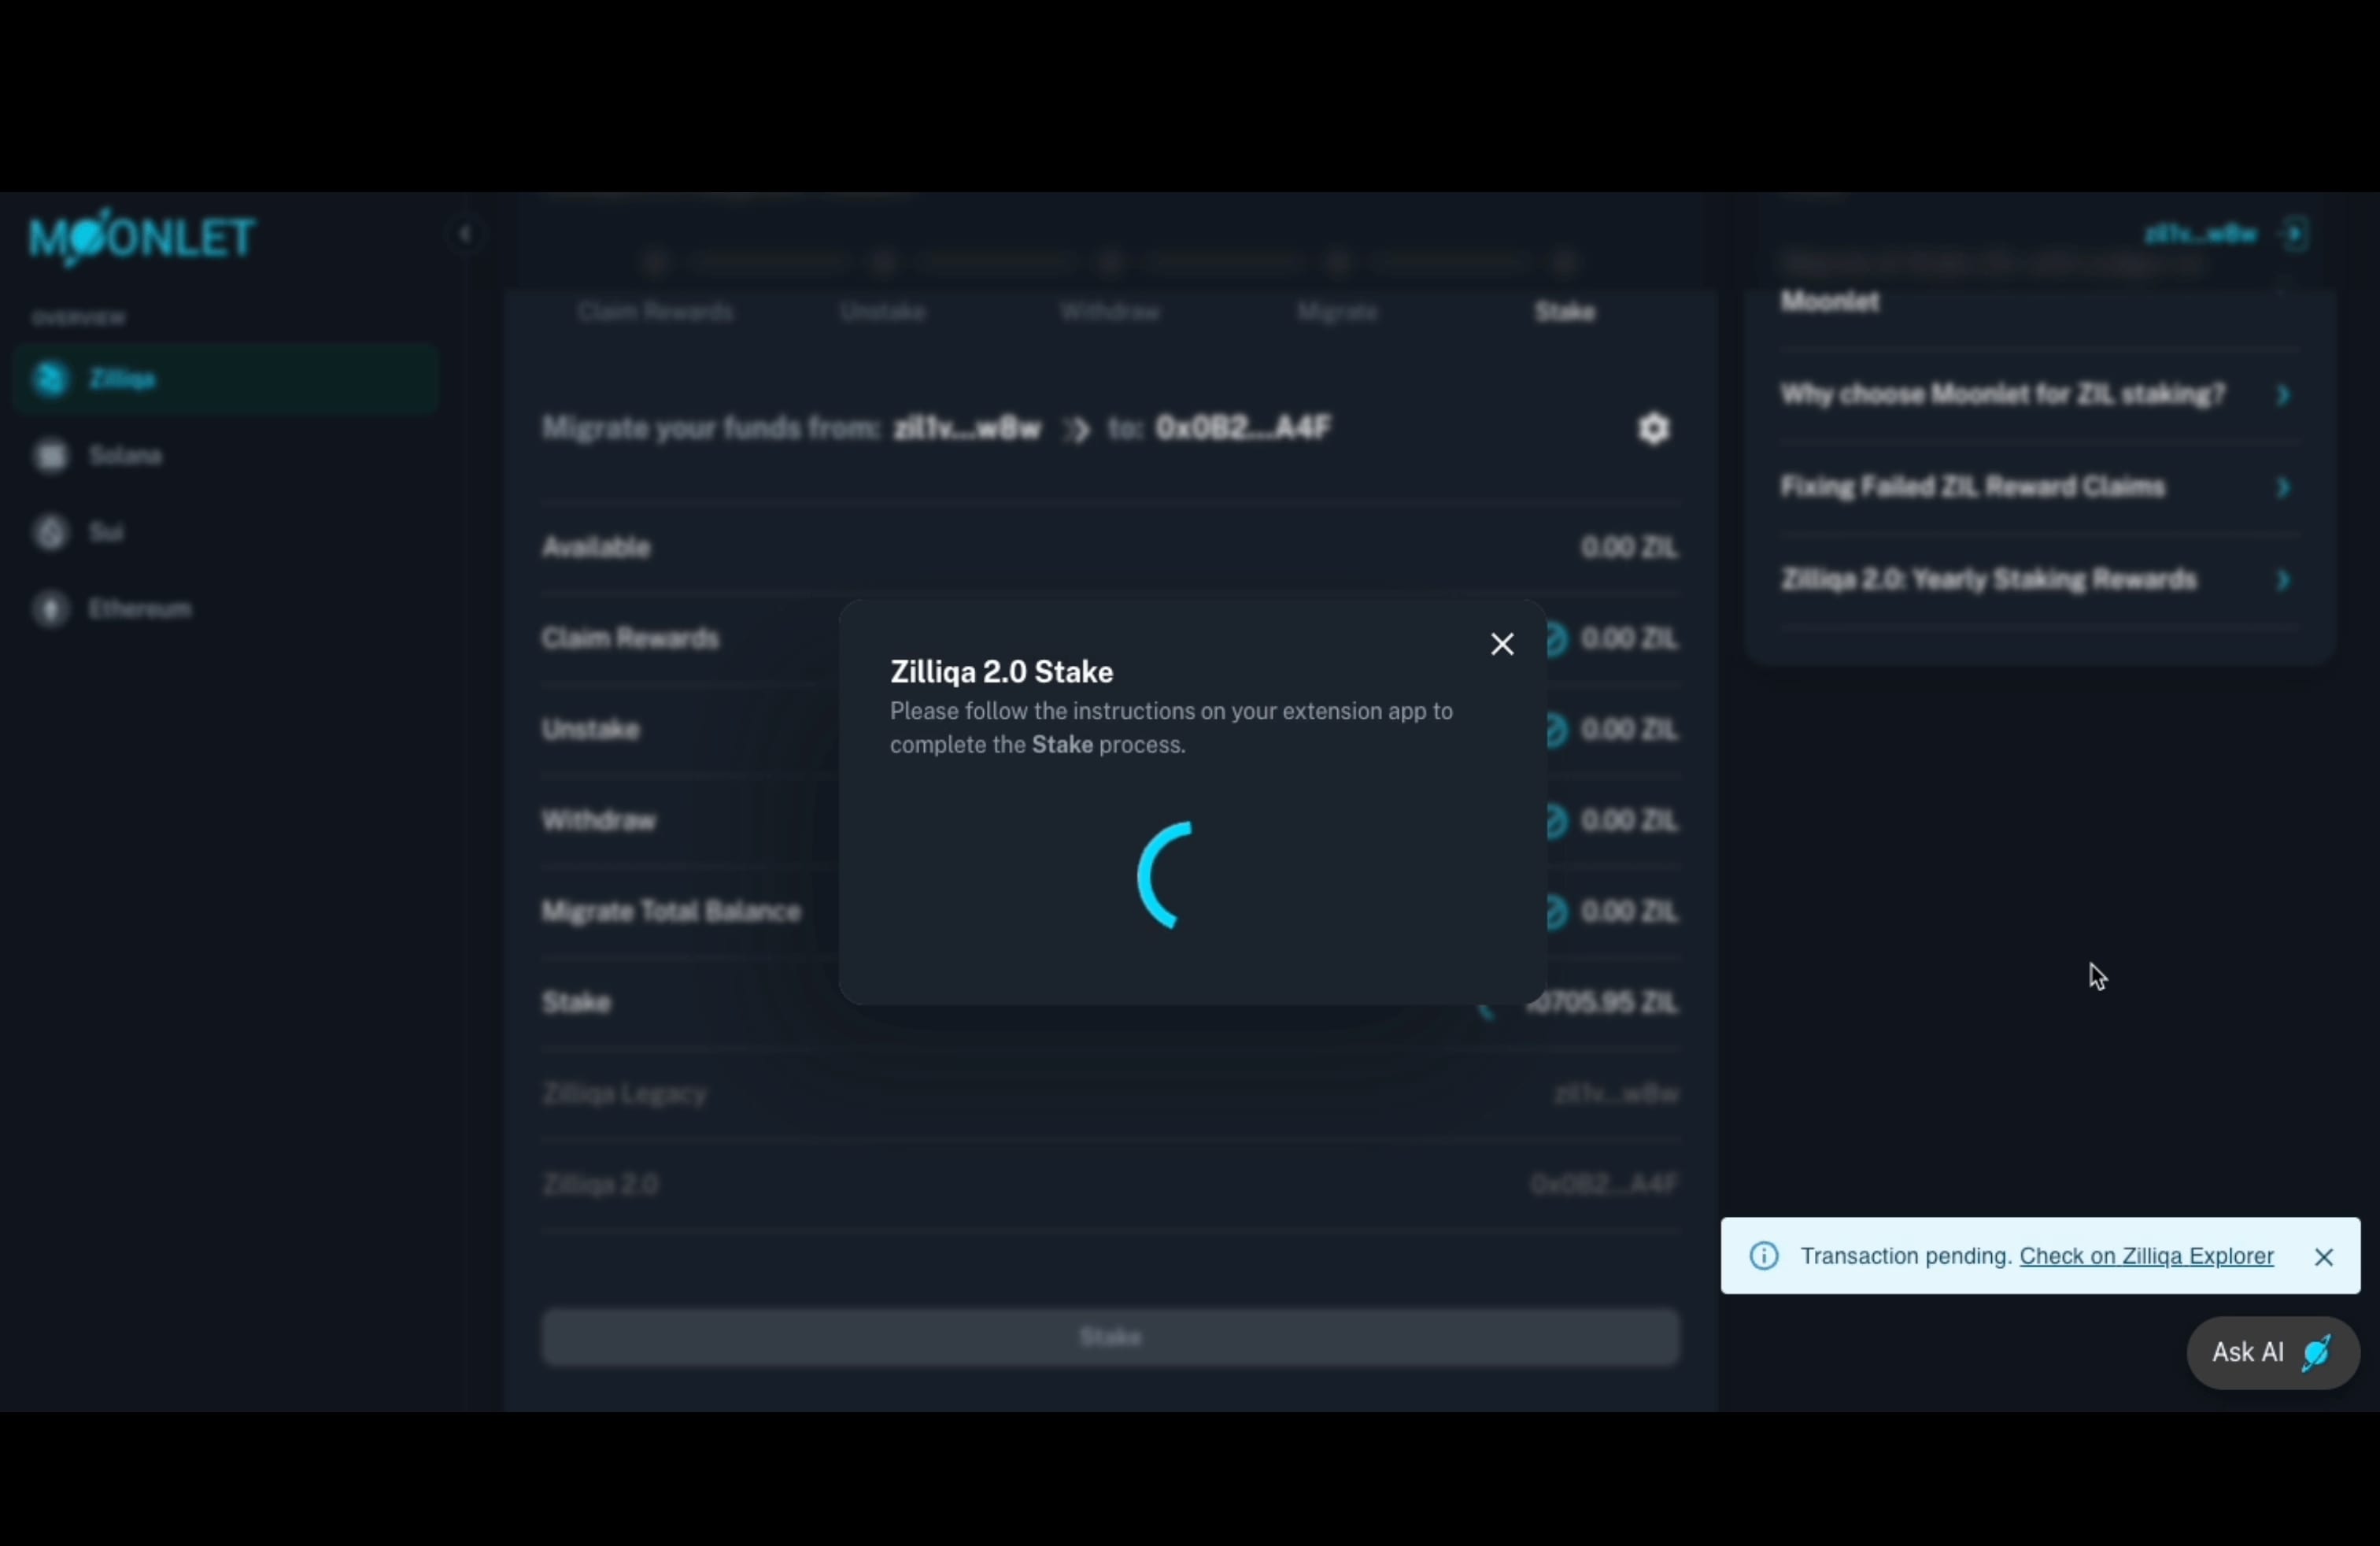
Once the transaction is confirmed on Zilliqa 2.0, your Migration and Staking process is complete.
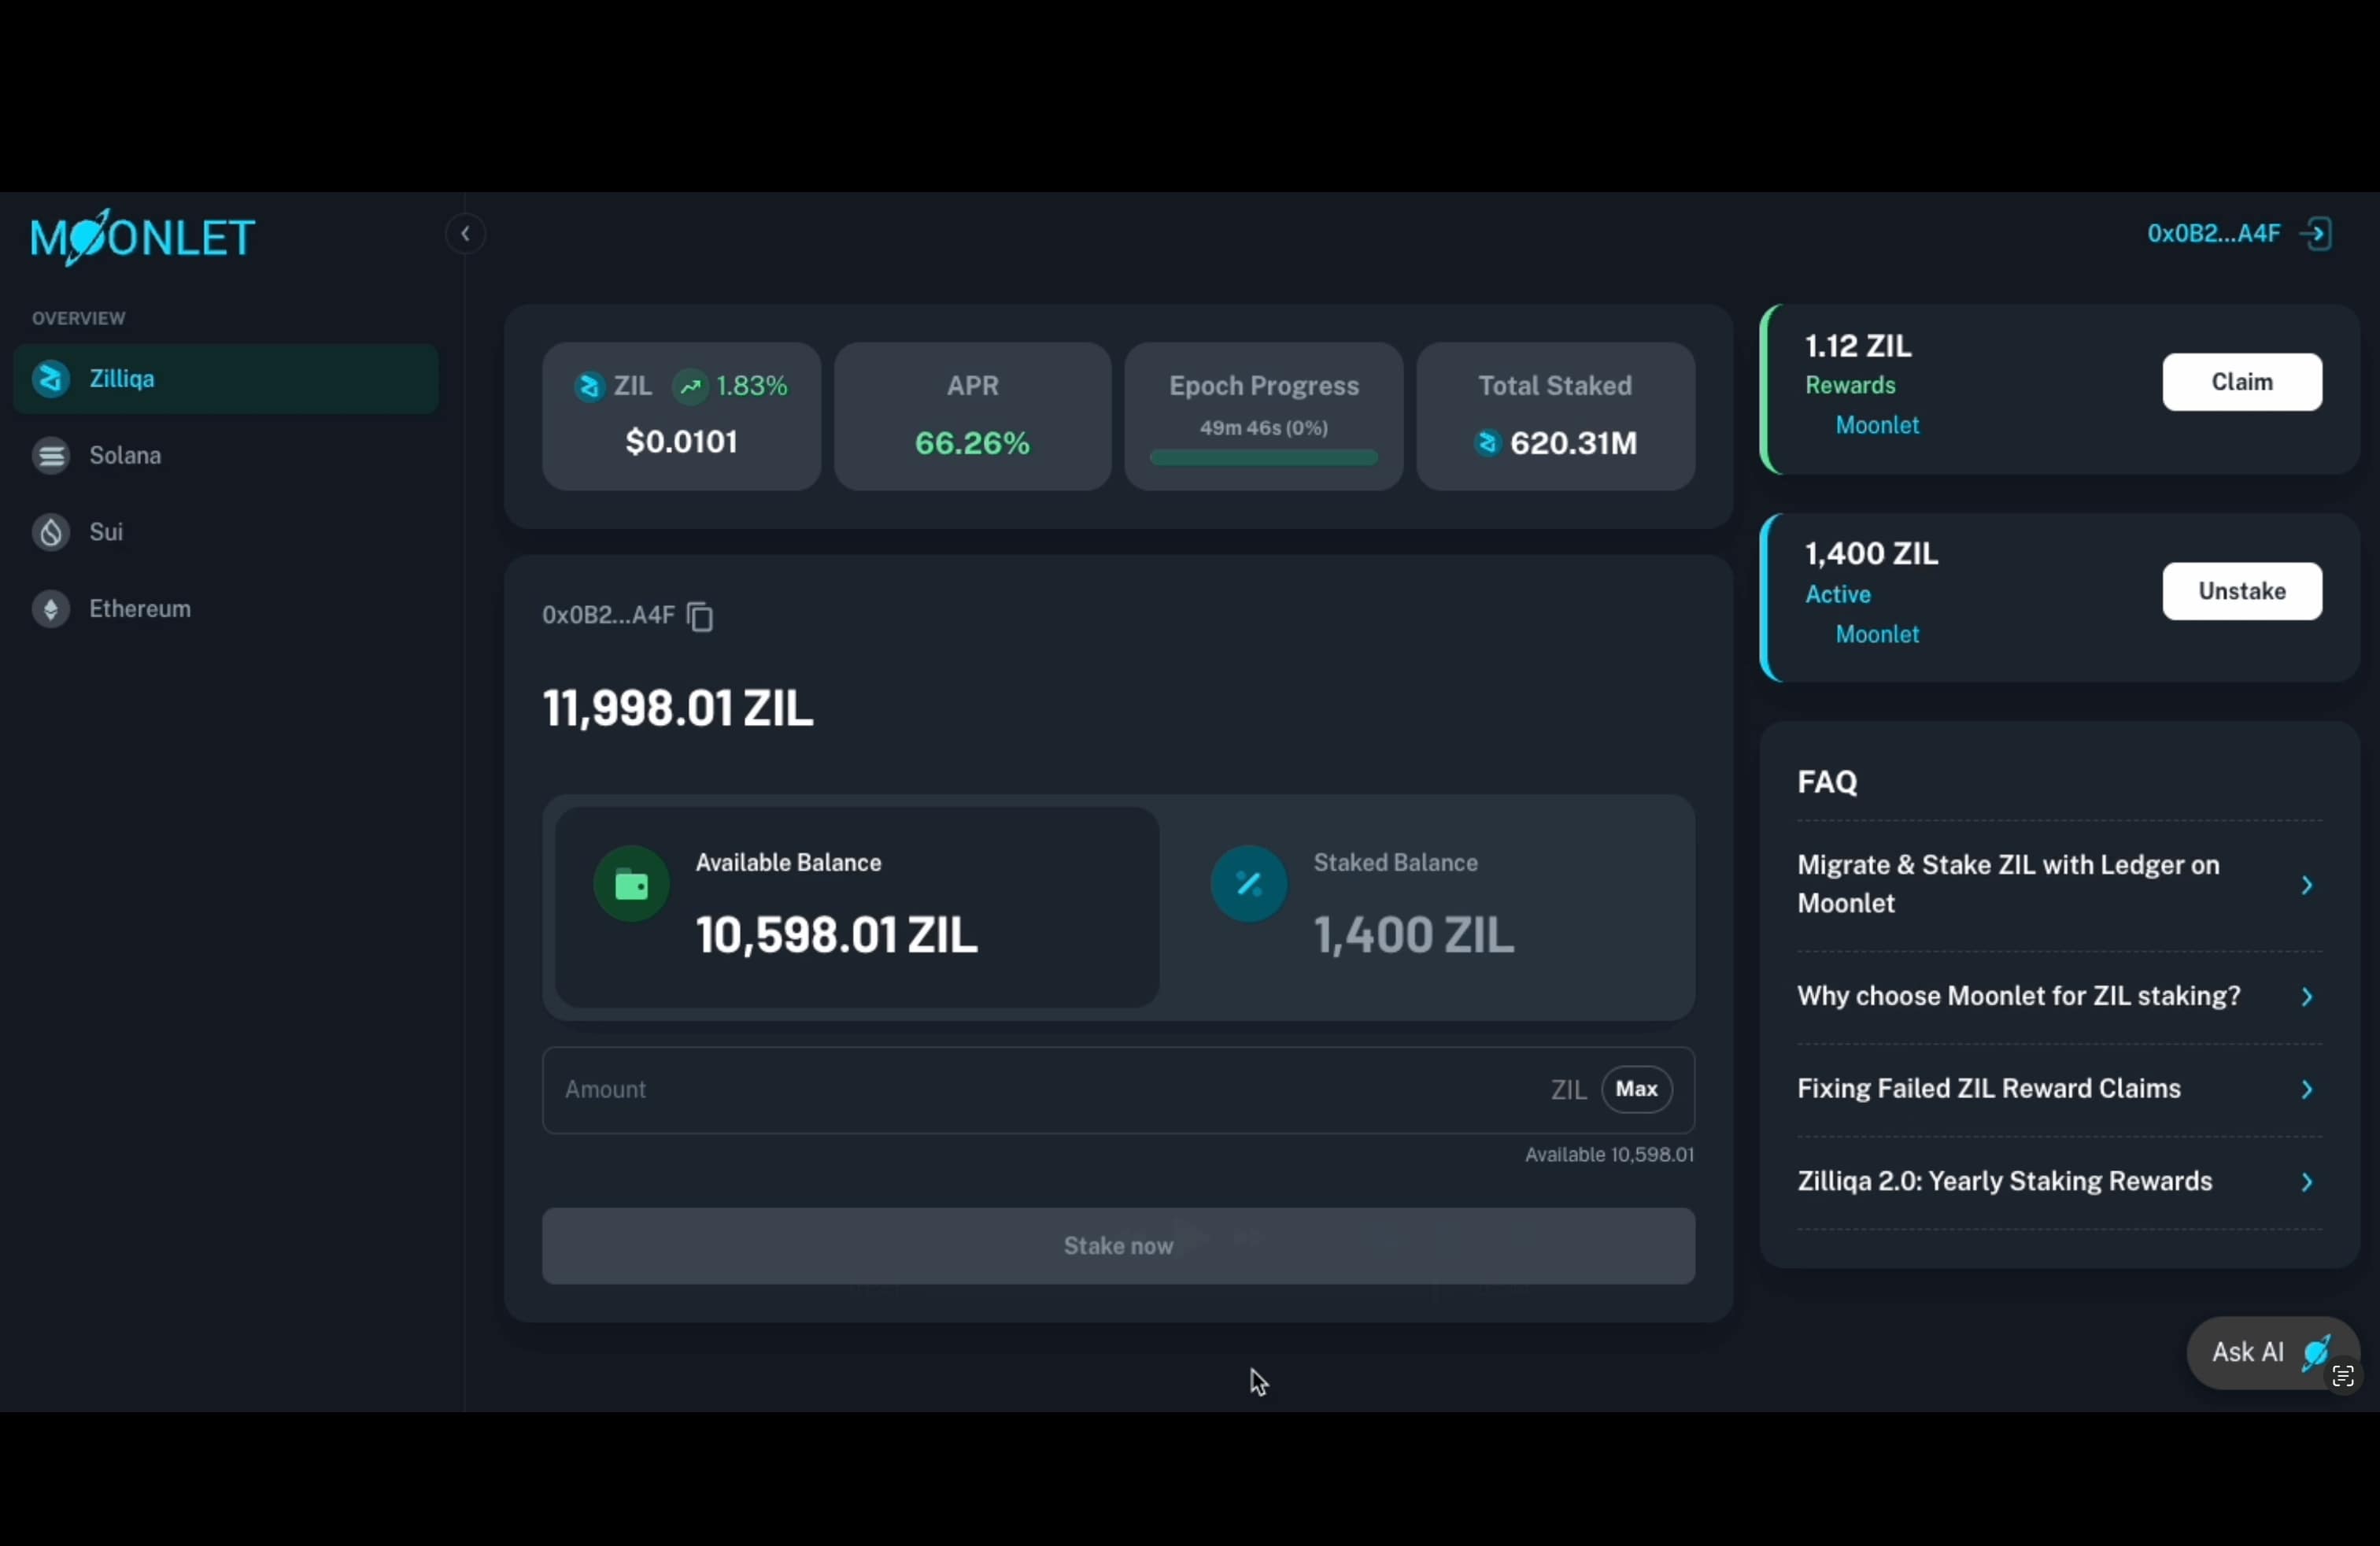
Click “Finish” to be redirected to the new Zilliqa 2.0 Dashboard, where you’ll find real-time metrics related to your staking position, validator performance, and network stats.
This dashboard becomes your primary point of reference within Moonlet—not just for Zilliqa, but for all supported networks. We already offer self-custodial staking on Solana, and are preparing to launch support for Ethereum, Sui, and Cosmos, as we continue to scale our infrastructure and product offerings for a secure, seamless multi-chain experience.
If you need assistance at any point, feel free to use our Ask AI feature for instant guidance. If your issue requires further support, you can also raise a ticket directly through Ask AI, and a member of our team will get in touch with you.